How Can We Help?
Using Triggers in aNinja
Triggers in aNinja allow you to define actions that are automatically executed when a specific event occurs—no manual steps needed.
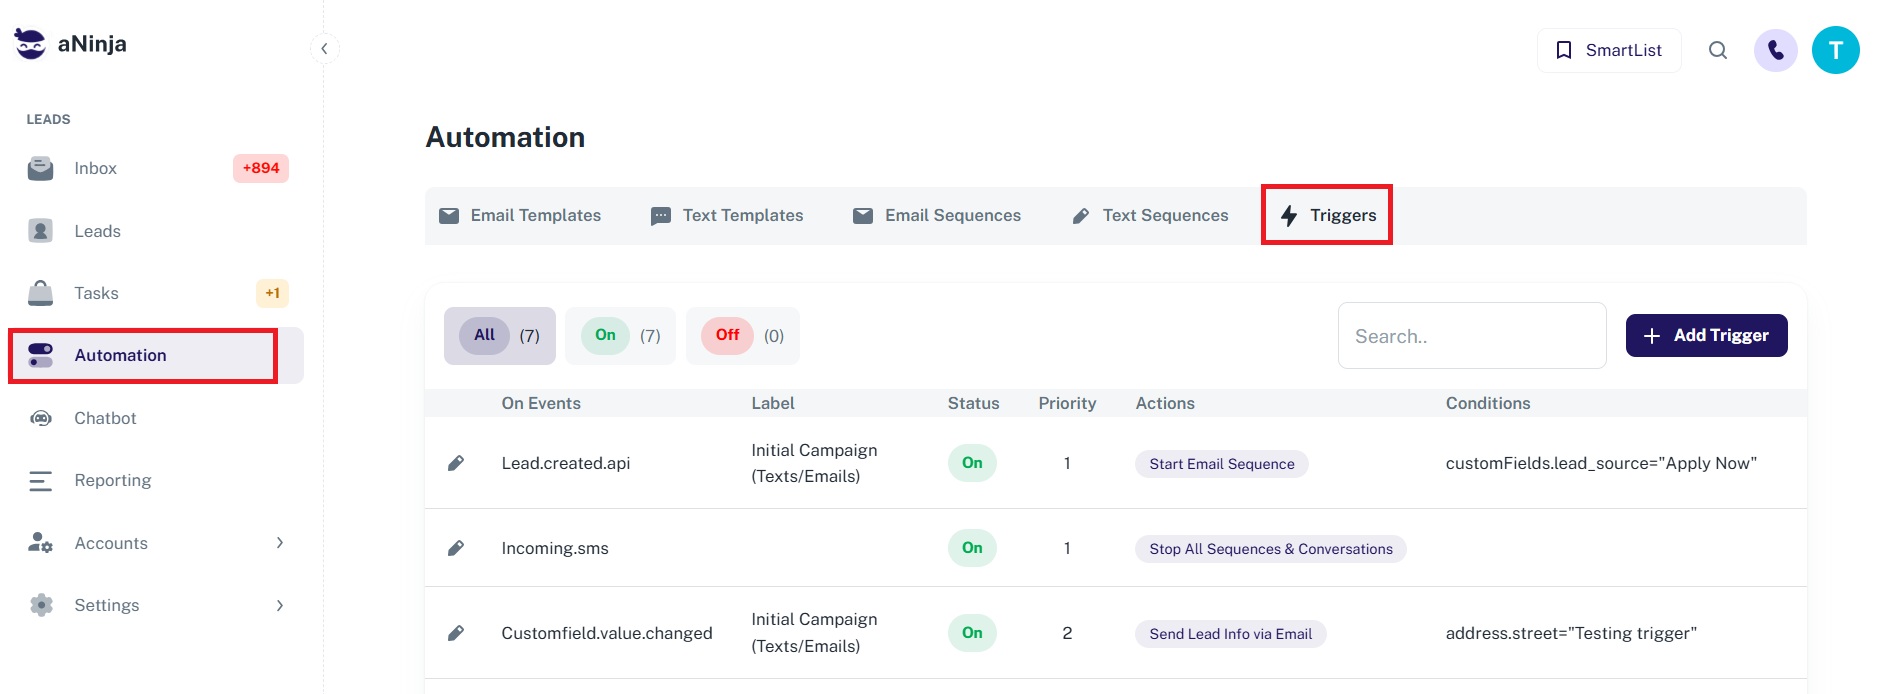
How to Access Triggers
- From the left sidebar, click Automations.
- On the Automations page, look toward the middle-right area and click on the Triggers tab.
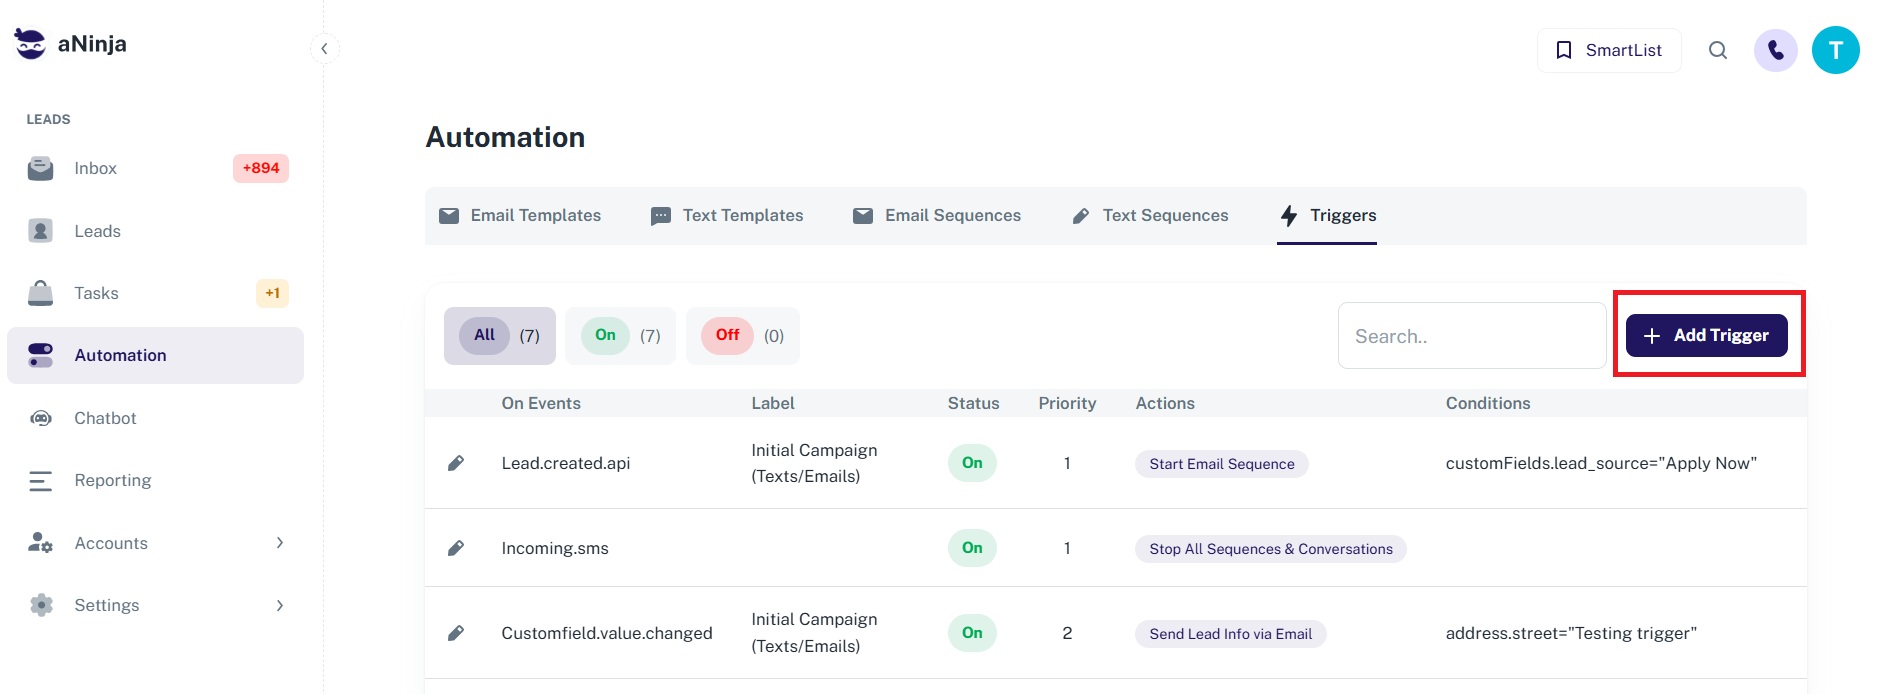
- You’ll see a list of existing triggers and a button to Add Trigger.
Main aNinja Trigger Actions
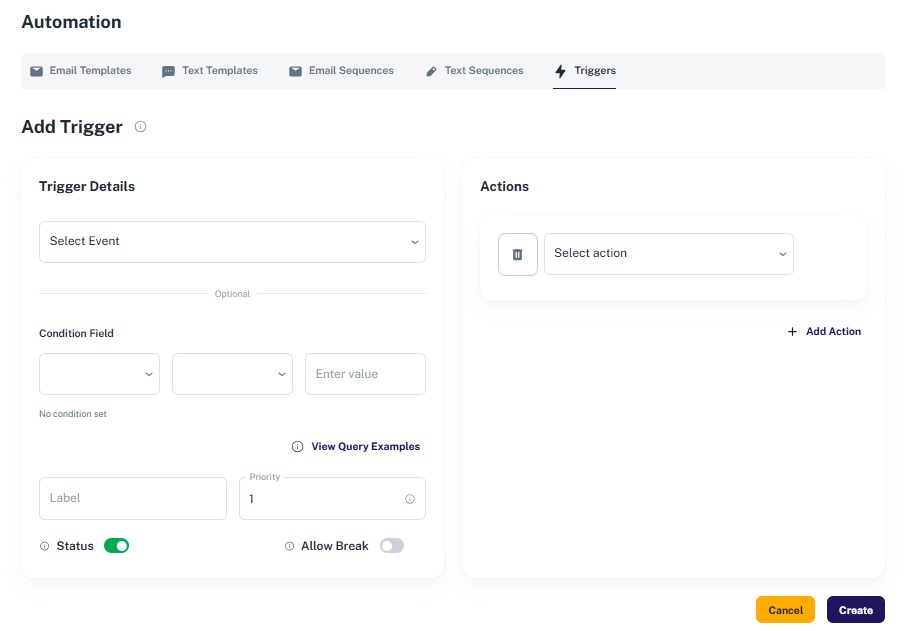
Once you create a trigger, you can configure it to execute one or more of the following actions:
- [Delay] Set delay duration in minutes before action runs
- [Do Not Contact] Add or remove lead contacts from the Do Not Contact list
- [Email] Send lead information to an email address
- [Lead Assignment] Assign lead to a specific user or team (Round Robin or Weighted Round Robin)
- [Lead Merge] Automatically merge duplicates into existing leads
- [Sequence] Start or stop an Email or Text Sequence
- [Webhooks] Post lead details to a custom URL
- [Workflow Step Status] Update the workflow step status
Why Use Triggers?
Triggers automate repetitive tasks and help ensure timely follow-up, lead management, and communication. They streamline operations, reduce human error, and help your team stay efficient and responsive.
Need help creating or customizing a trigger? Reach out to us at [email protected] — we’re happy to assist!