How Can We Help?
Shopify Integration
Shopify → aNinja CRM Integration Guide
Follow the steps below to automatically send new Shopify customers into your aNinja CRM as leads.
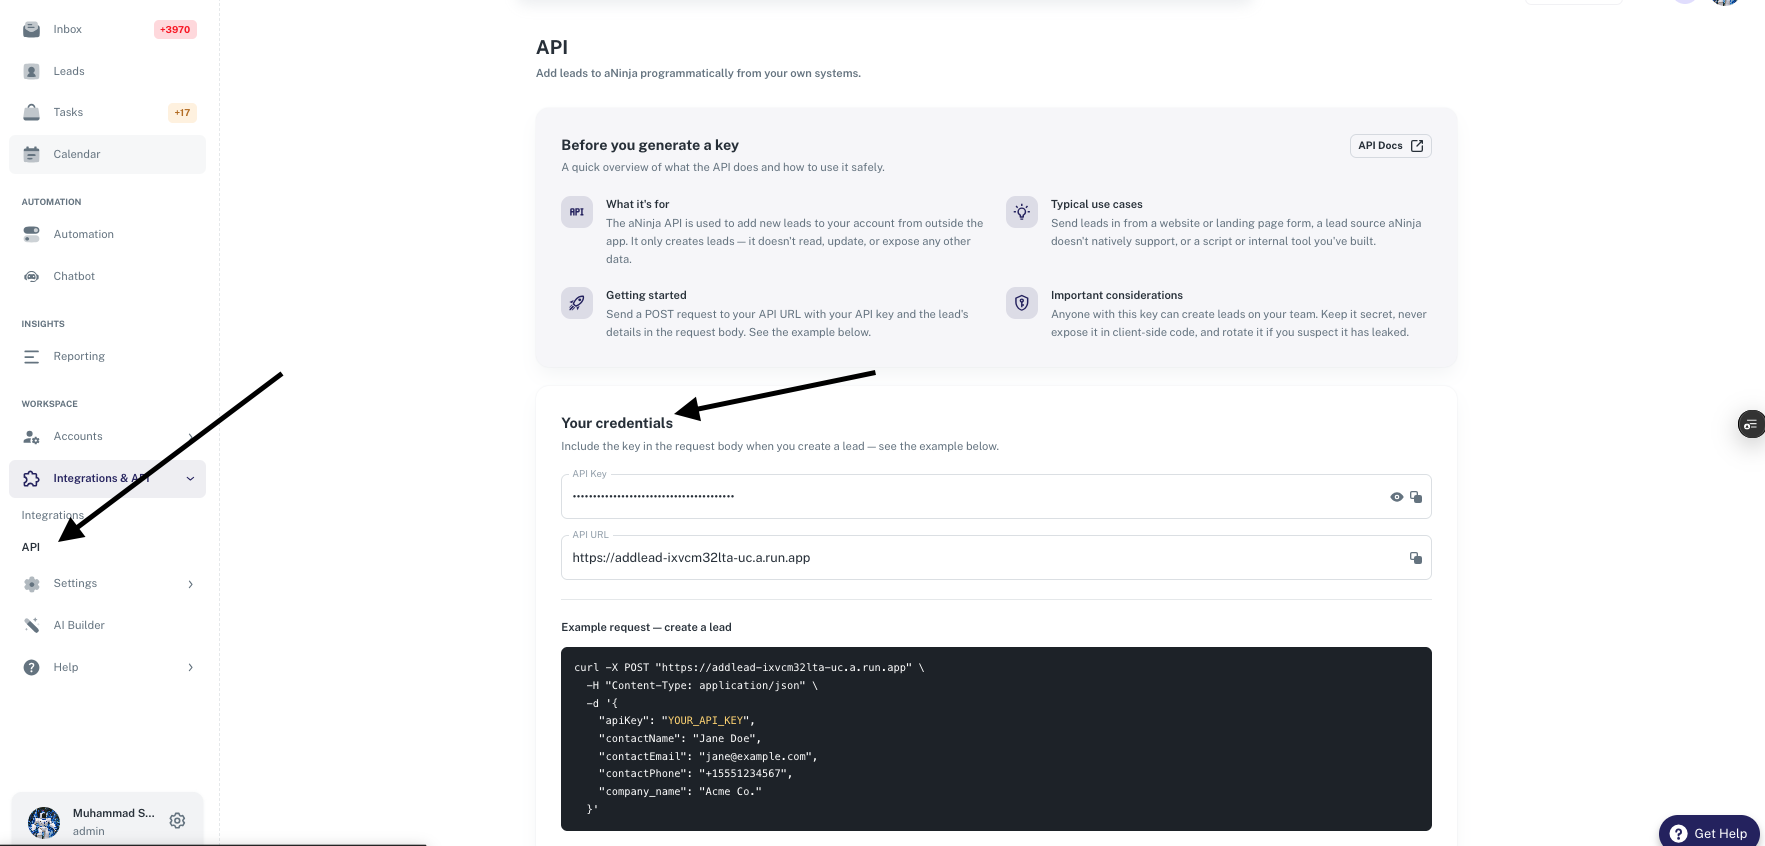
Step 1: Copy Your aNinja API Key
- Log in to your aNinja CRM account.
- Navigate to Settings → Organization / Profile Settings.
- Locate your API Key.
- Copy the API Key to your clipboard.
Note: Keep your API Key private. Anyone with this key can send data to your CRM.
Step 2: Create Your Webhook URL
Your Shopify webhook needs a unique URL that contains your aNinja API Key.
Use the following format:
https://addlead-ixvcm32lta-uc.a.run.app?platform=shopify&apiKey=YOUR_ANINJA_API_KEYReplace:
YOUR_ANINJA_API_KEYwith the API Key you copied in Step 1.
Example
https://addlead-ixvcm32lta-uc.a.run.app?platform=shopify&apiKey=abc123xyz456⚠️ Important
- Replace only
YOUR_ANINJA_API_KEY.- Do not remove or modify
platform=shopify.- The completed URL will be used in the next step.
Step 3: Create the Webhook in Shopify
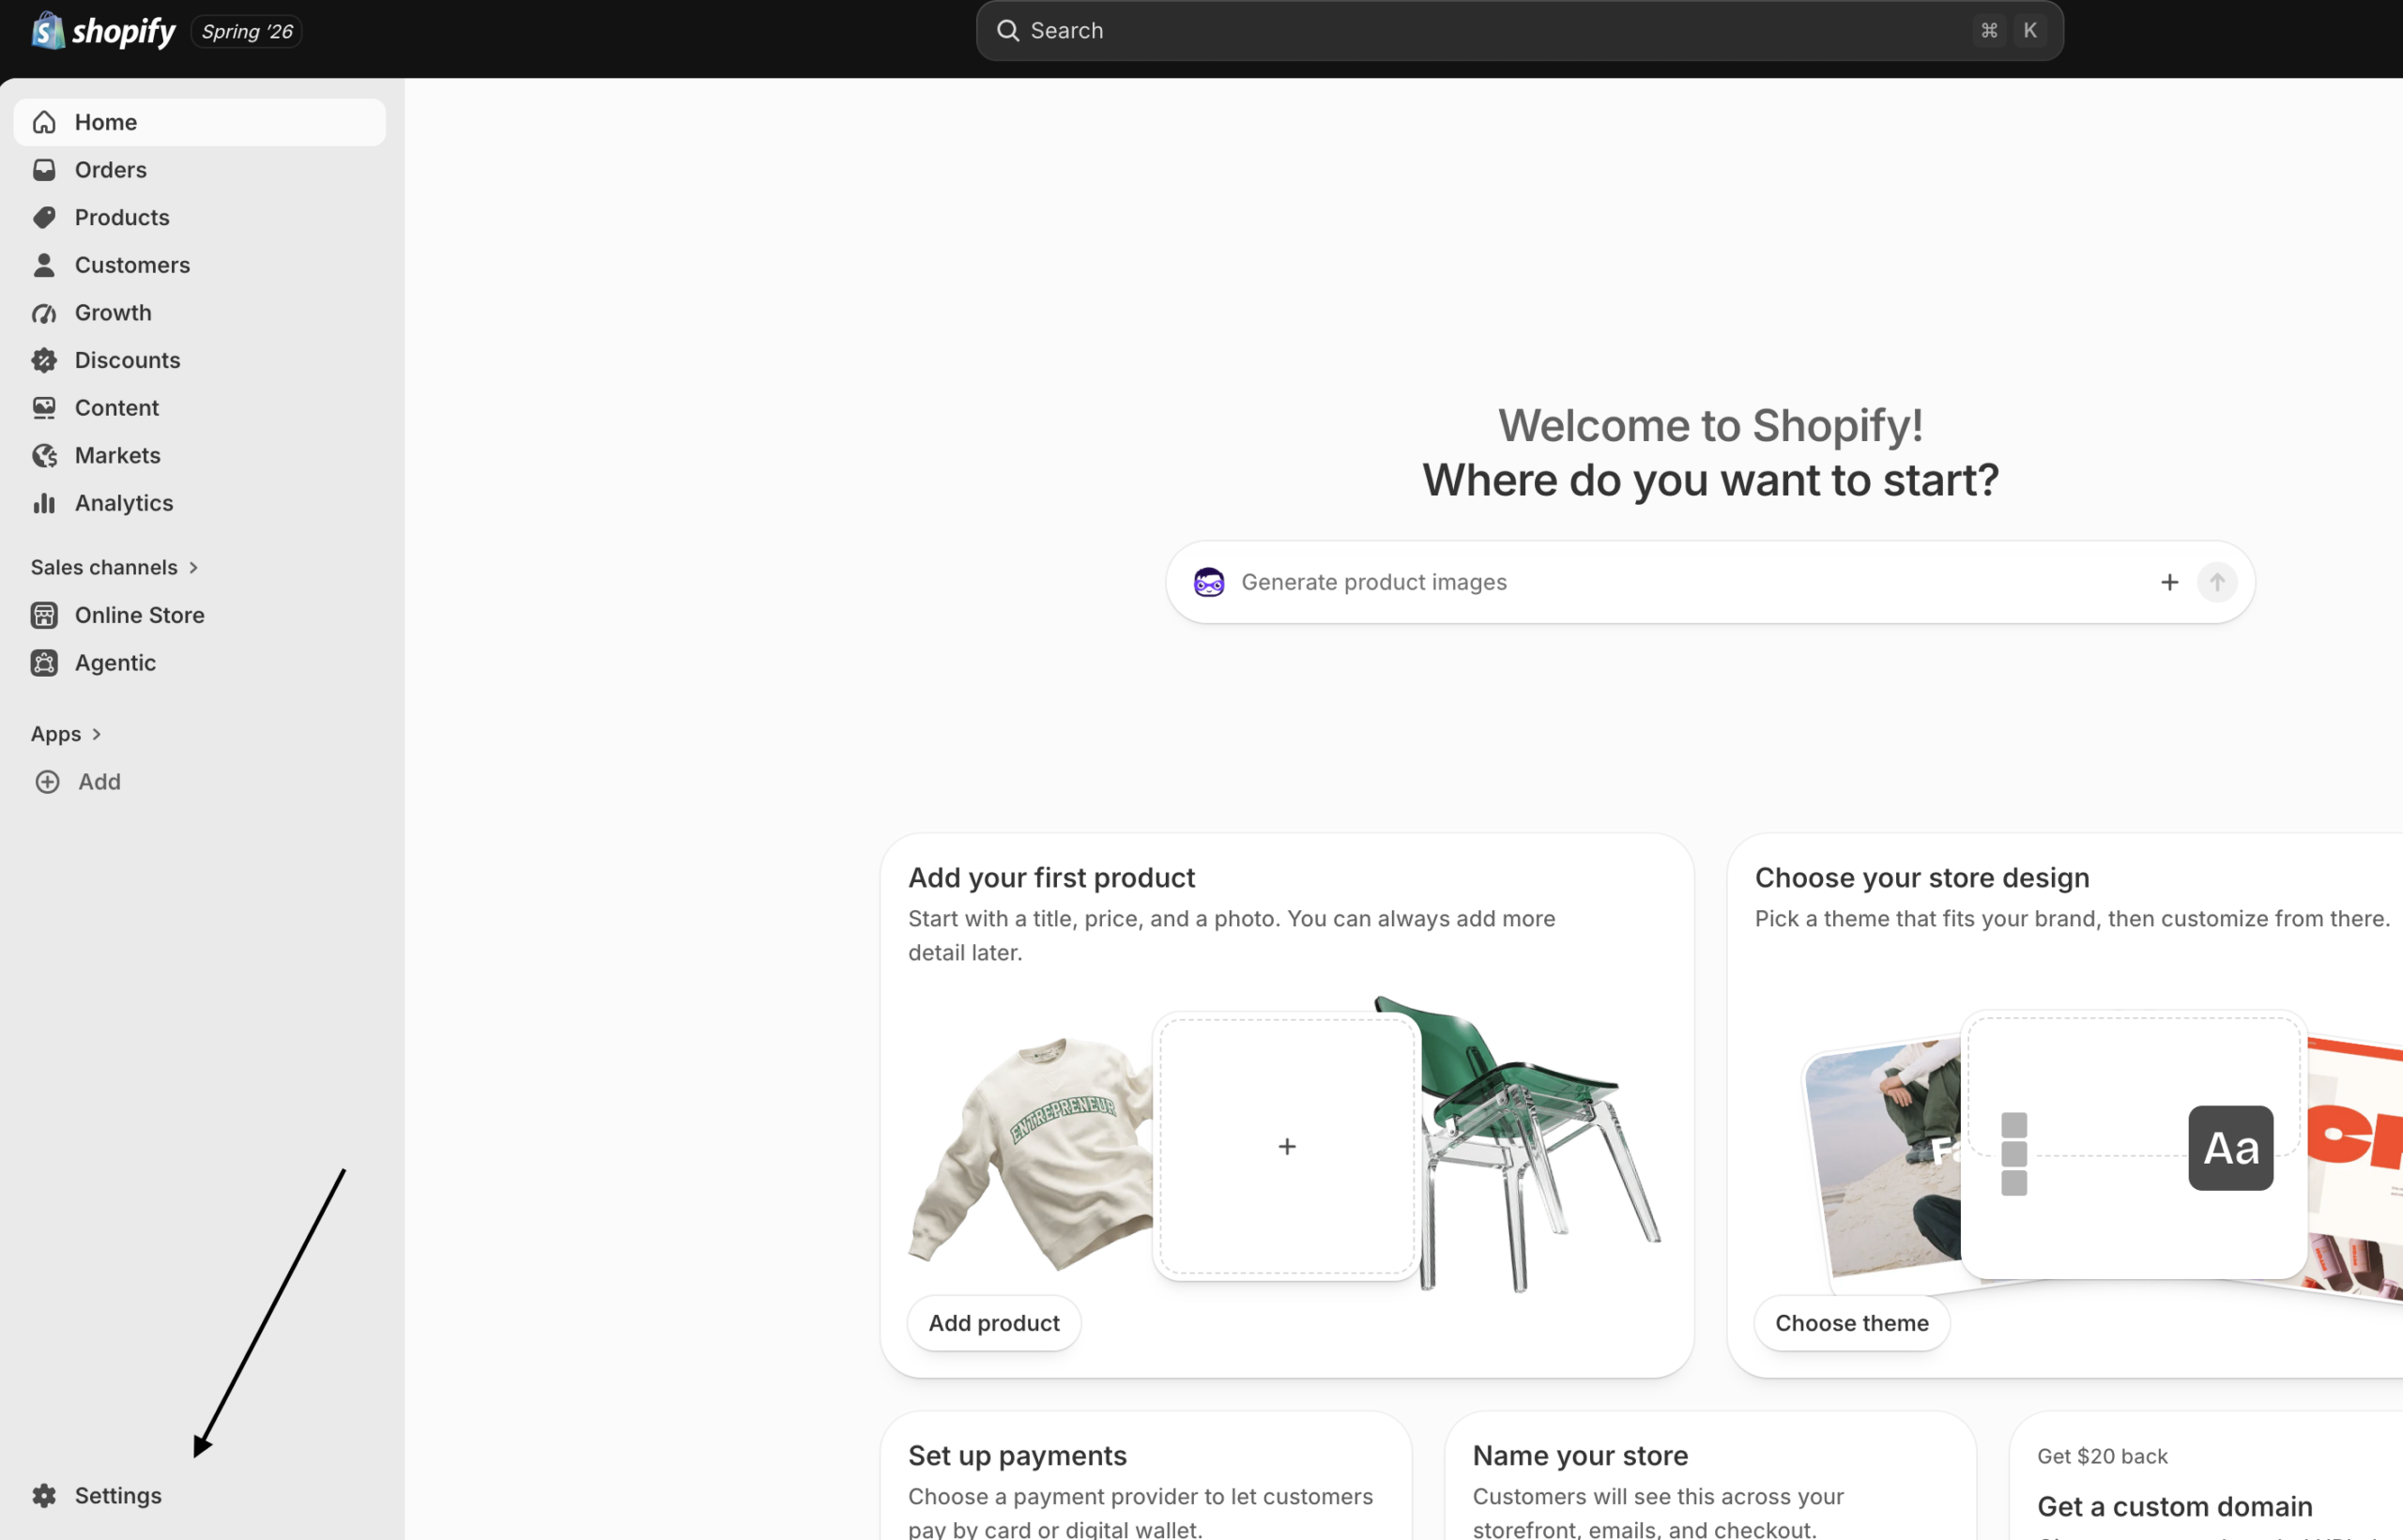
- Log in to your Shopify Admin.
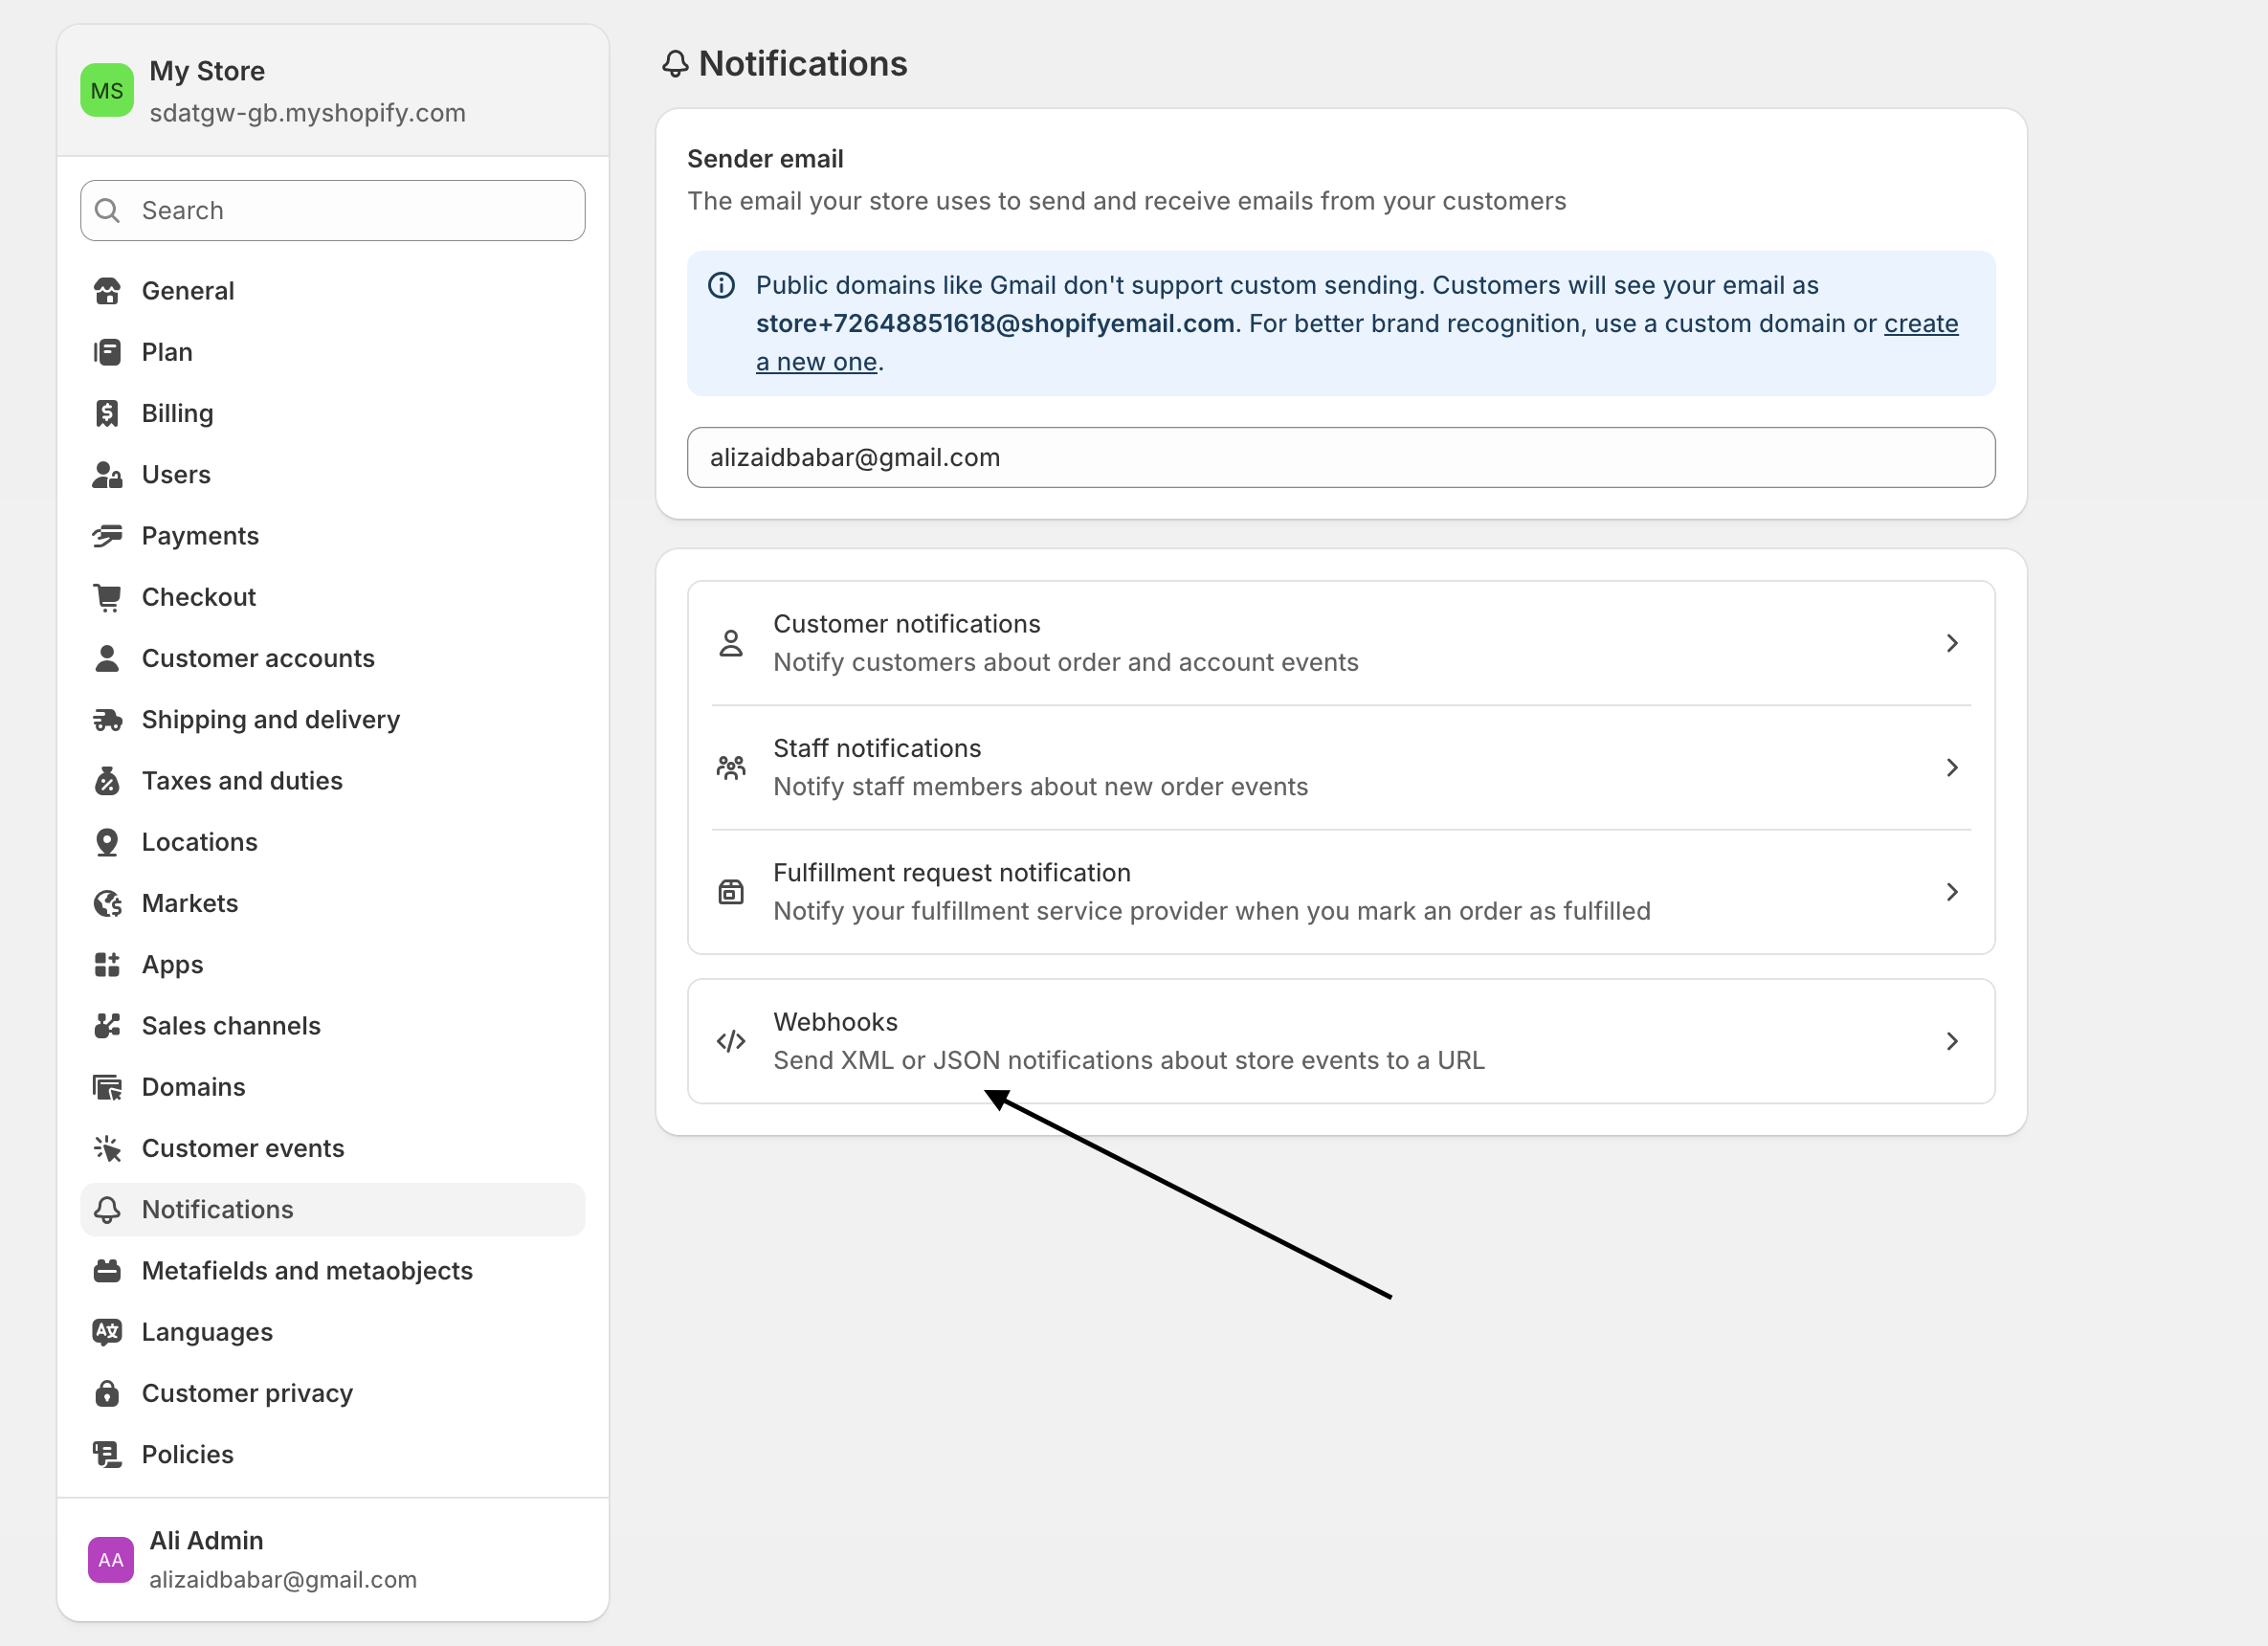
- Click Settings (⚙️) in the bottom-left corner.
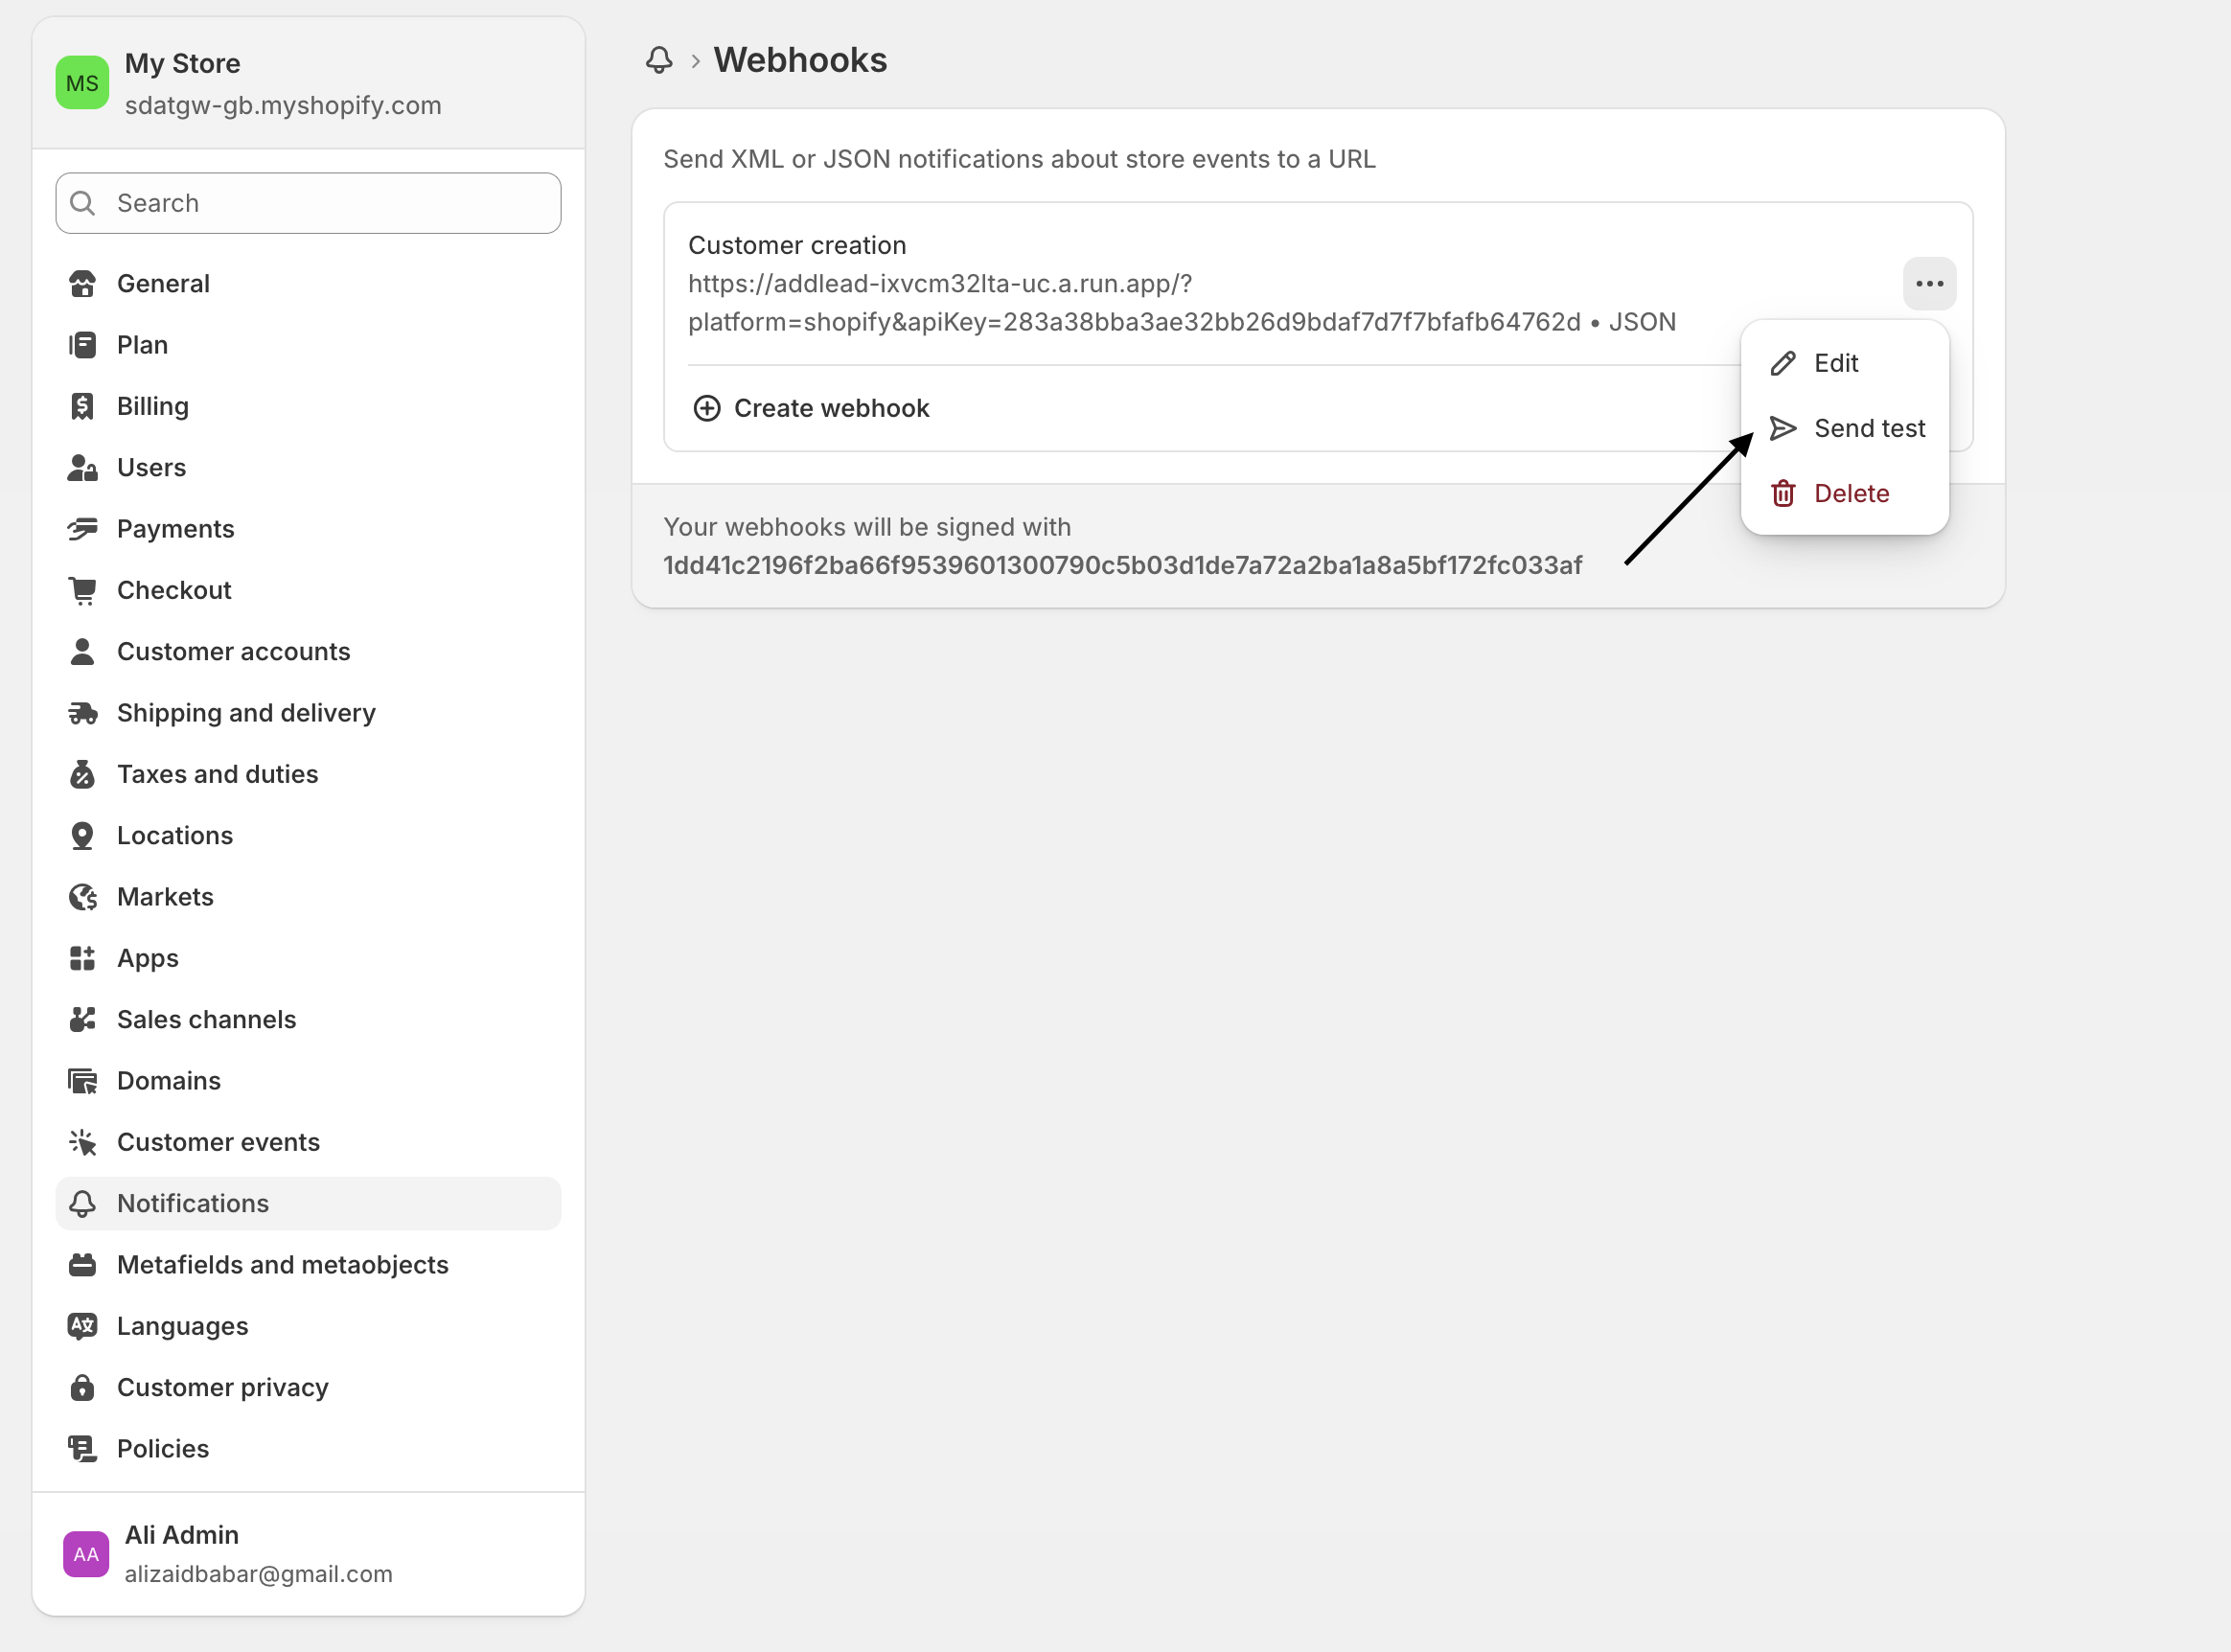
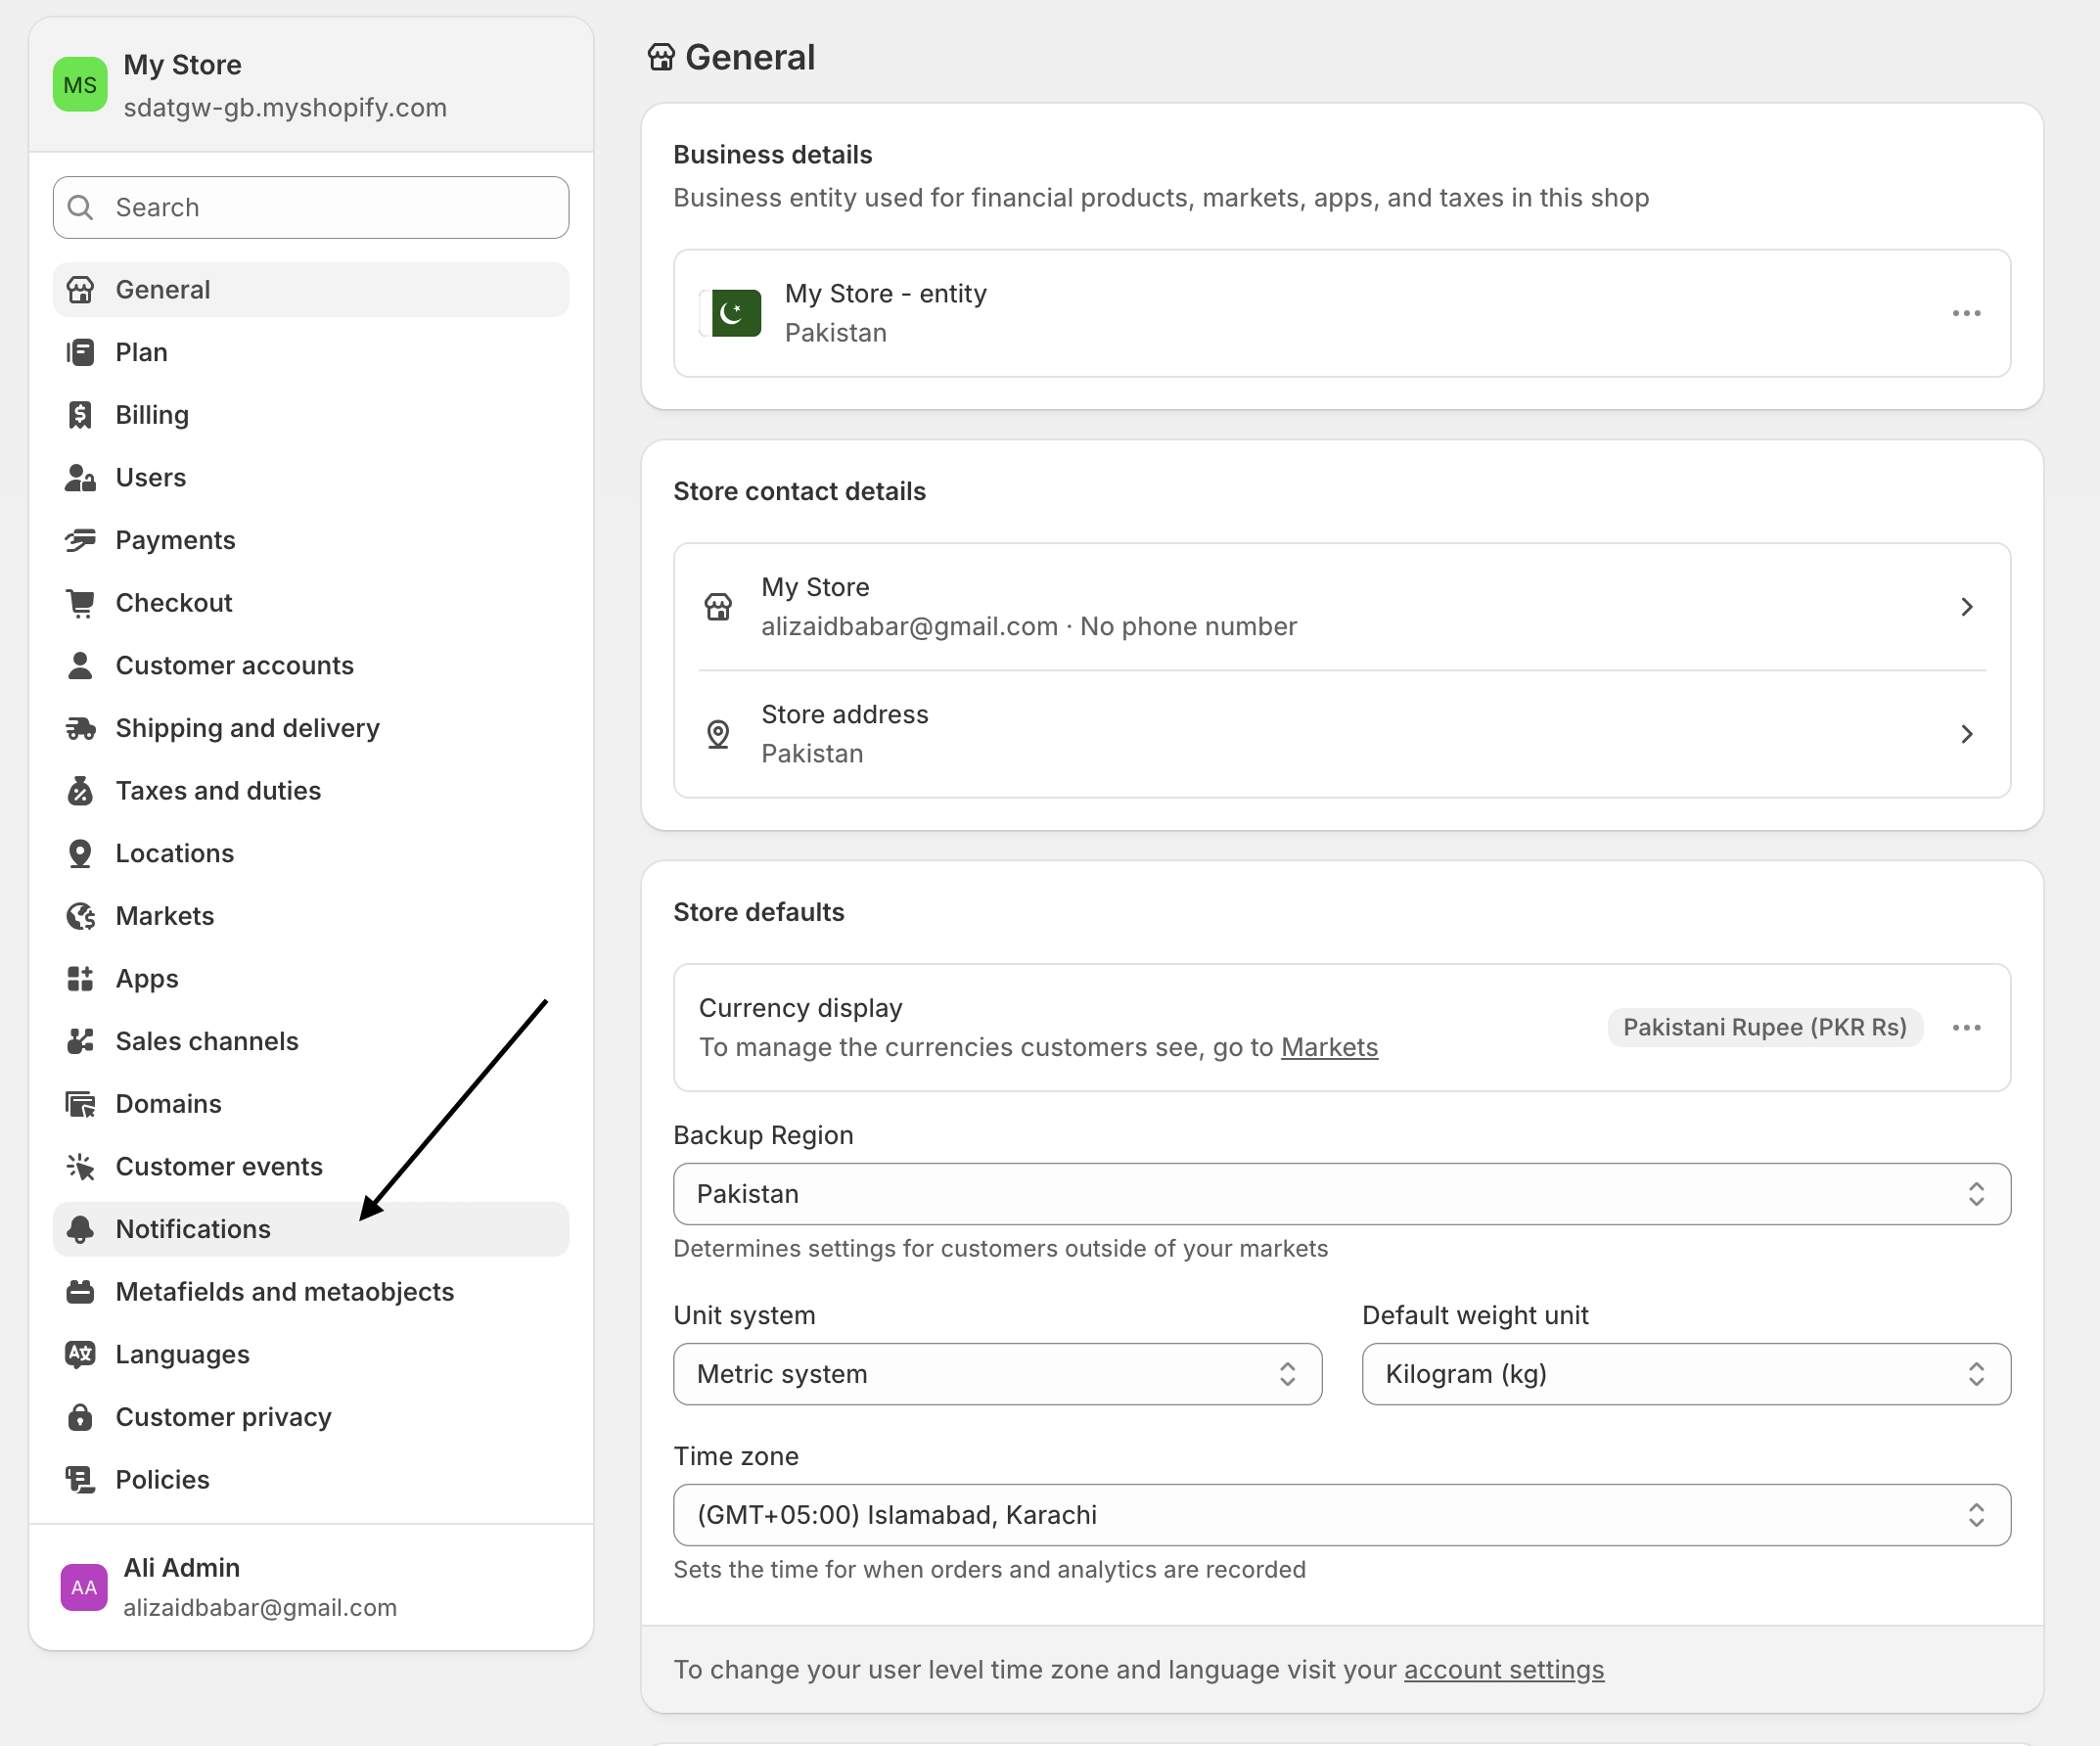
- Open Notifications (or Webhooks, depending on your Shopify version).
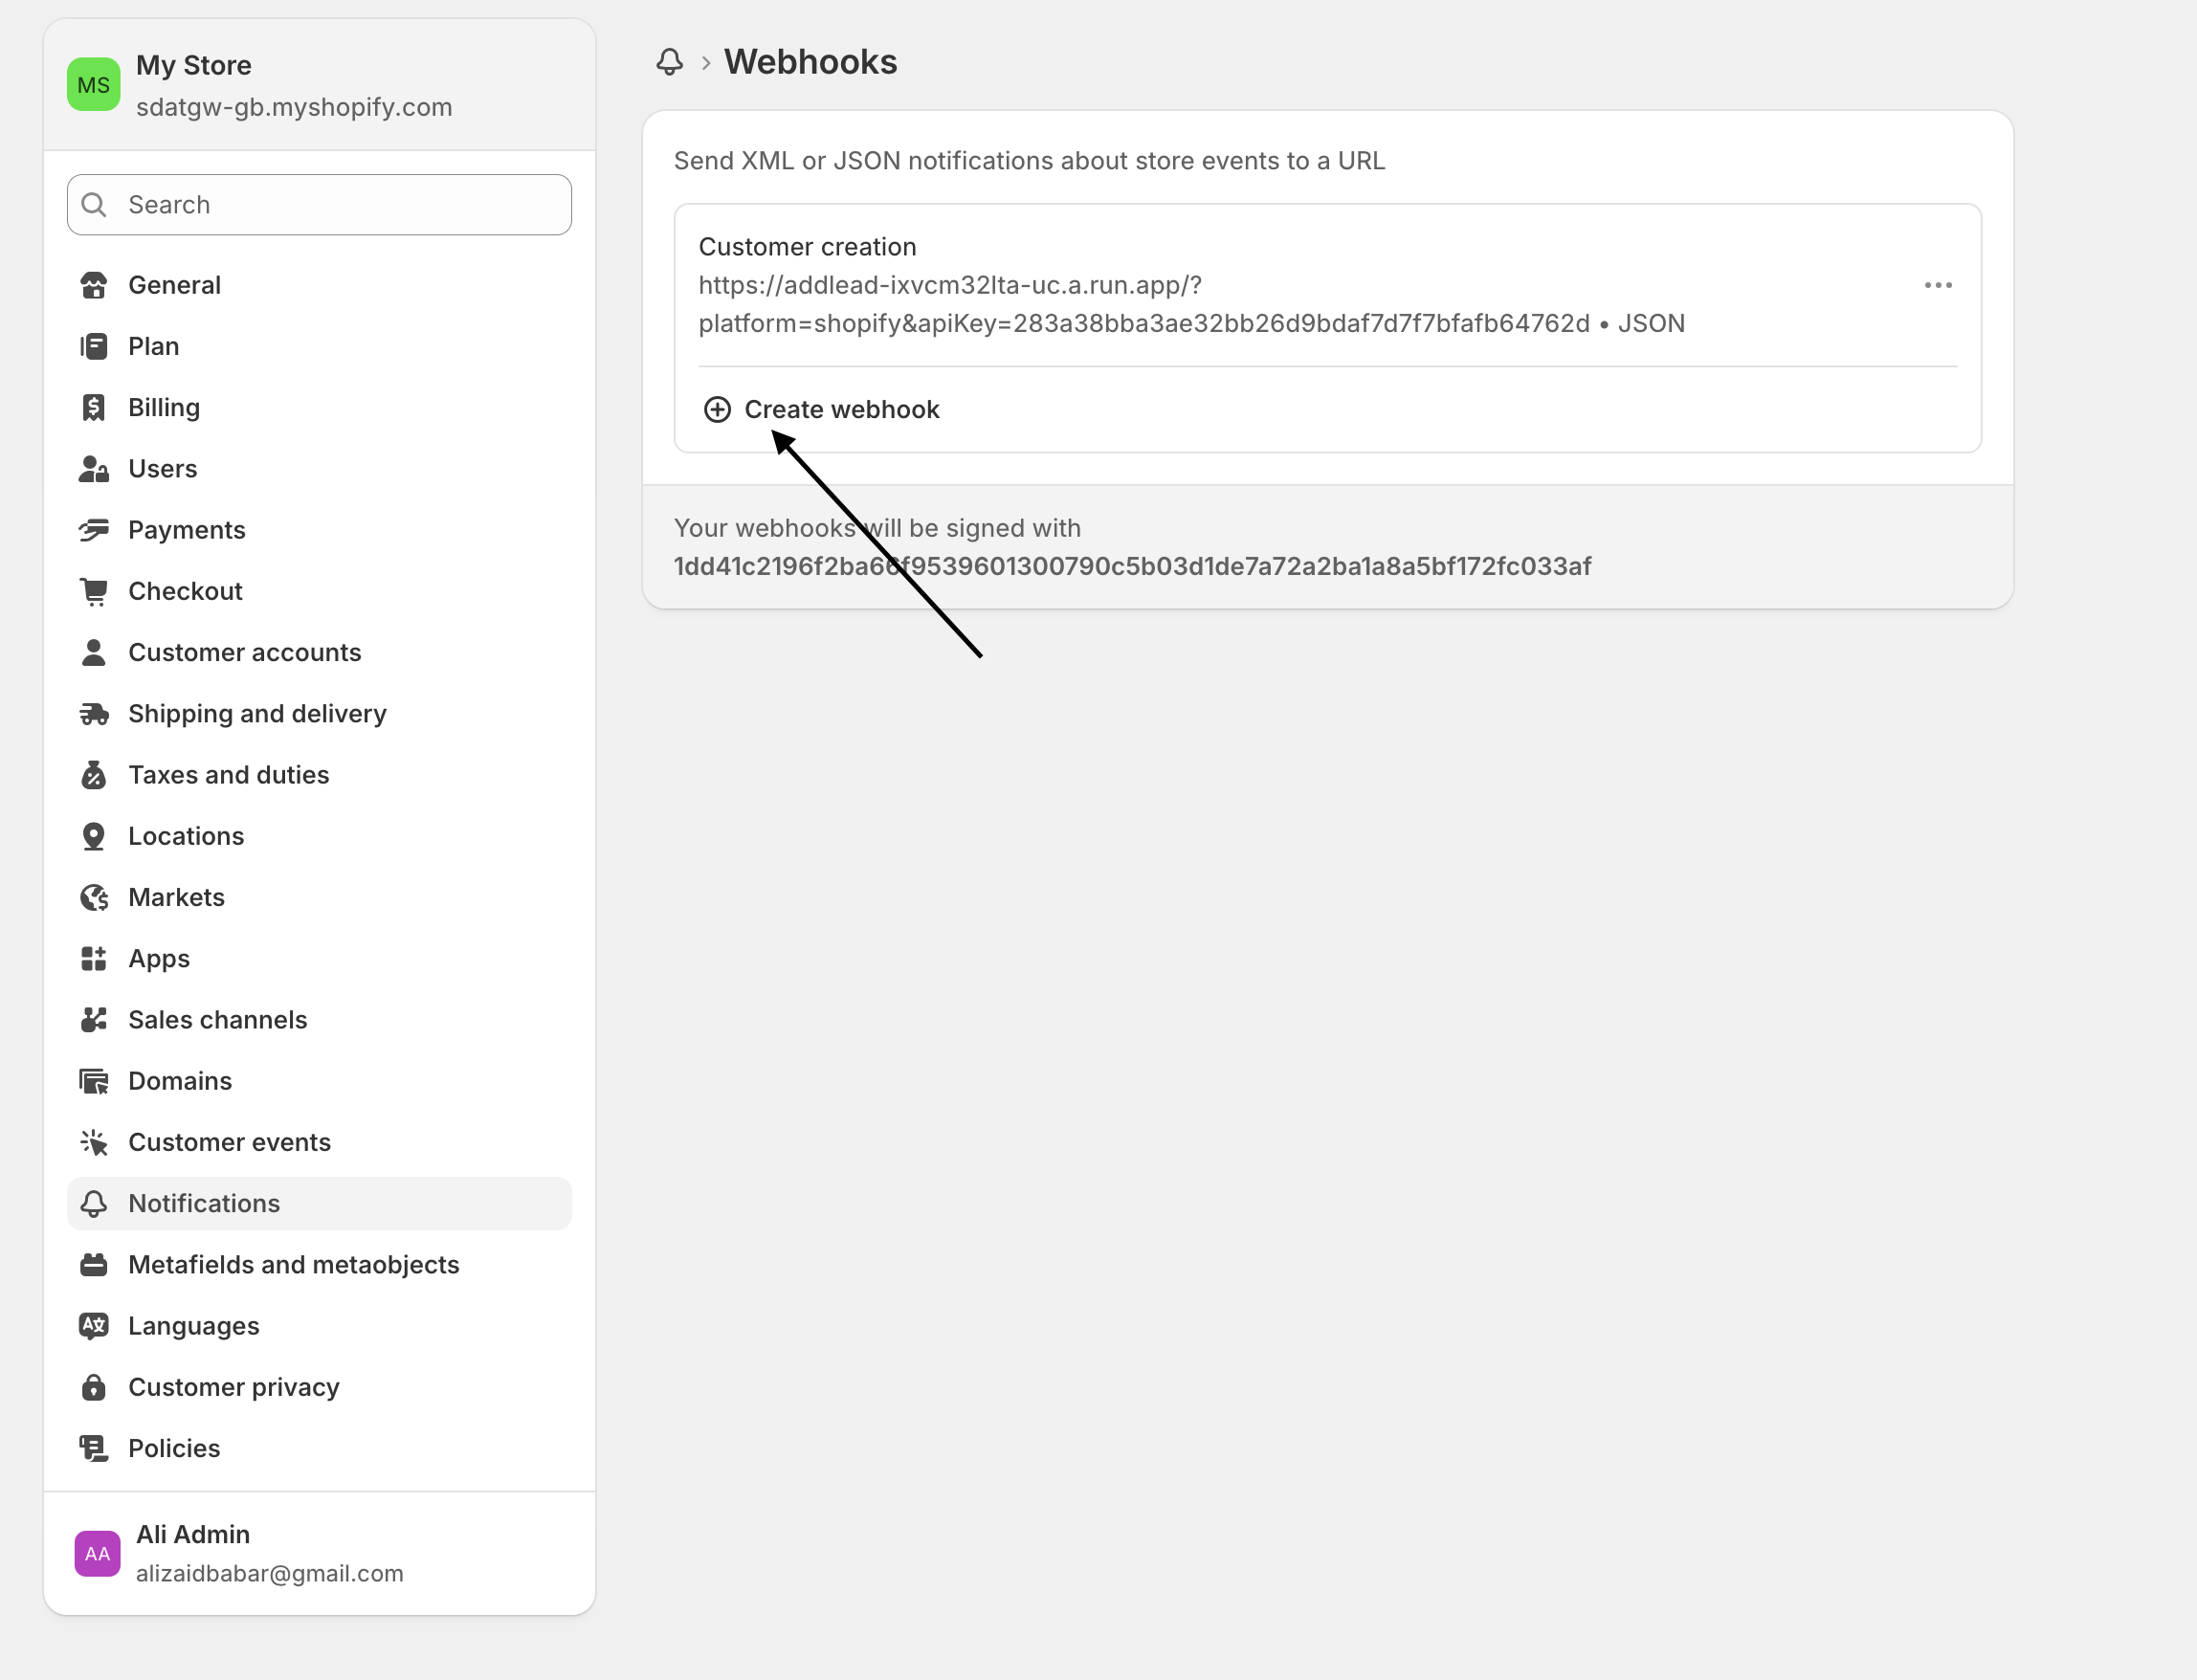
- Scroll down to the Webhooks section.
- Click Create webhook.
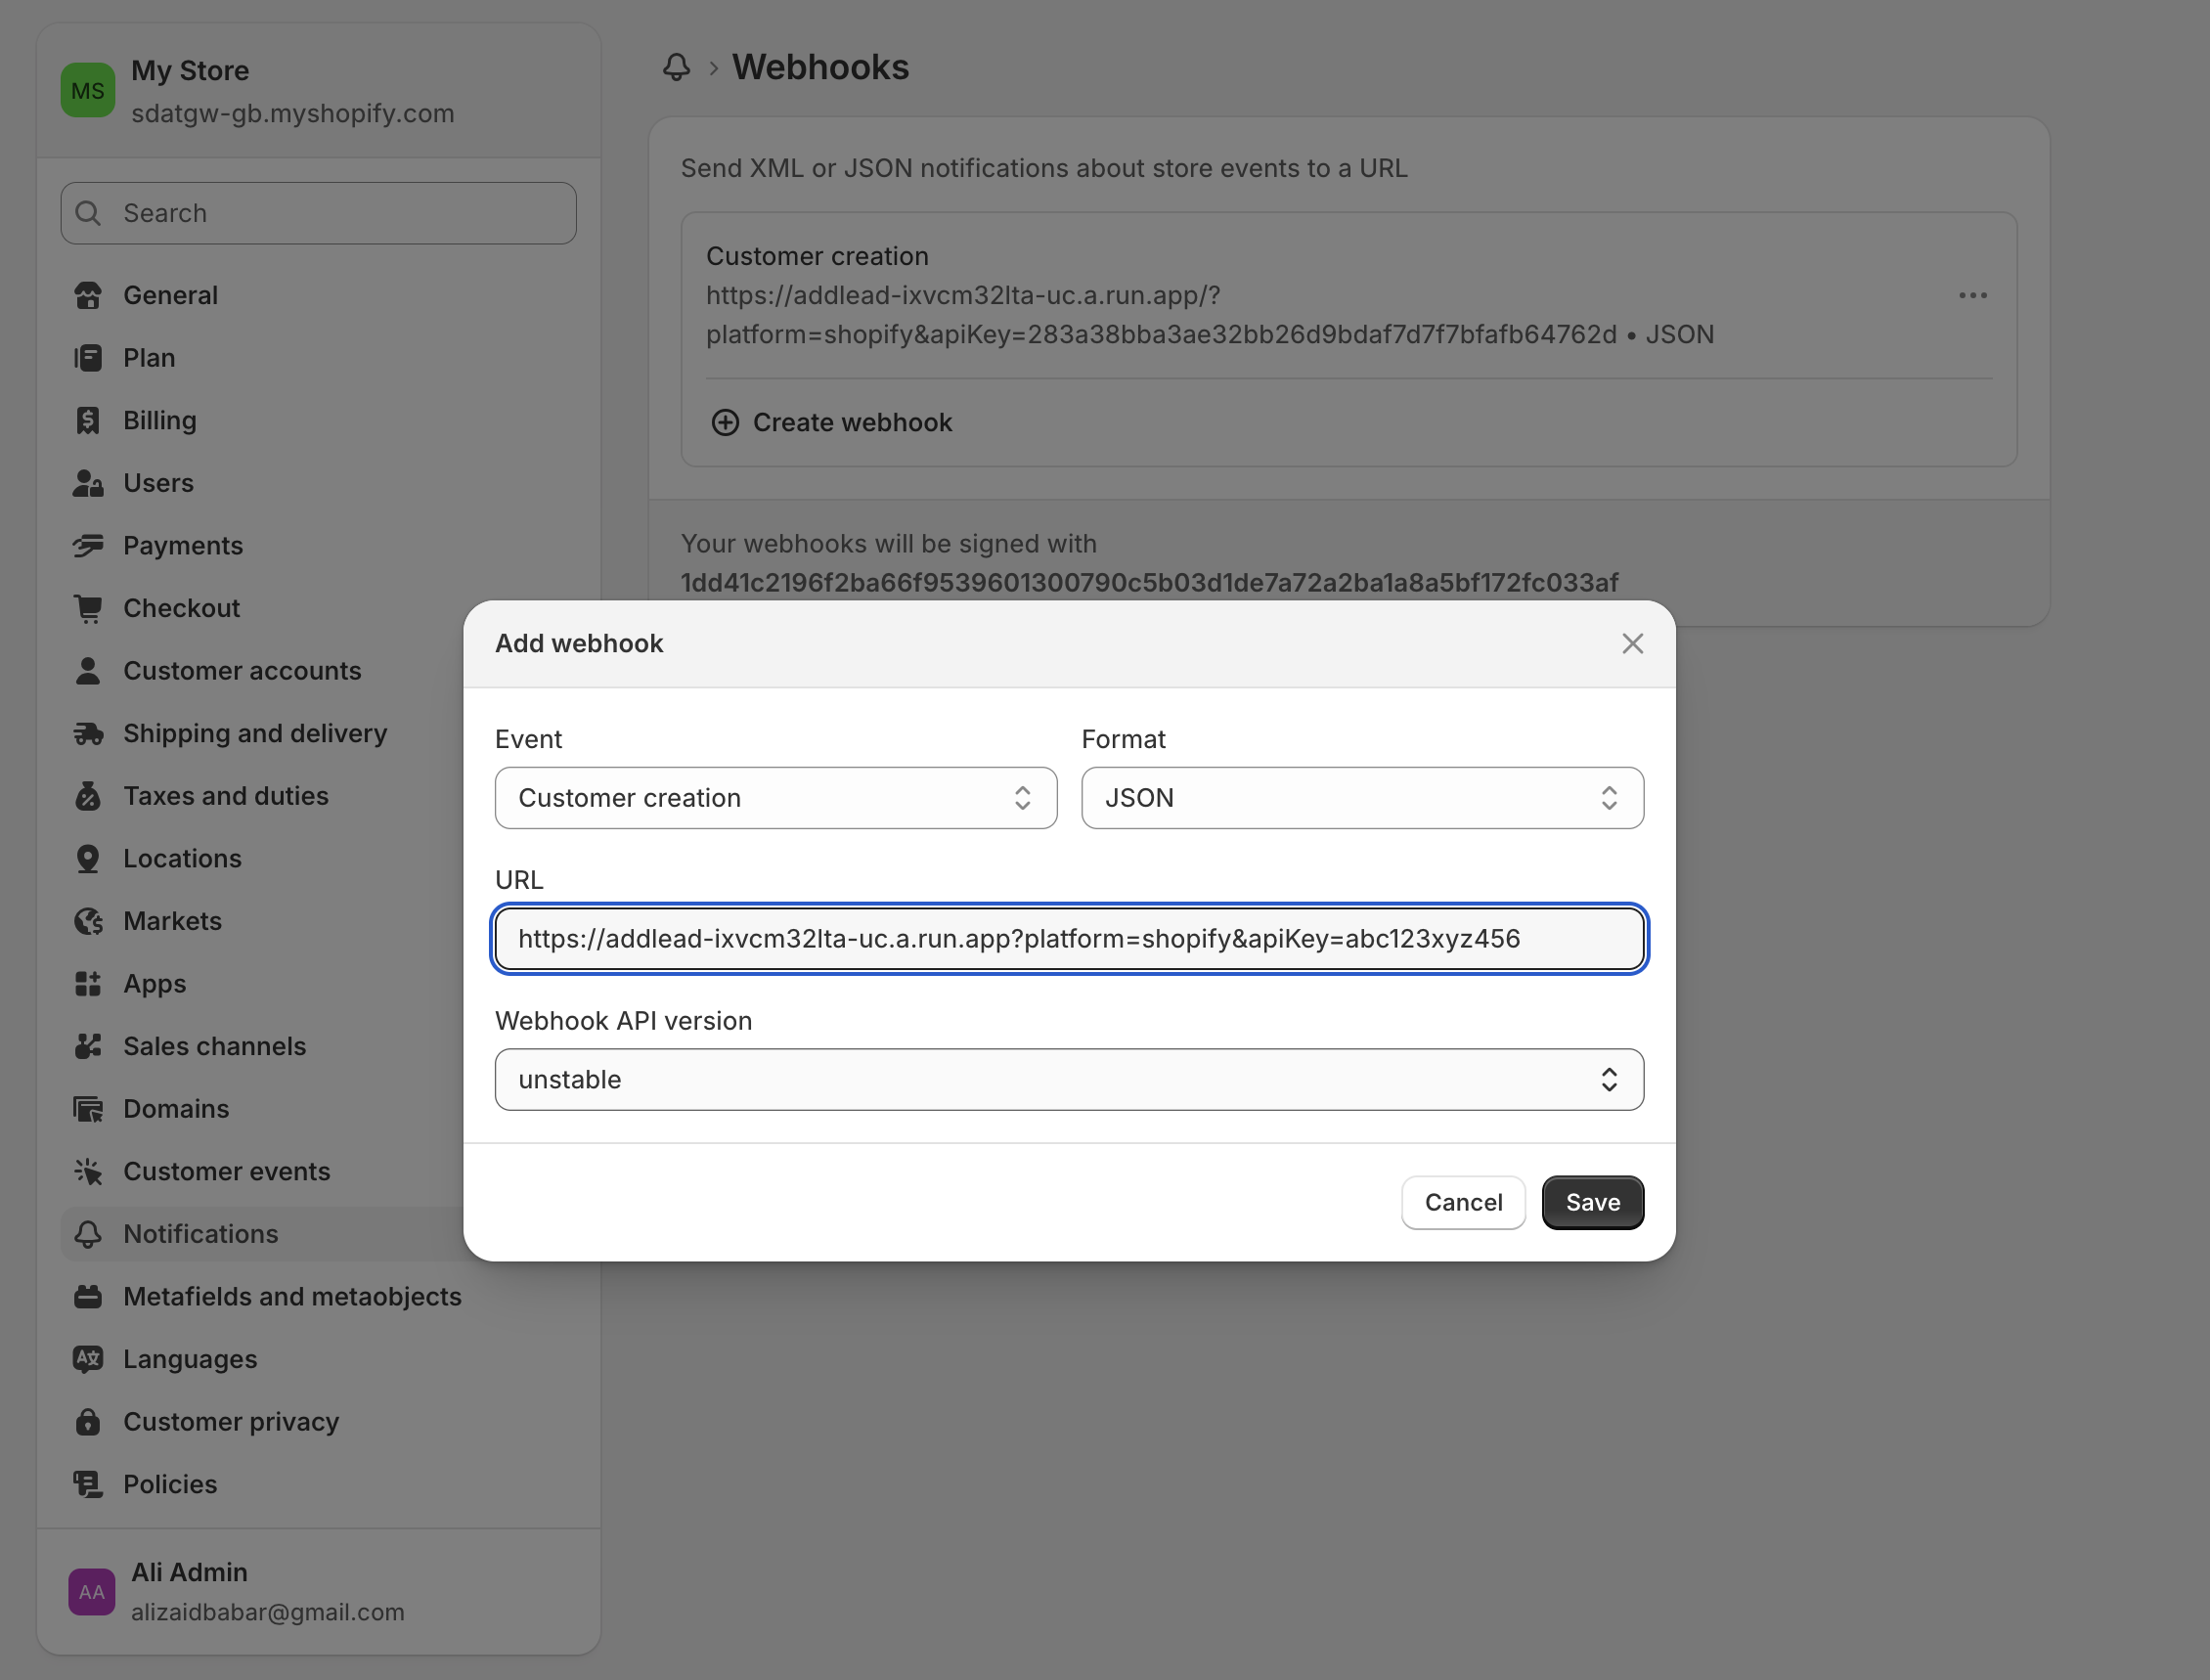
Configure the webhook using the following settings:
| Setting | Value |
|---|---|
| Event | Customer creation |
| Format | JSON |
| URL | Paste the Webhook URL you created in Step 2 |
| Webhook API Version | Latest stable version |
- Click Save.
Step 4: Test the Integration
Once the webhook has been created, it’s time to verify everything is working correctly.
Option 1 (Recommended)
Click Send test notification next to the webhook inside Shopify.
Option 2
Create a new customer manually in Shopify.