How Can We Help?
Integrating Wofu with aNinja
This tutorial will walk you through integrating Wofu with aNinja to automate lead collection and streamline your workflow. Follow the steps below to ensure a smooth data sync between the two platforms.
Step 1: Obtain Your aNinja API Key & URL
- Log in to aNinja 2.0
- Navigate to Your Account Settings > API
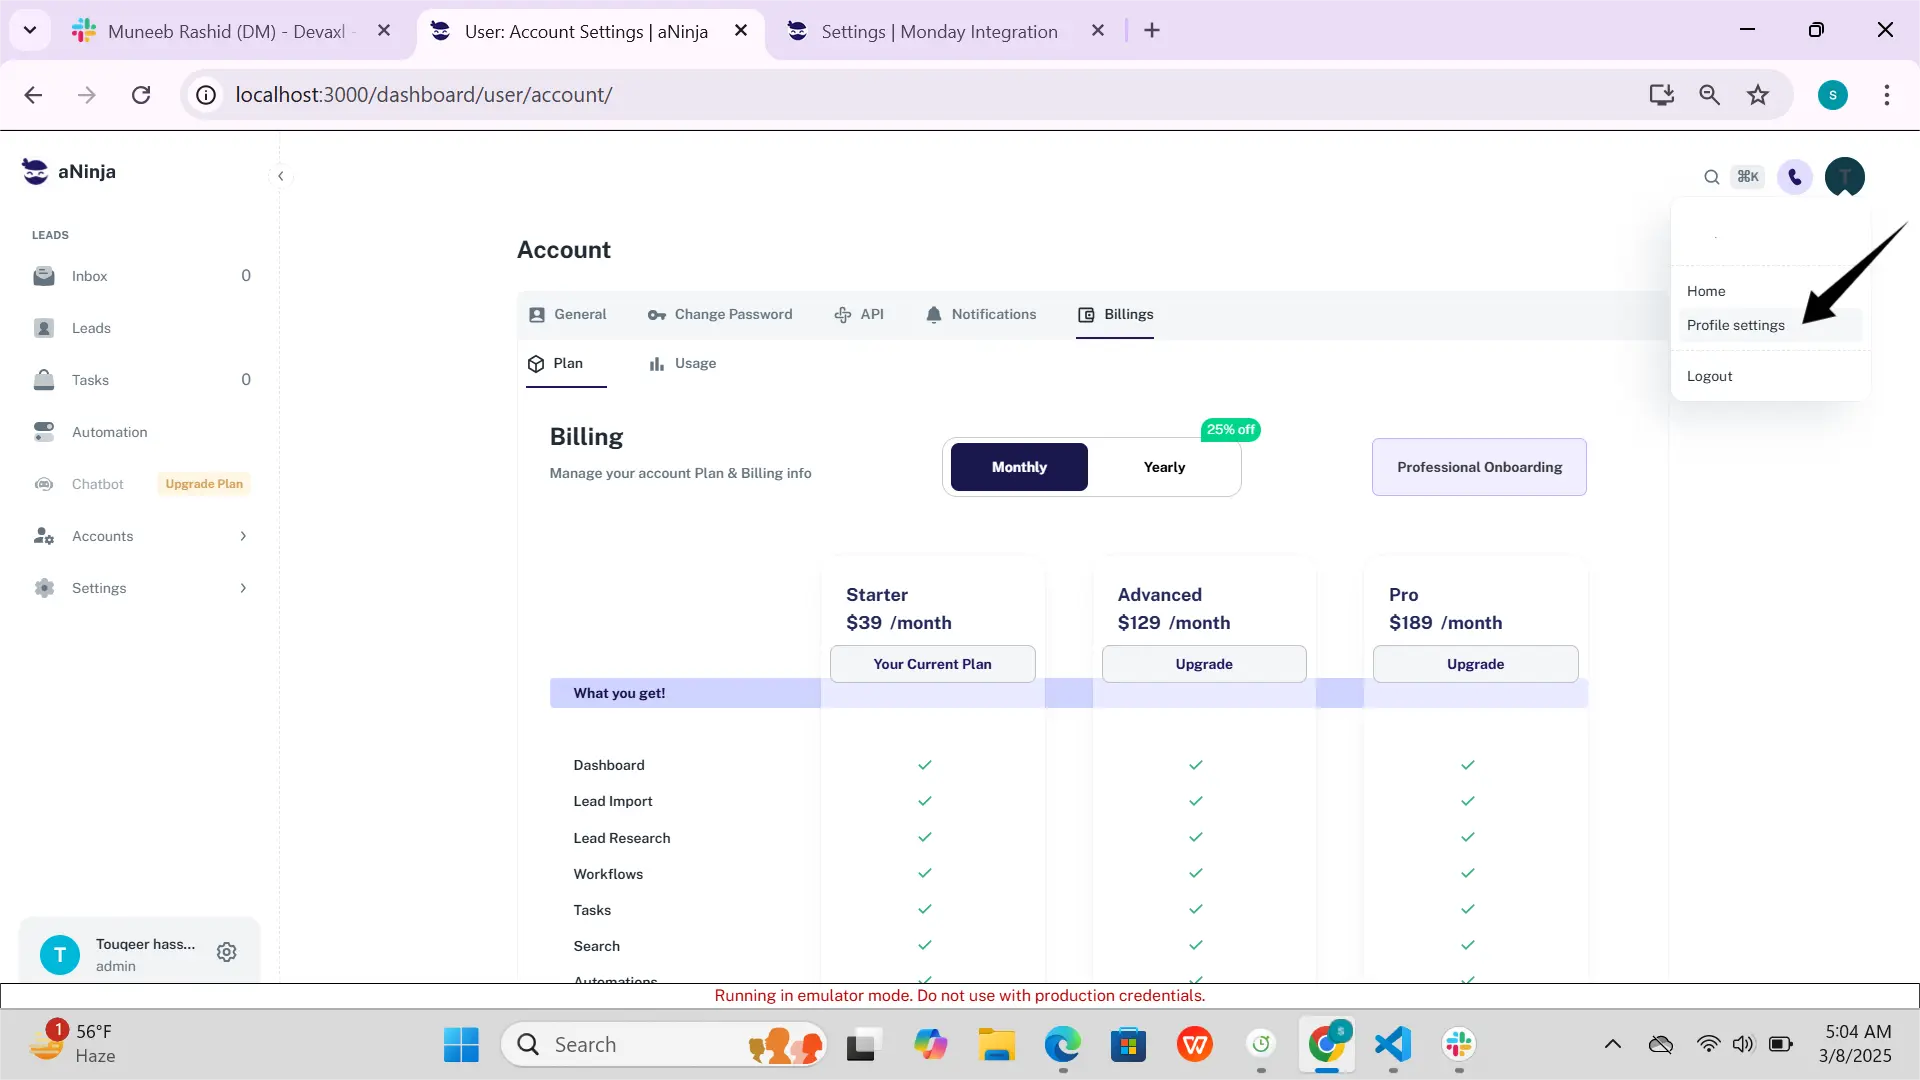
- Click on your name in the upper-left corner and choose Profile Settings
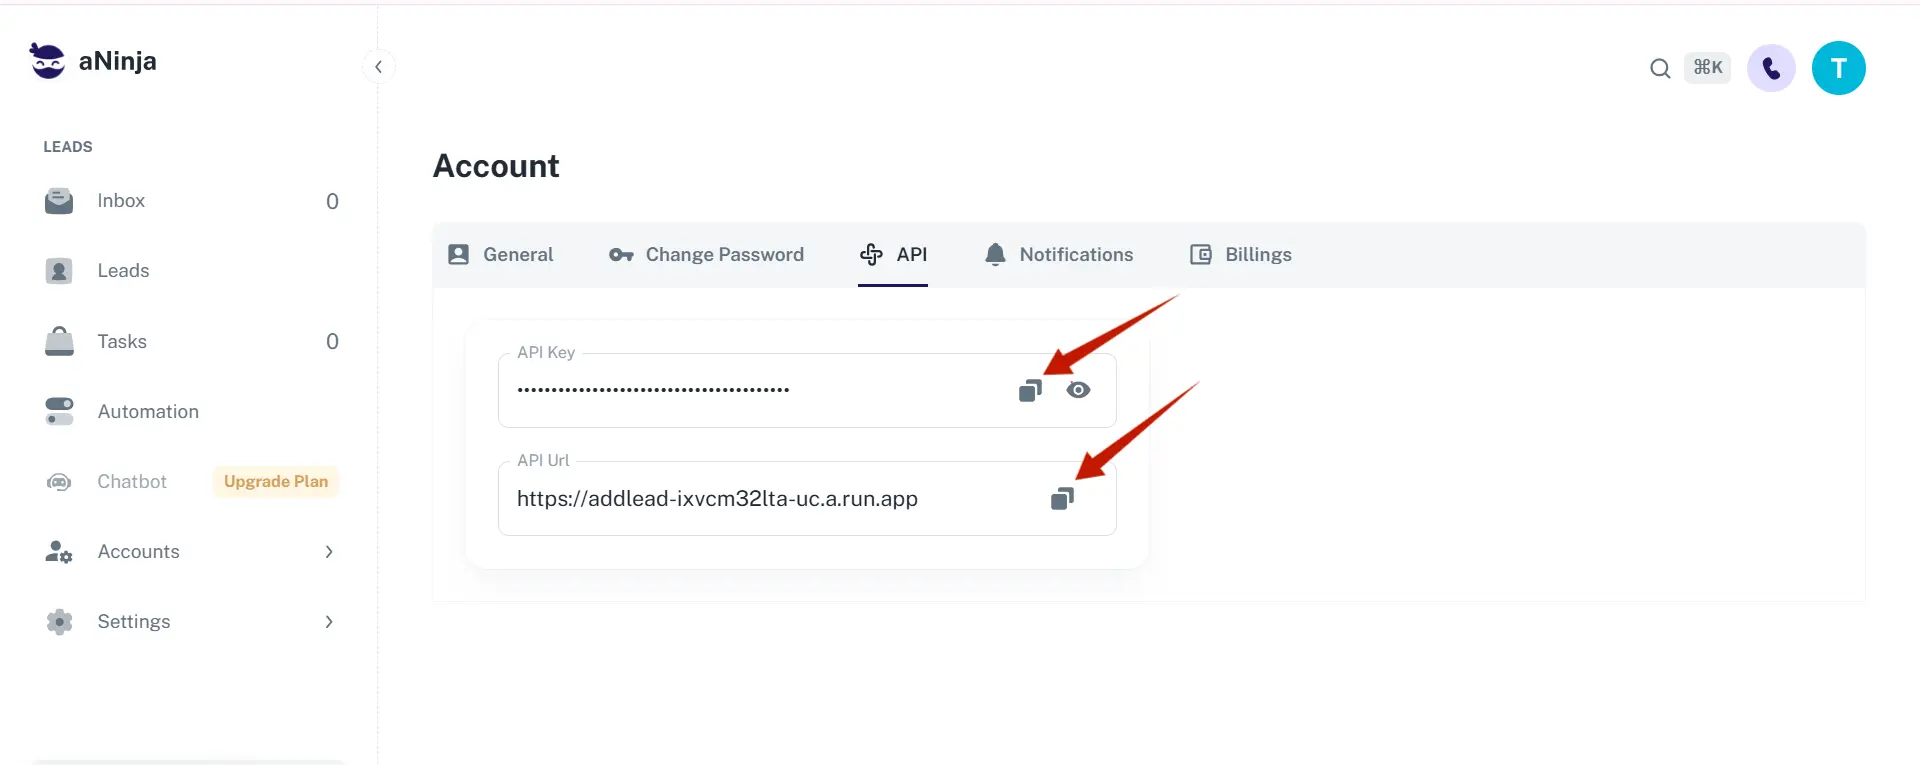
- Open the API tab
- Copy the Webhook URL and Webhook Handshake Key (API Key) for later use
Step 2: Configure Wofu Web Application
- Go to the Wofu Web Application and either sign up or log in
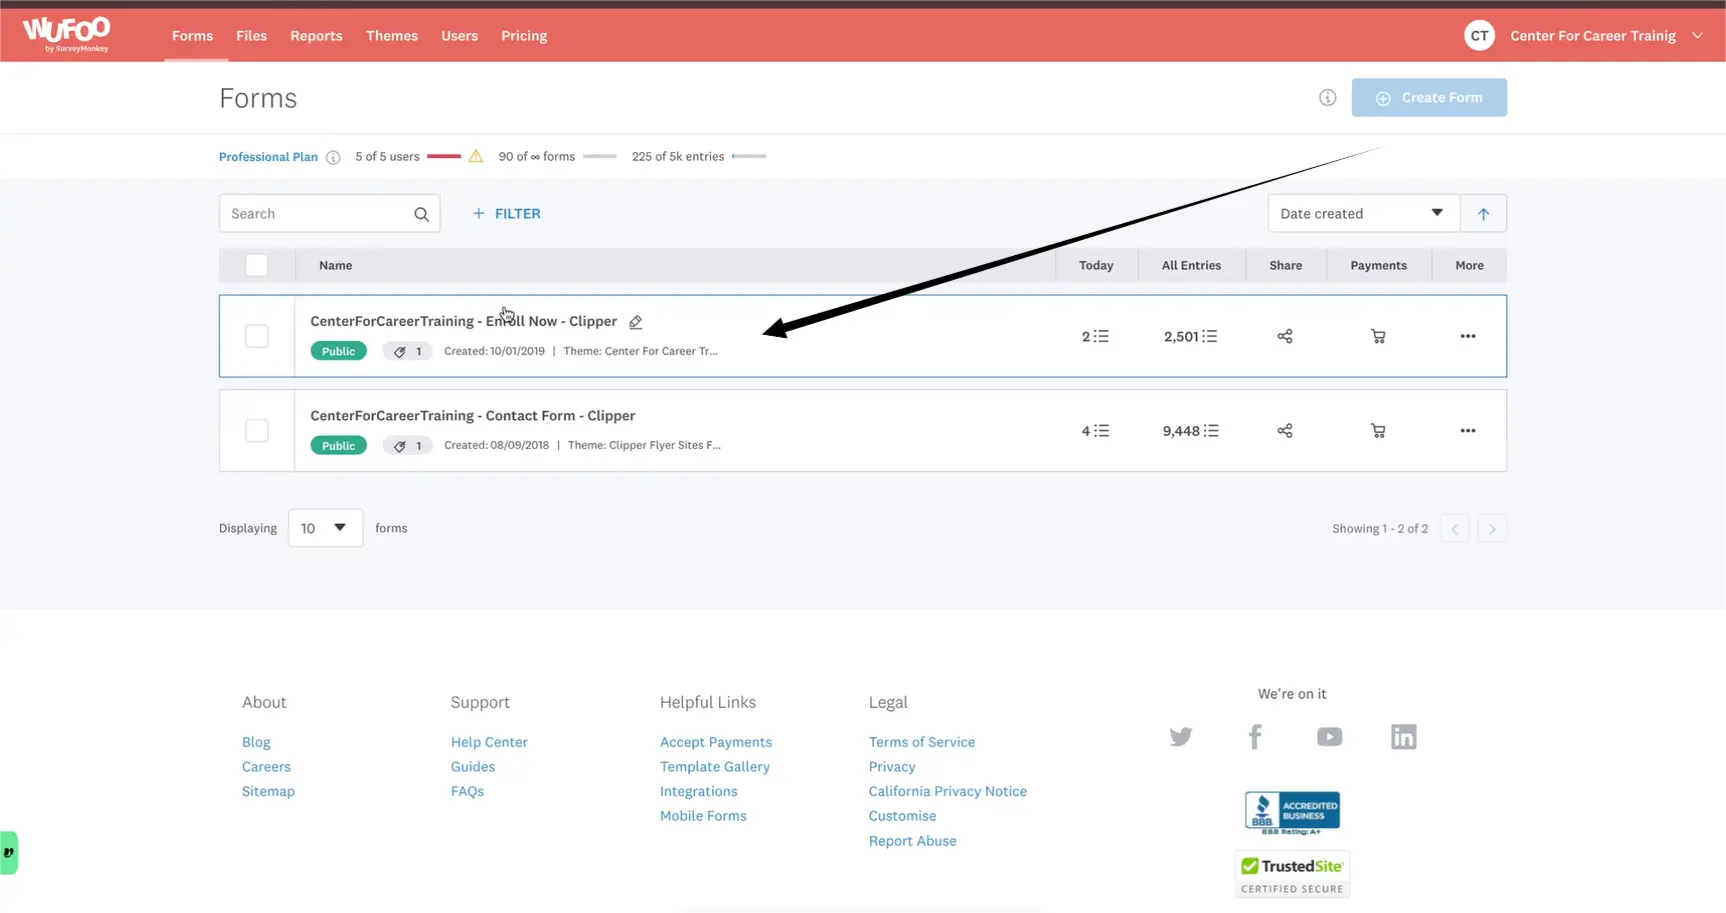
- Navigate to the Forms section
- Click Enroll Now to create or edit a form
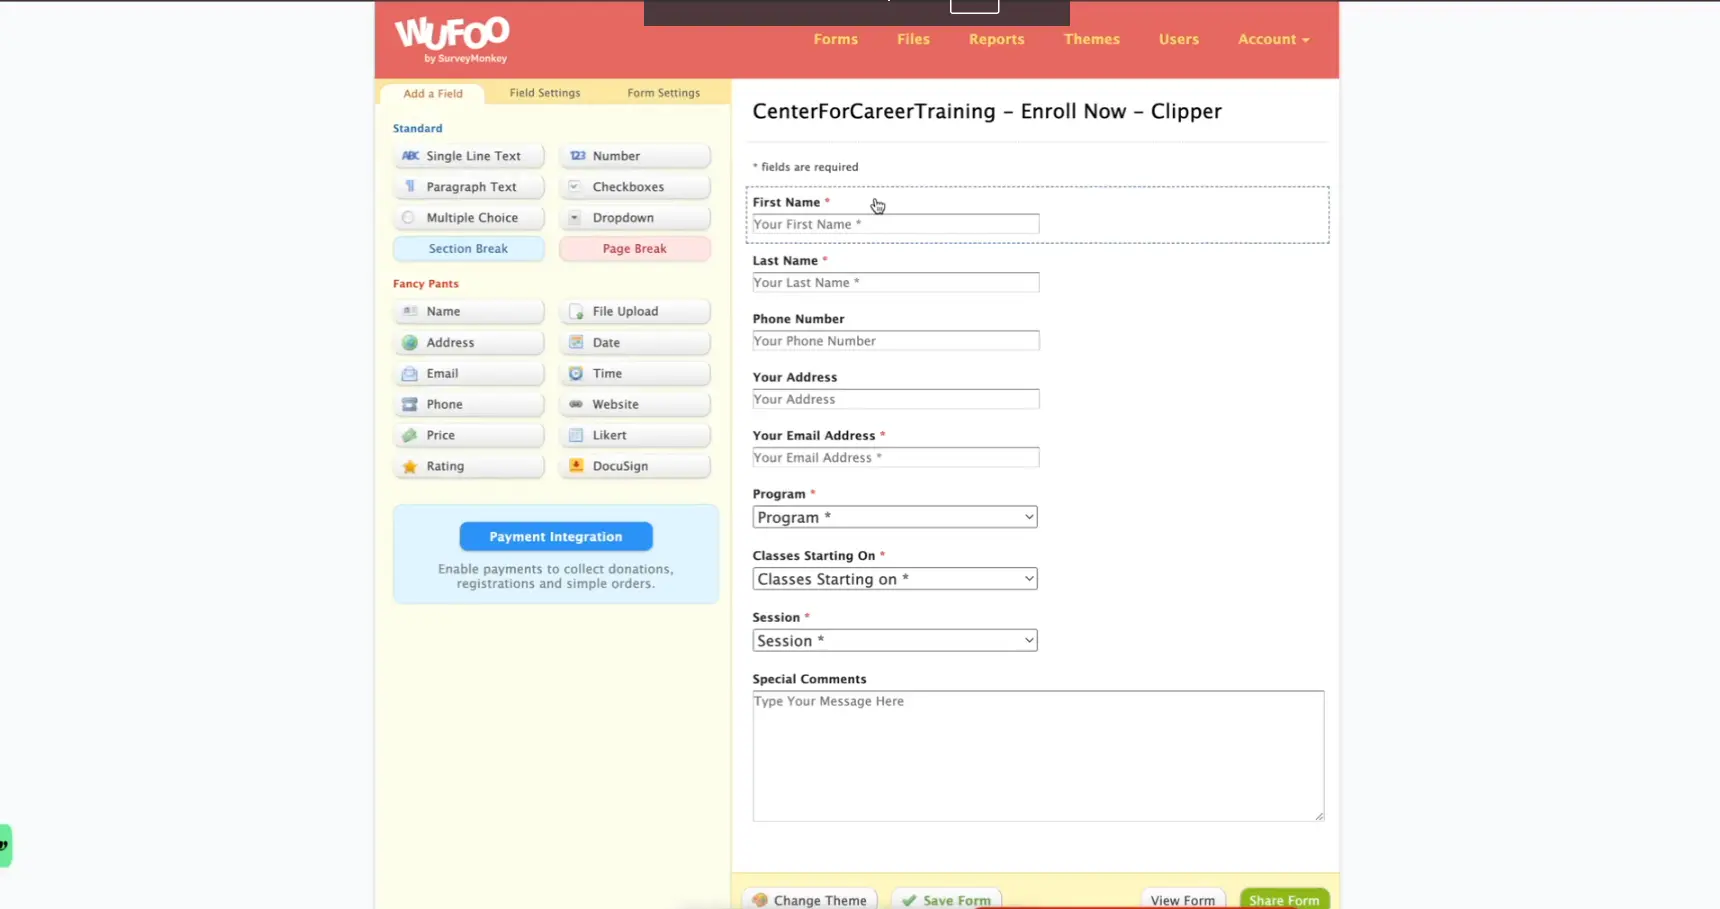
Step 3: Ensure Form Field Accuracy
Make sure the following fields are present in your form, and that the field names match exactly as listed:
- First Name
- Last Name
- Phone Number
- Your Address
- Your Email Address
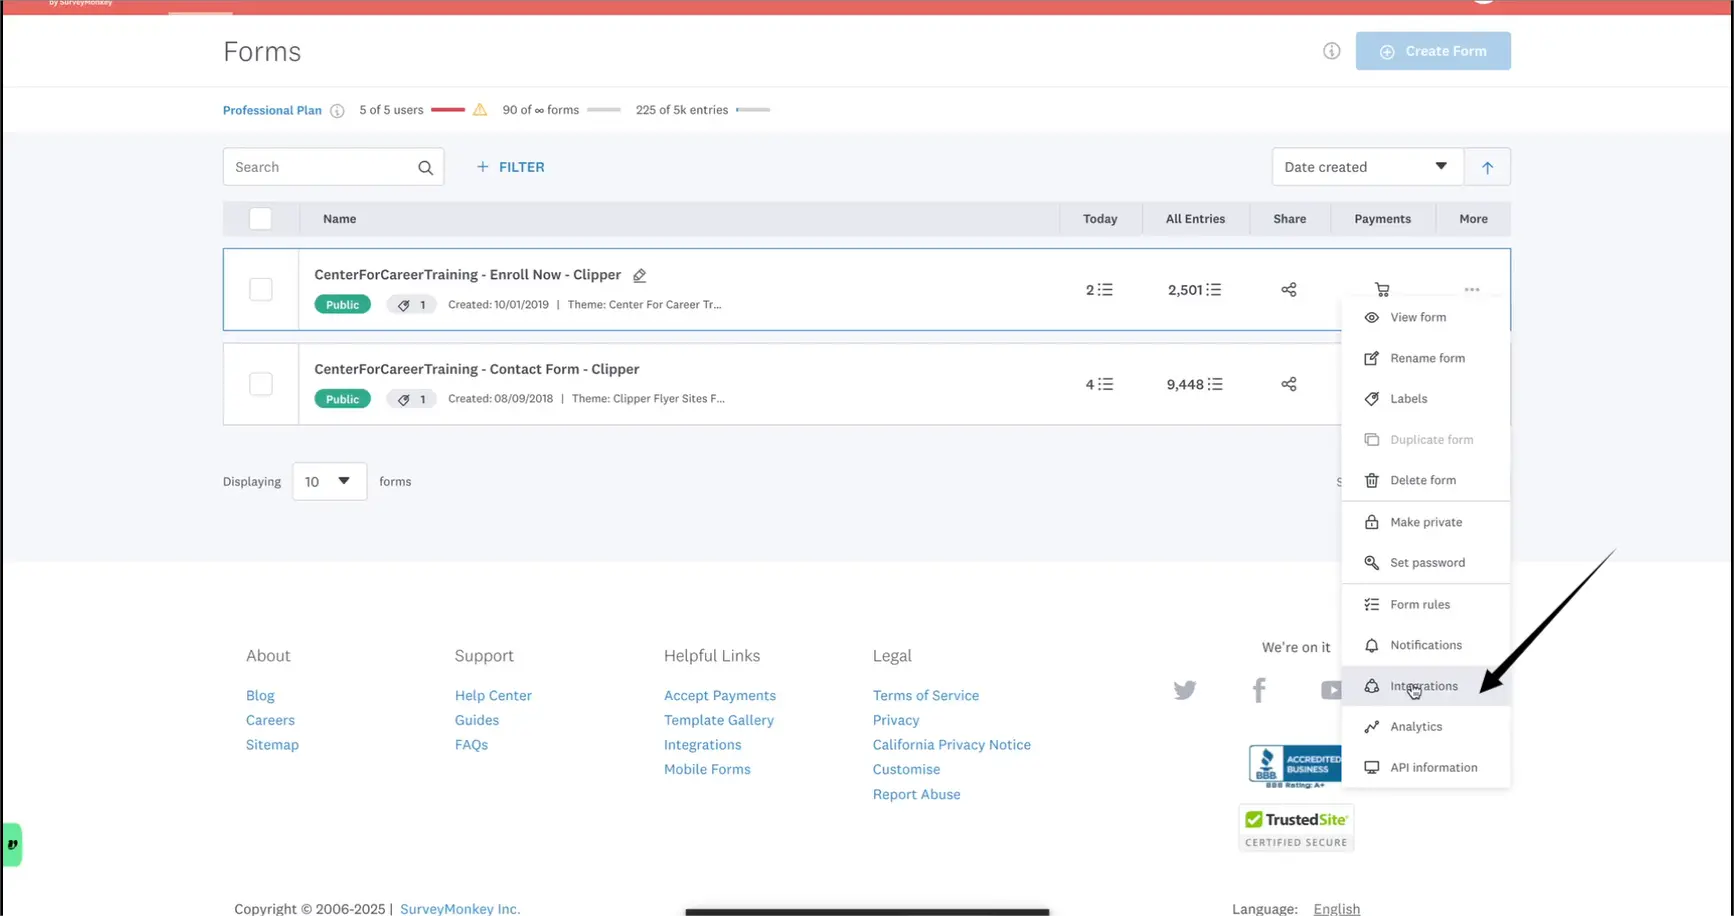
Step 4: Webhook Integration
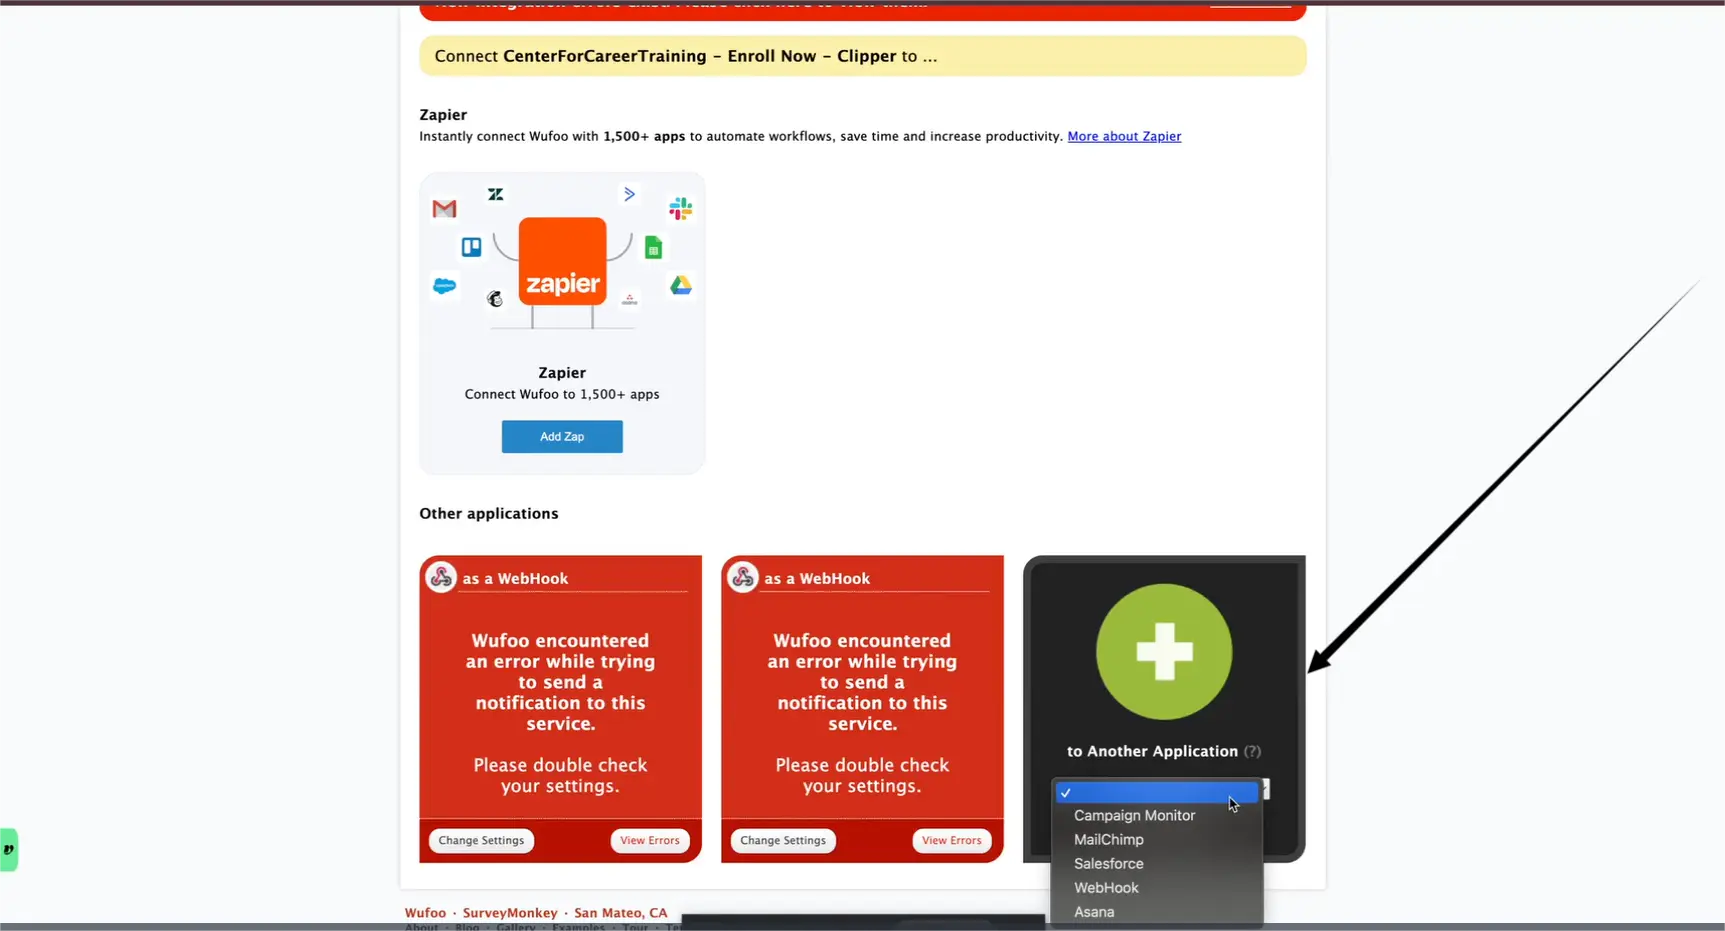
- Open your Wofu form and go to the Integration tab
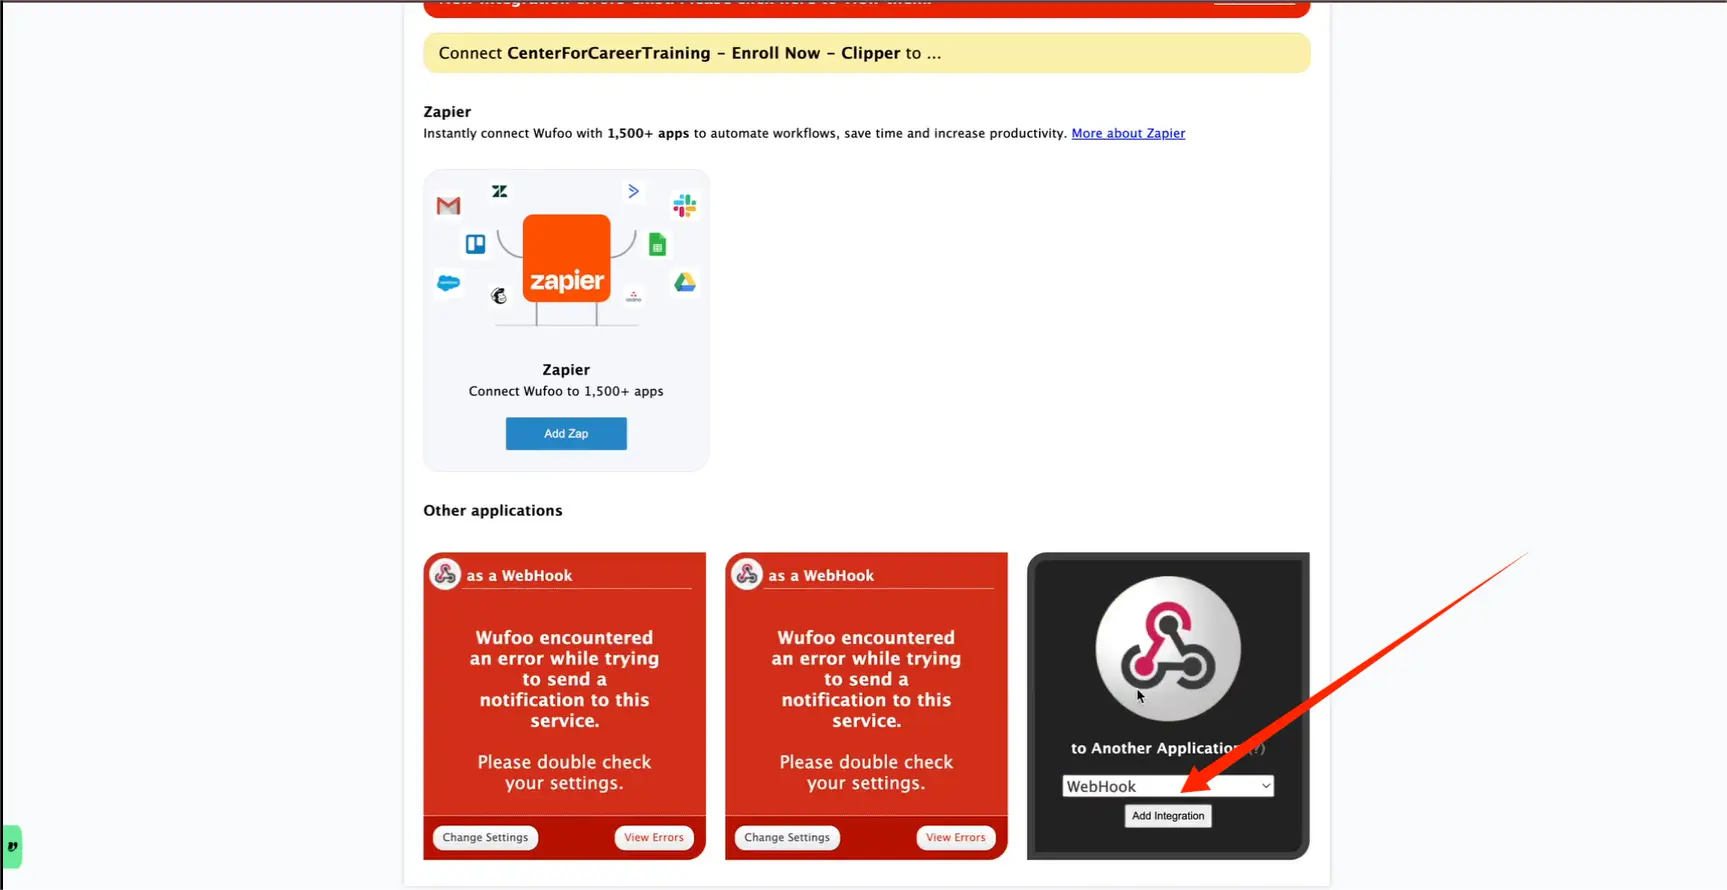
- Select Webhook as your integration method
- Click Add Integration
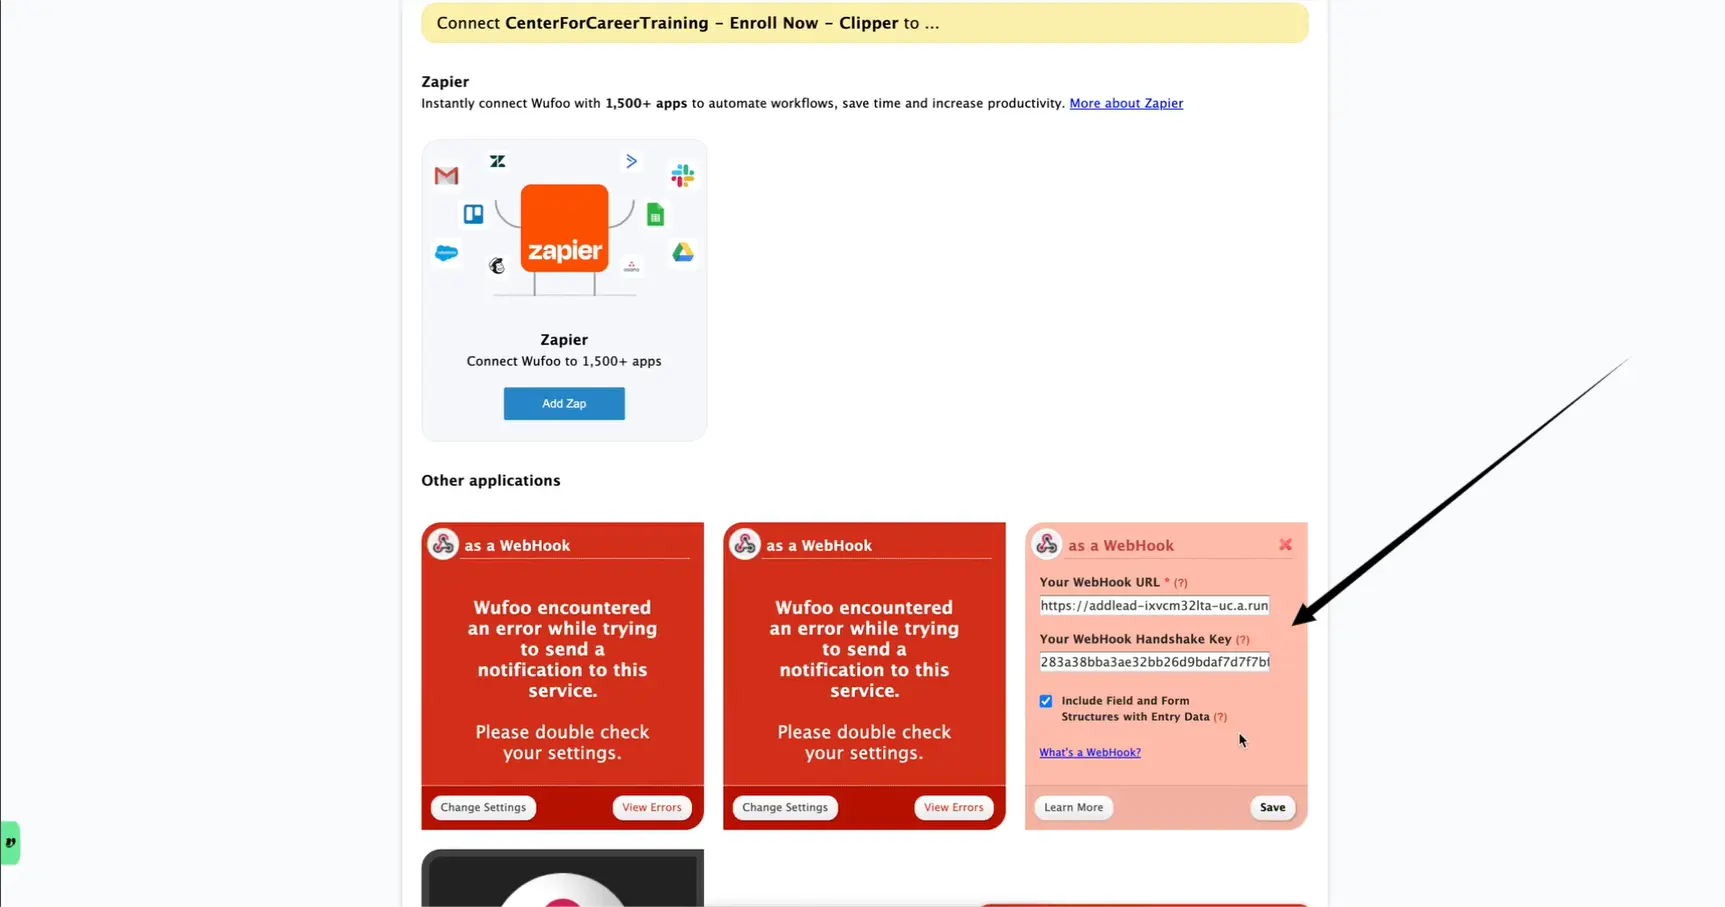
- Enter the Webhook URL (aNinja API URL) and the Webhook Handshake Key (aNinja API Key)
- Enable the checkbox that says “Include field and form structure…”
- Click Save to complete the integration
Step 5: Test the Wofu Integration
- Submit a test entry using the Wofu form
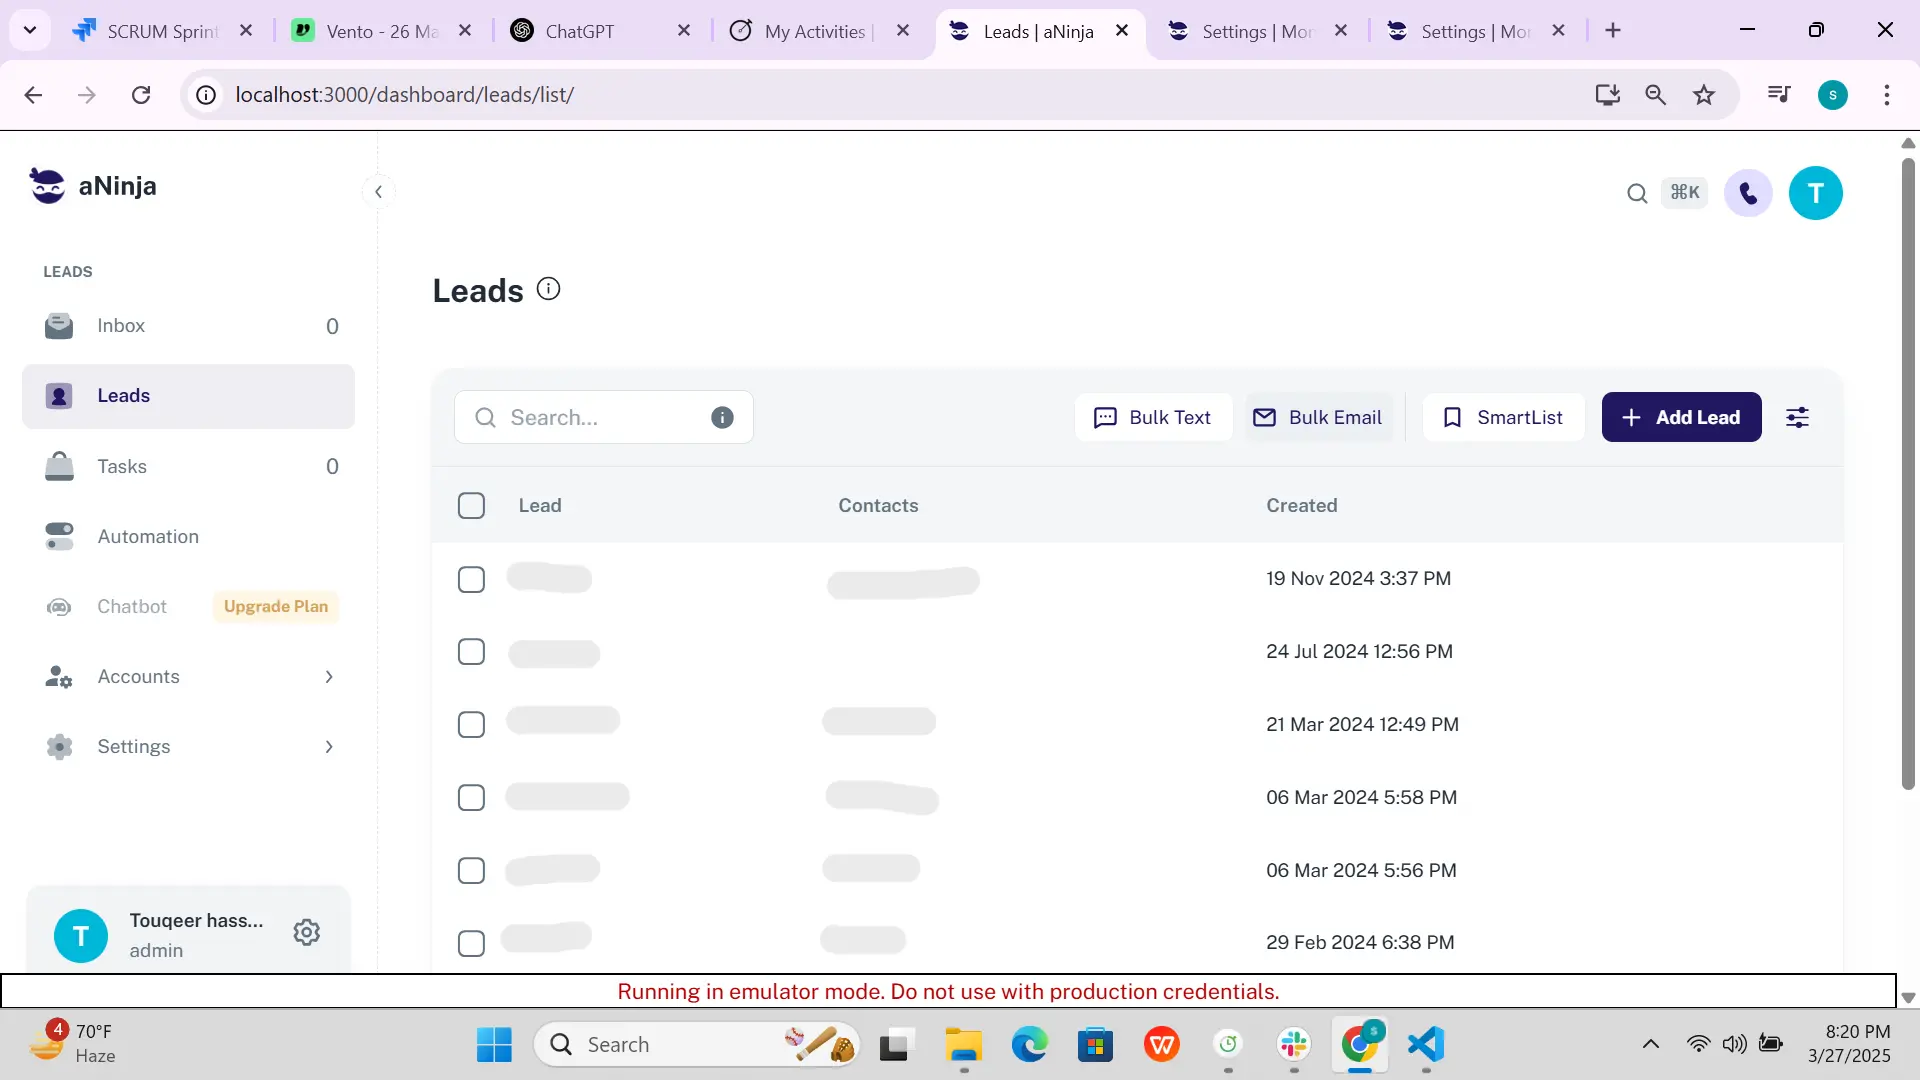
- Go to aNinja > Leads to confirm the new lead has been added
Troubleshooting
Not Seeing Data in aNinja?
- Verify that the API Key is valid and active
- Confirm that you’re using the correct form in Wofu
- Try refreshing both Wofu and aNinja after completing the setup
Incorrect Field Mapping?
- Ensure each form field is properly aligned with the expected names
Need Support?
If you run into any issues or need assistance, feel free to contact [email protected]. We’re always here to help!