How Can We Help?
Integrate Gravity Forms with aNinja
Prerequisites:
- A licensed Gravity Forms account (you need to purchase it from gravityforms.com)
- Admin access to your WordPress dashboard
- aNinja apiKey & URl
Step-by-Step Integration:
1. Download the Plugin ZIP File
Go to https://www.gravityforms.com
Log in to your account.
Navigate to Downloads.
Download the Gravity Forms plugin ZIP file to your computer.
2. Log in to WordPress Admin
Go to: yourdomain.com/wp-admin
3. Upload the Plugin
In the WordPress dashboard, go to:
Plugins → Add New → Upload Plugin
Click “Choose File” and select the ZIP file you downloaded.
Click “Install Now”
4. Activate the Plugin
After installation, click the Activate Plugin button.
5. Enter Your License Key
Once activated, you’ll see a prompt to enter your Gravity Forms license key.
Go to:
Forms → Settings → Enter your license key (found in your Gravity Forms account).
Save the settings.
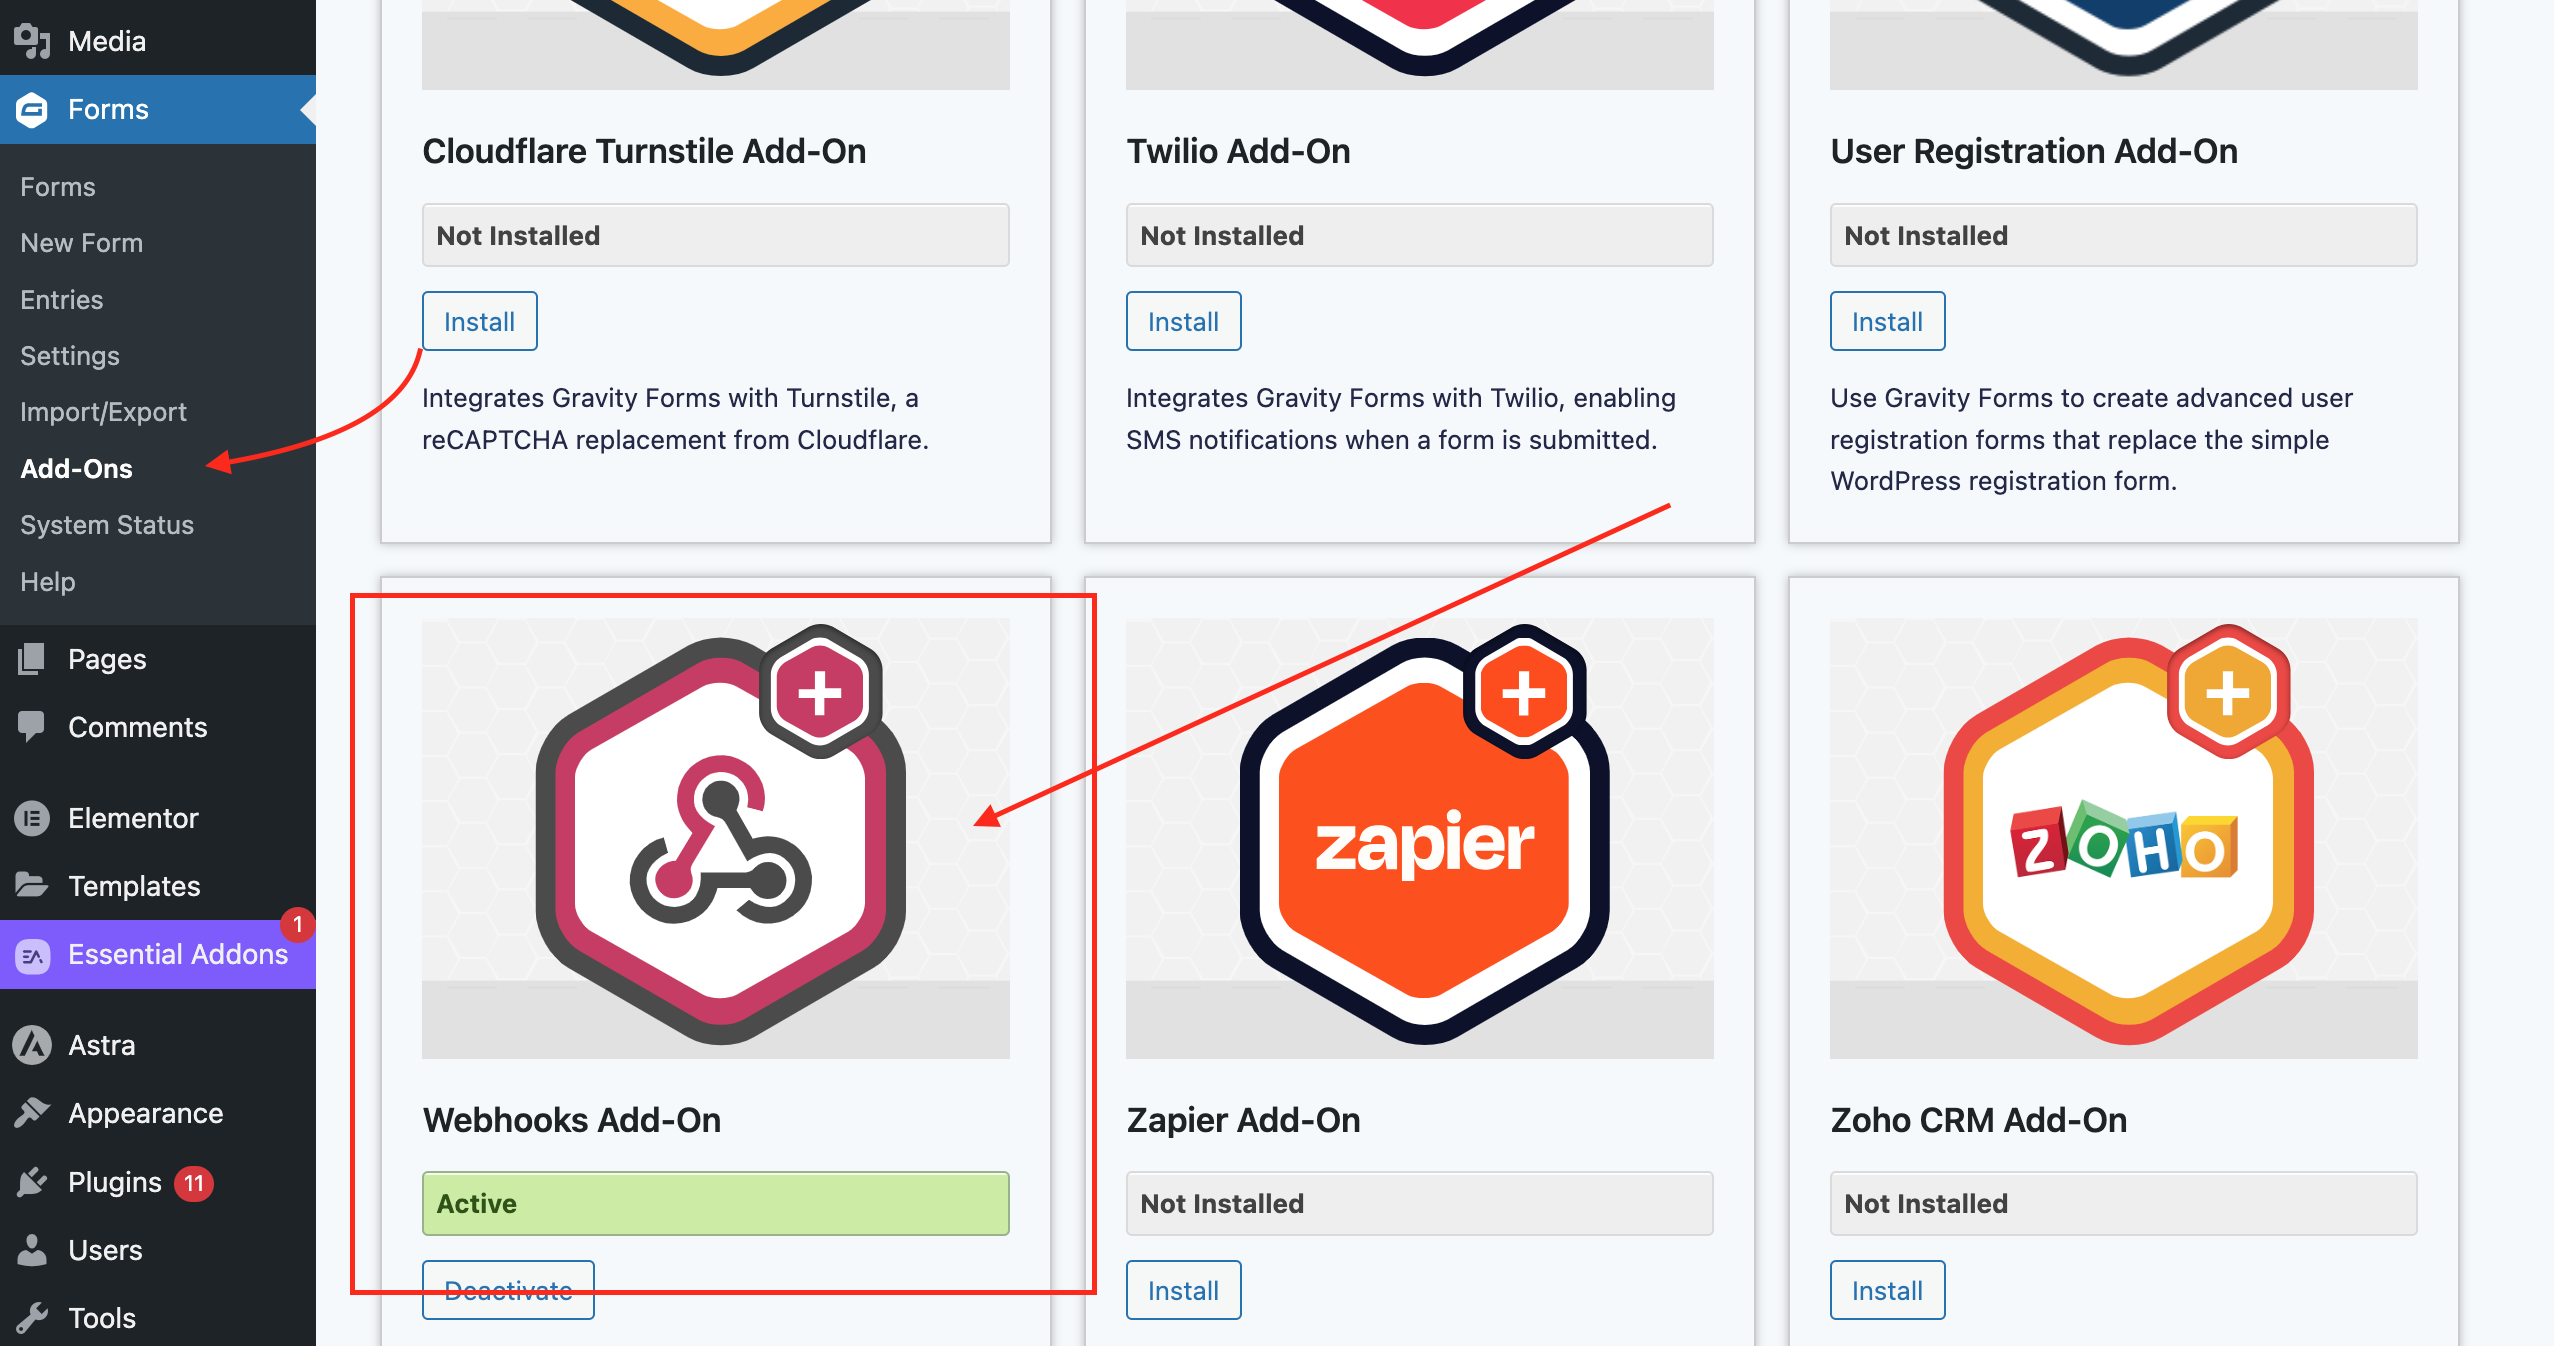
6. Add Webhook Add-on in Gravity Forms
Go to Forms → Add-Ons
Install and activate Webhook Add-on
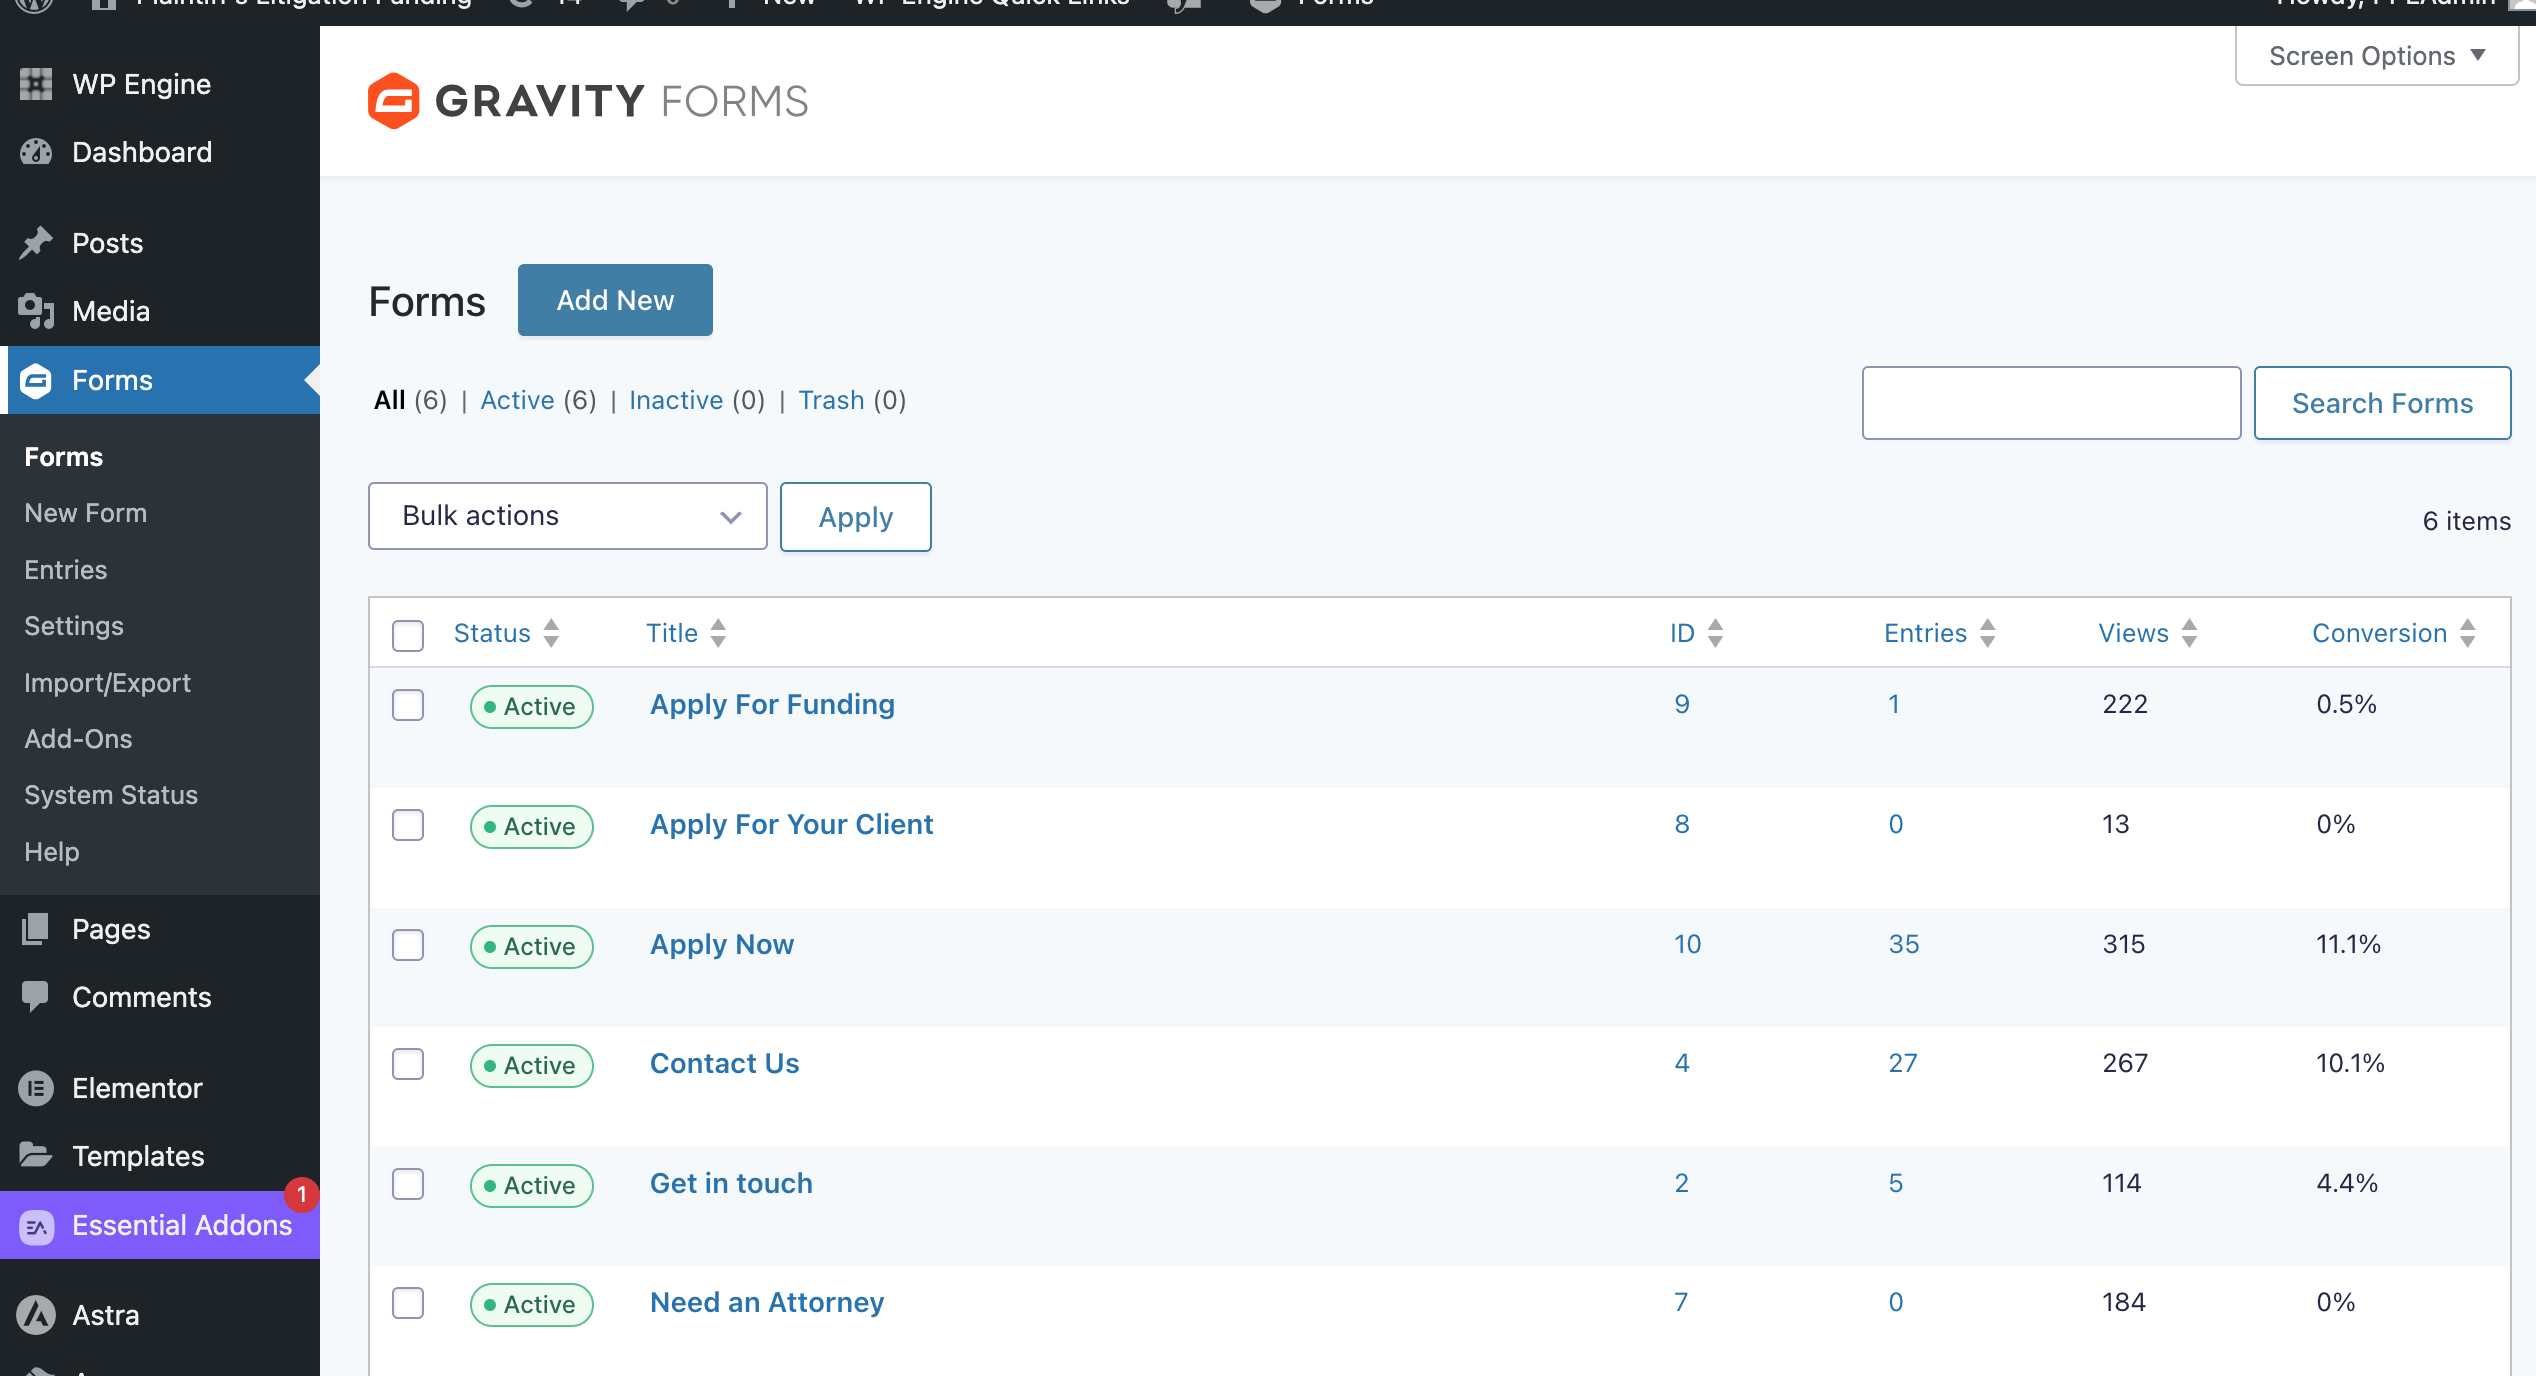
7. You can now start creating forms by going to:Forms → New Form
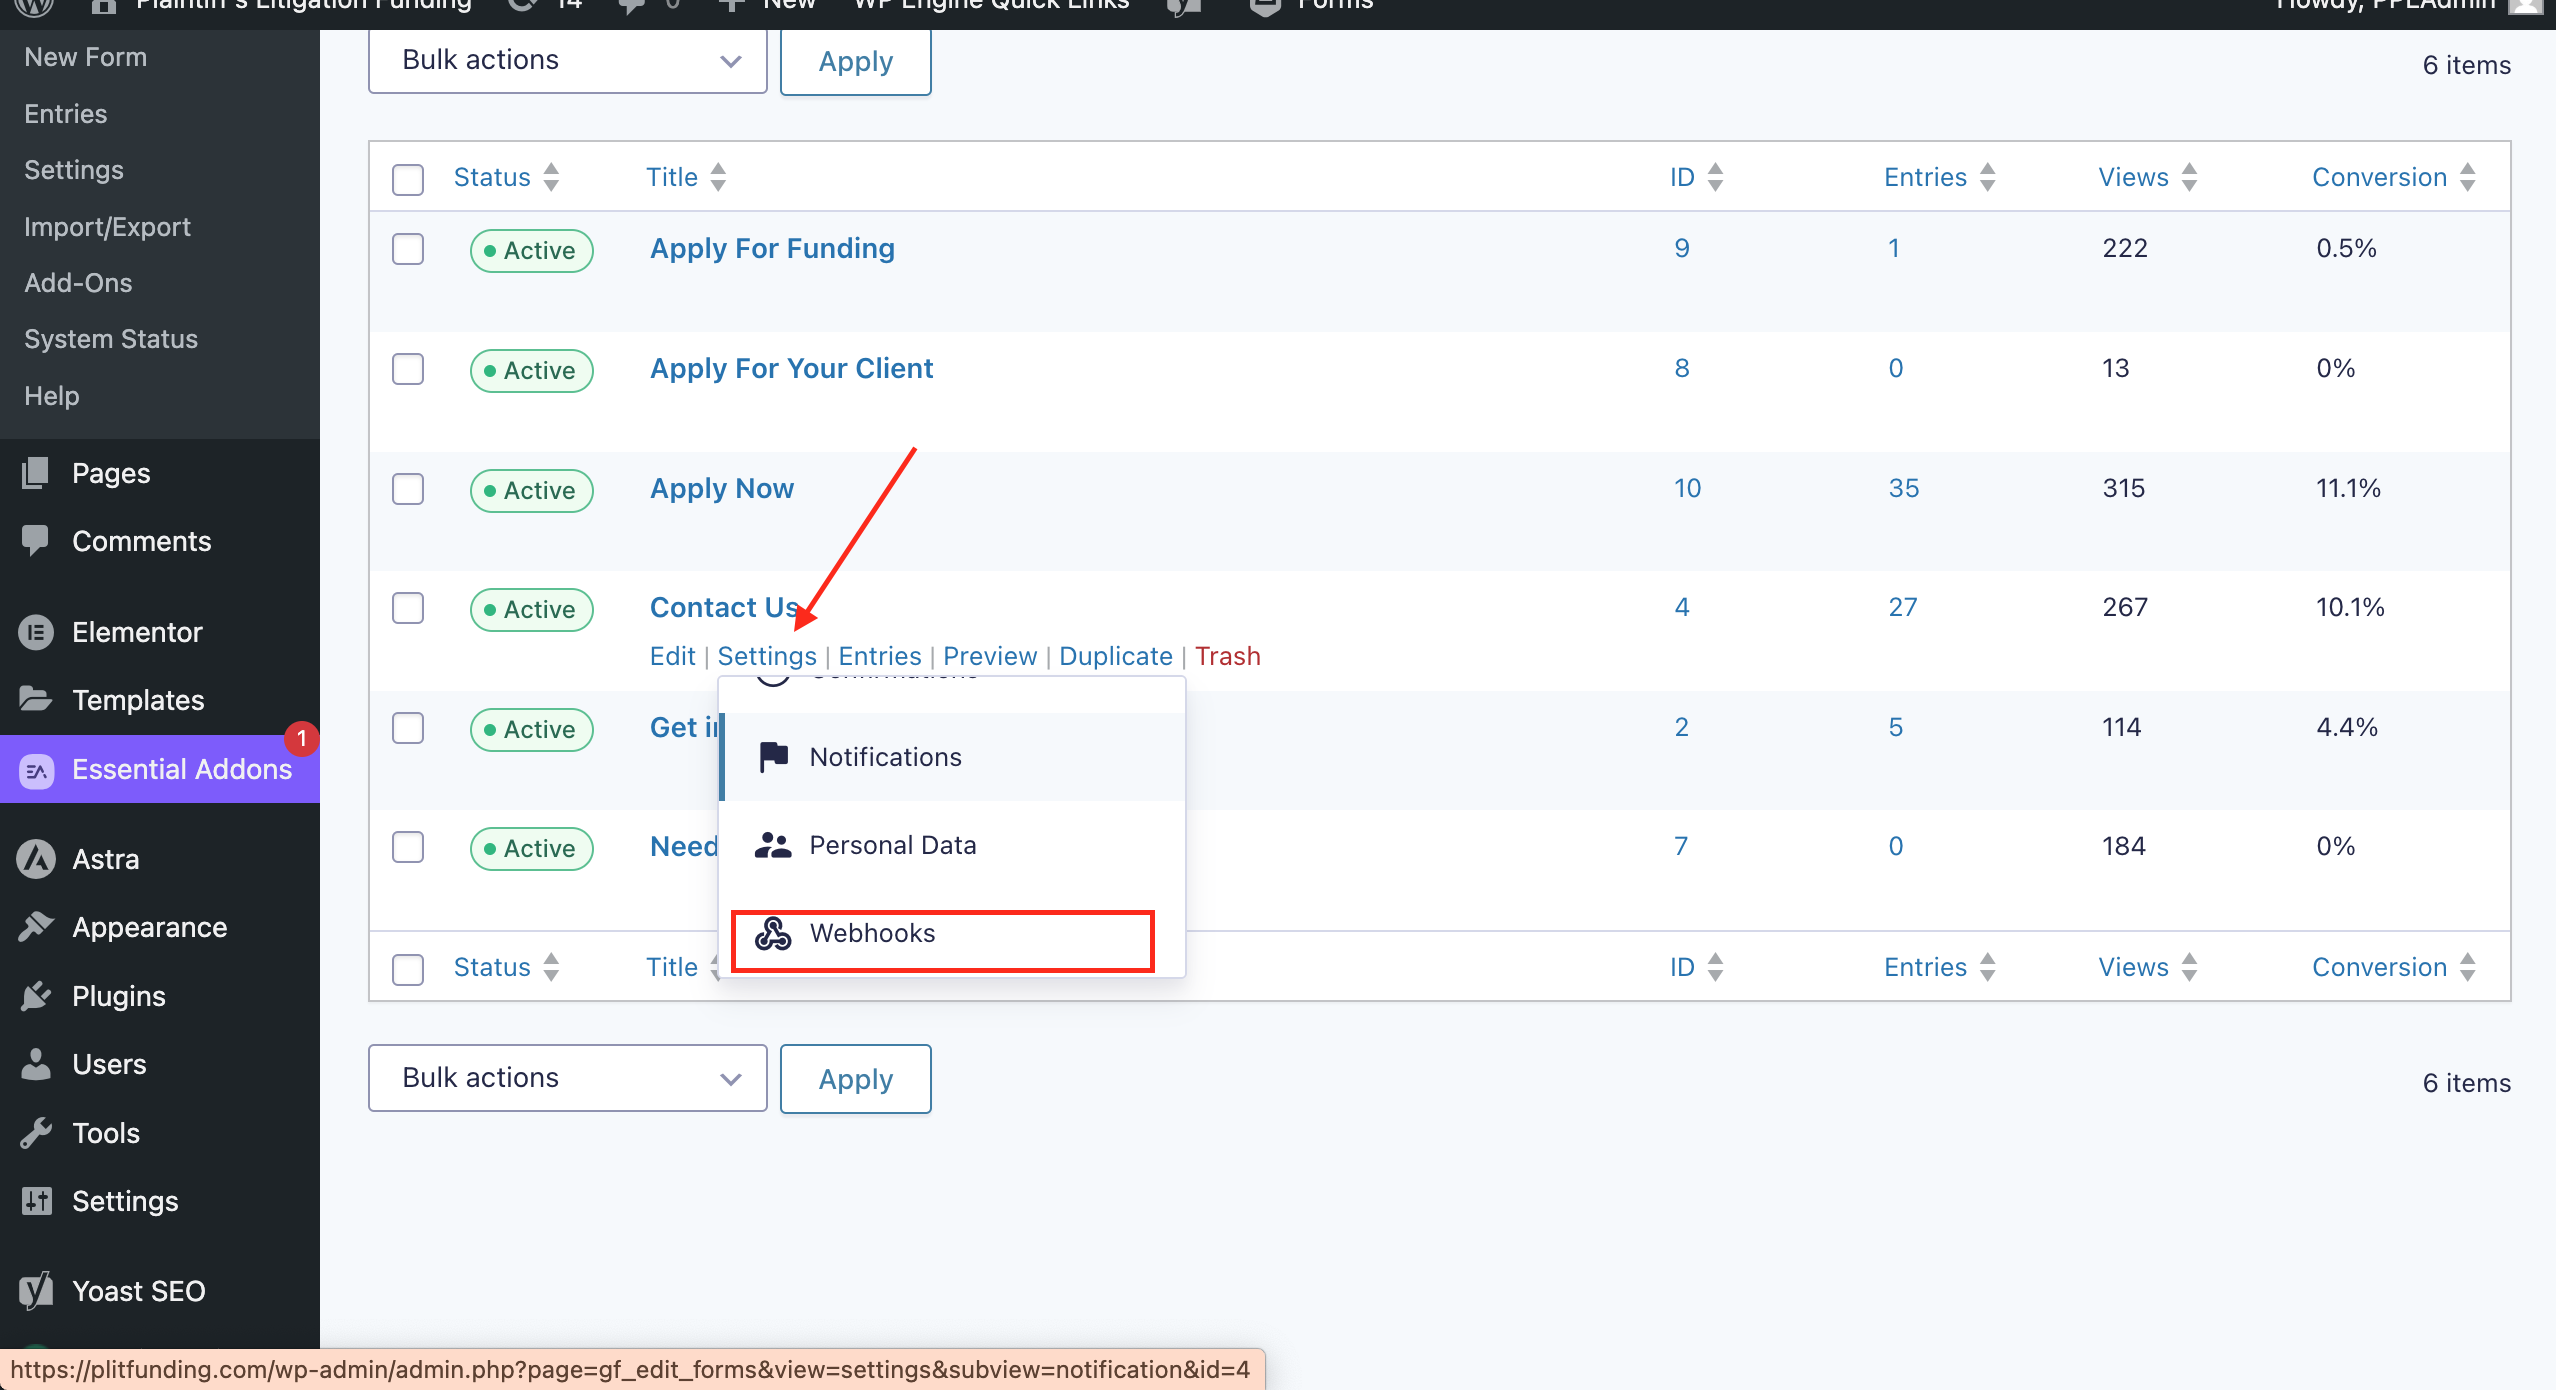
8. Connect your form with aNinja
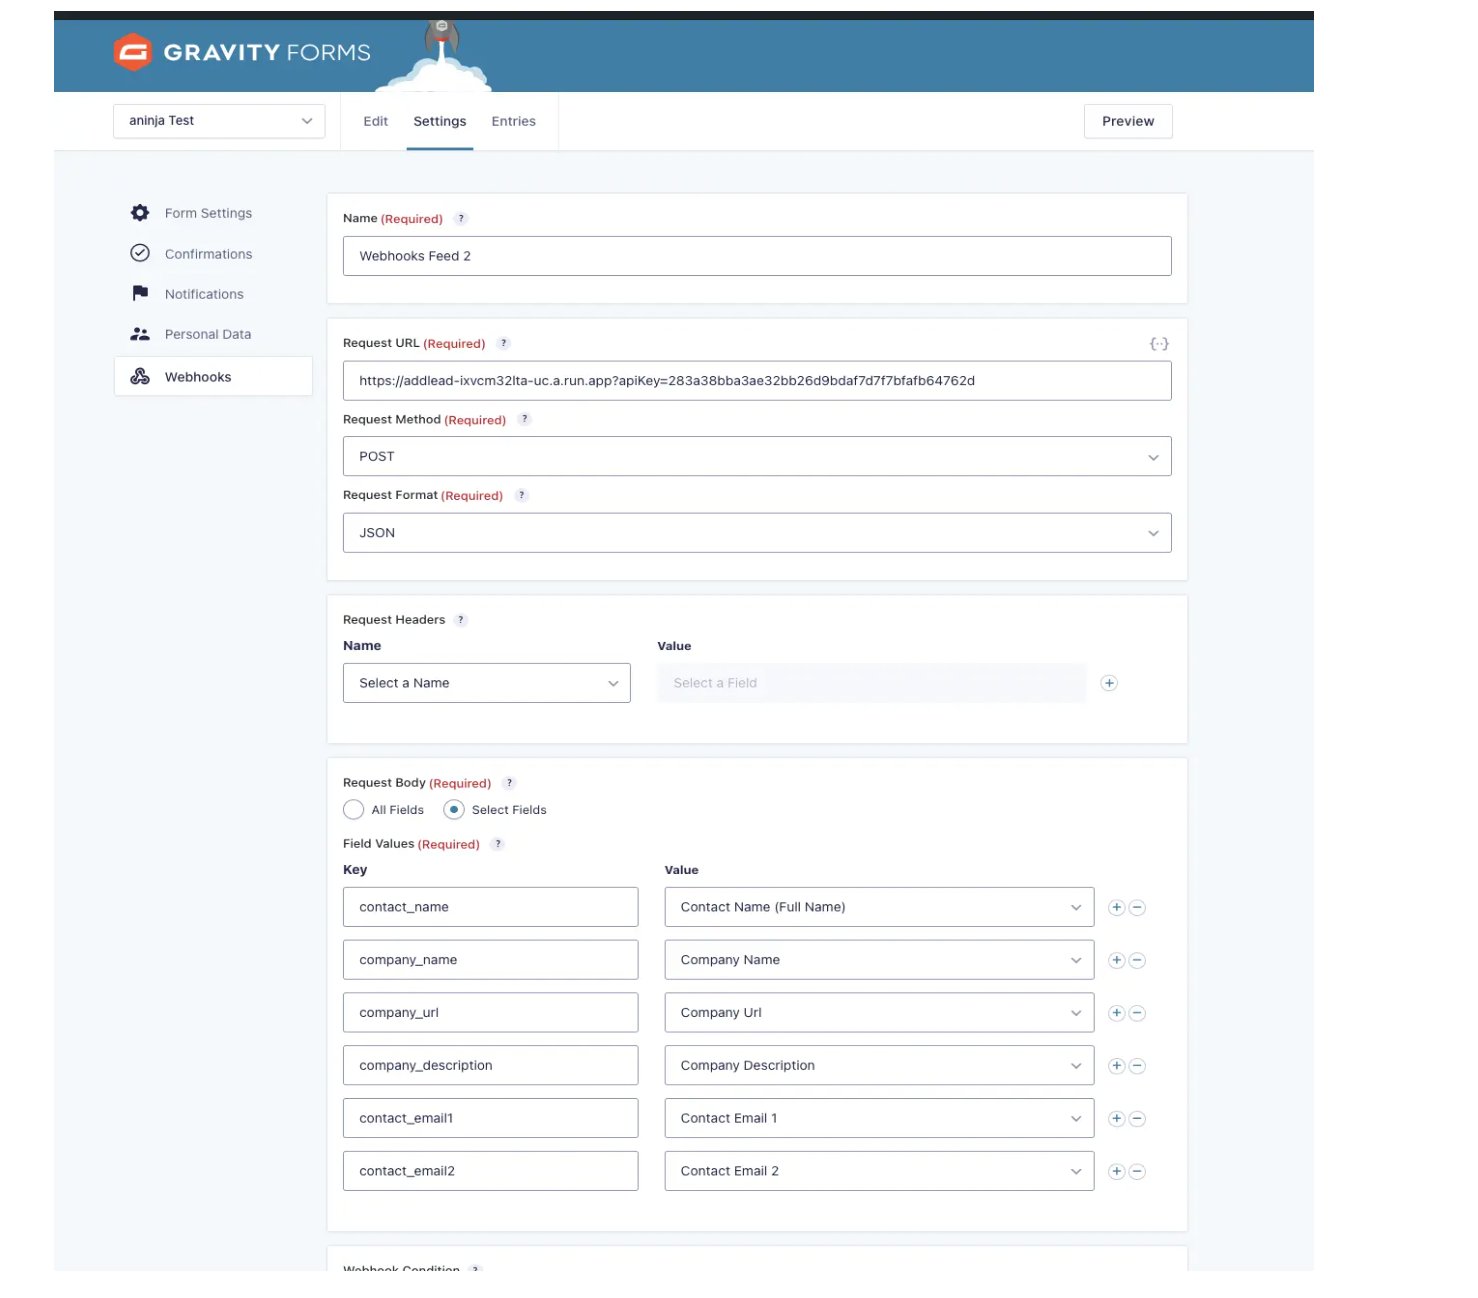
- Click on Webhooks under the form Settings
- Click on Add New under Webhooks Feeds
- Here, you need to get your aNinja API key and API Url
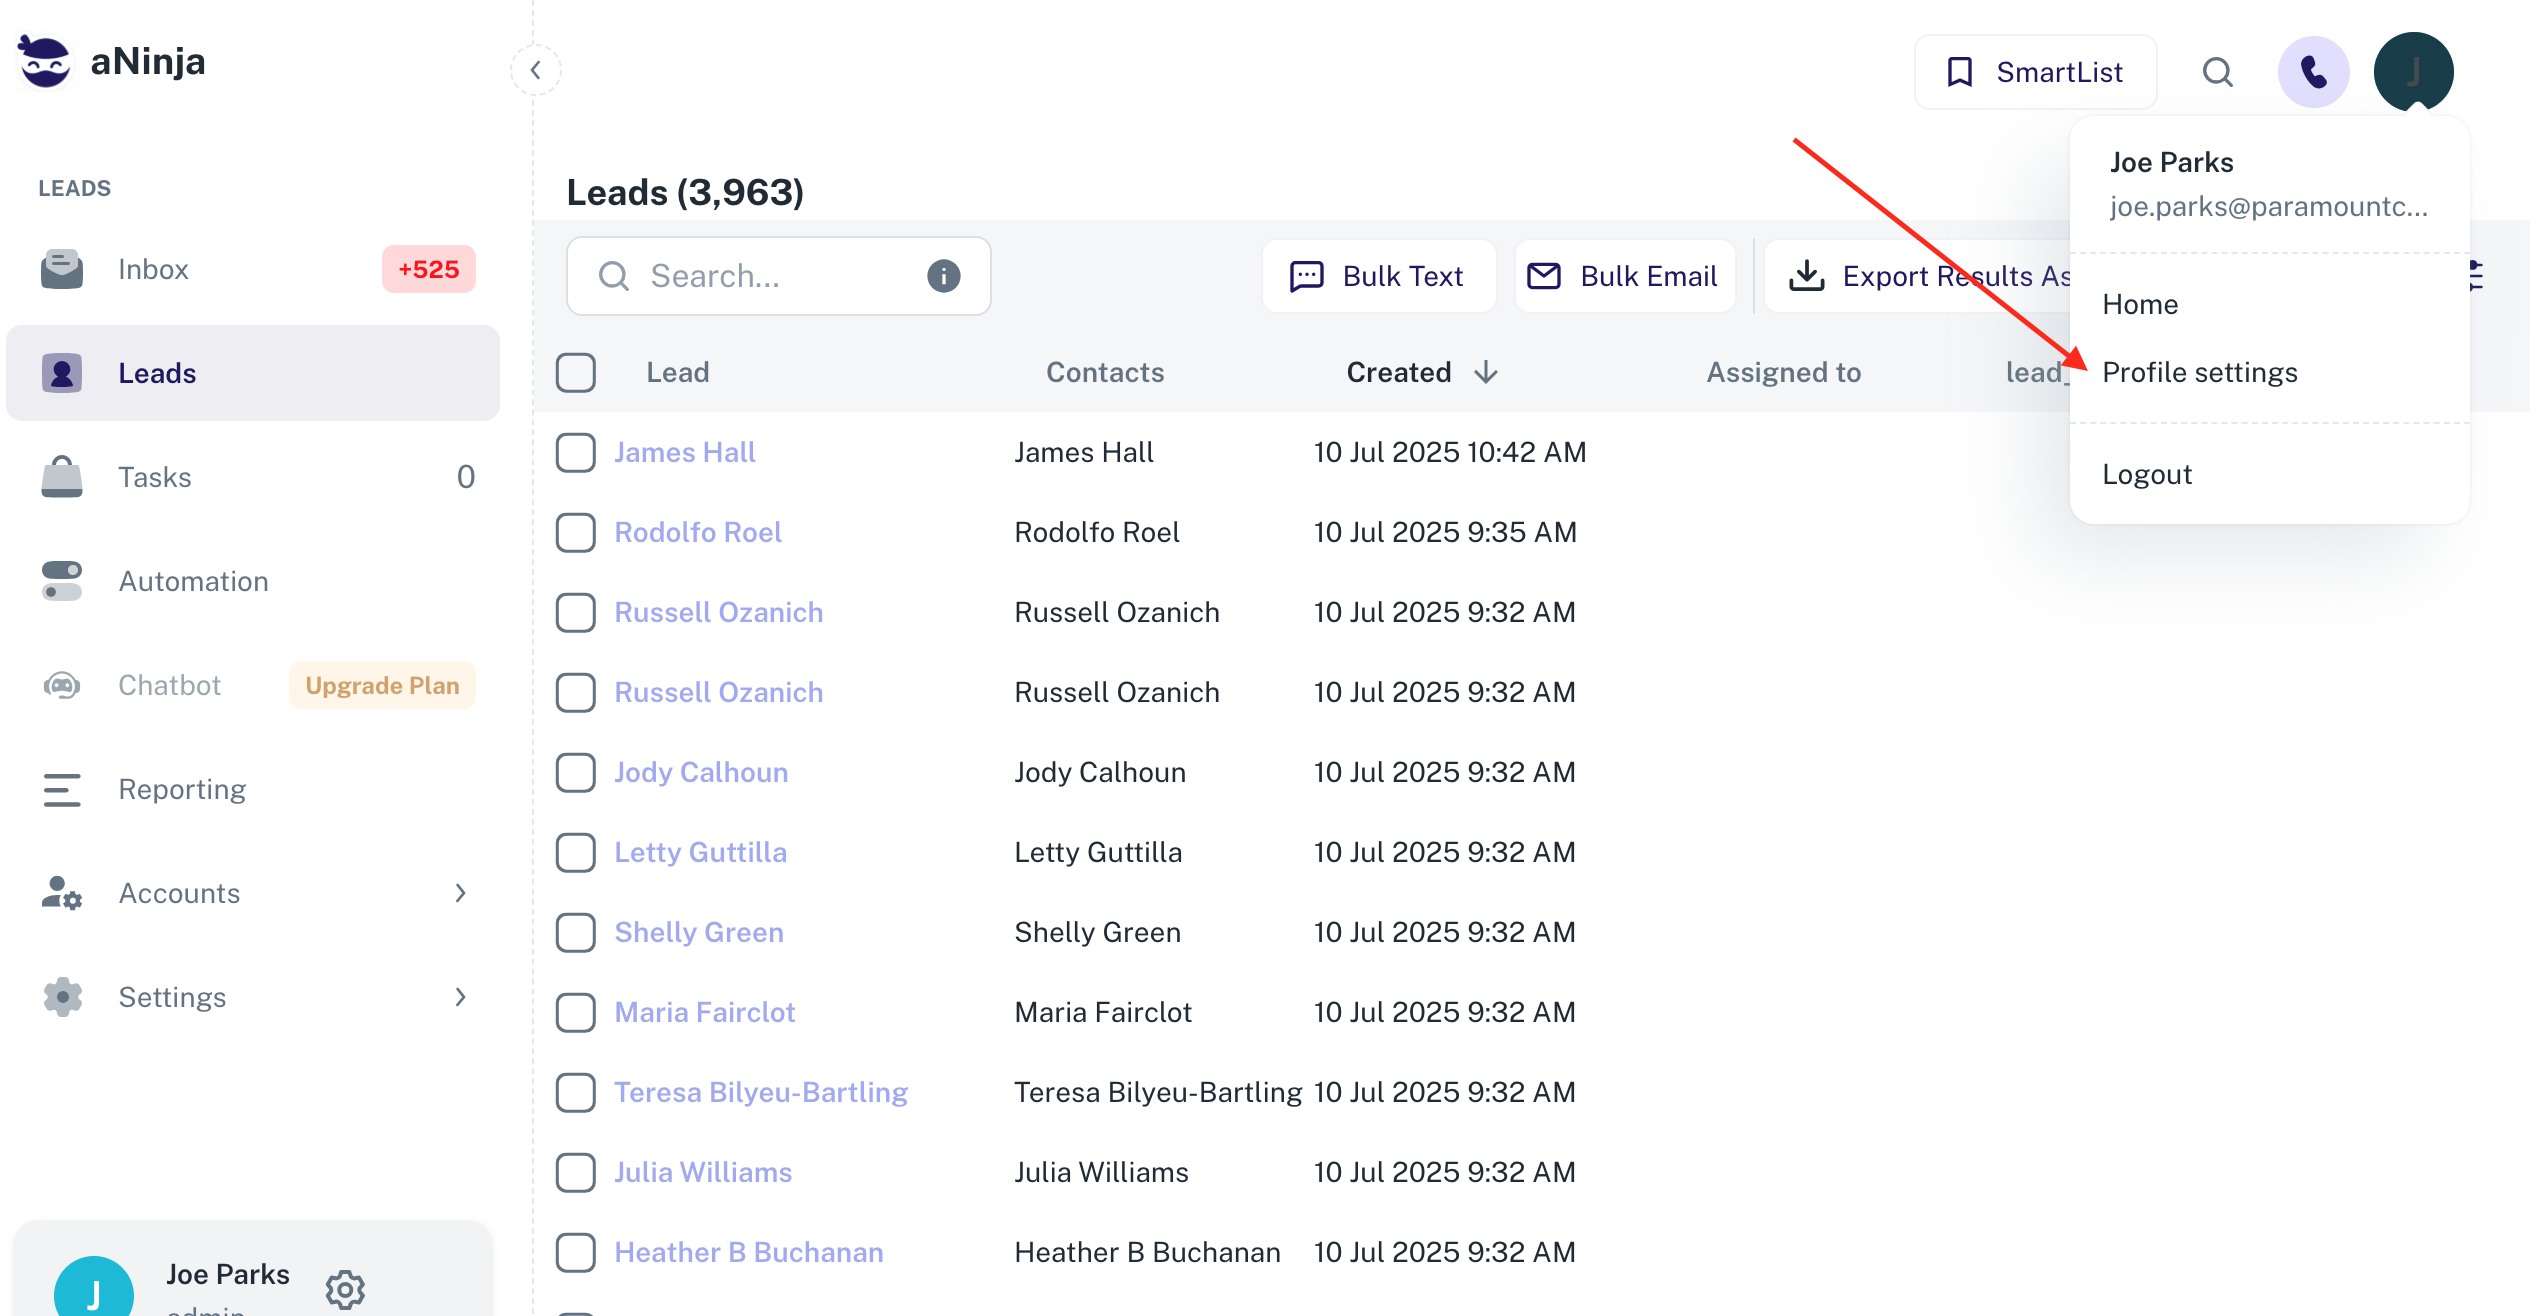
- On the top left of your aNinja, click on your name dropdown and choose Profile settings
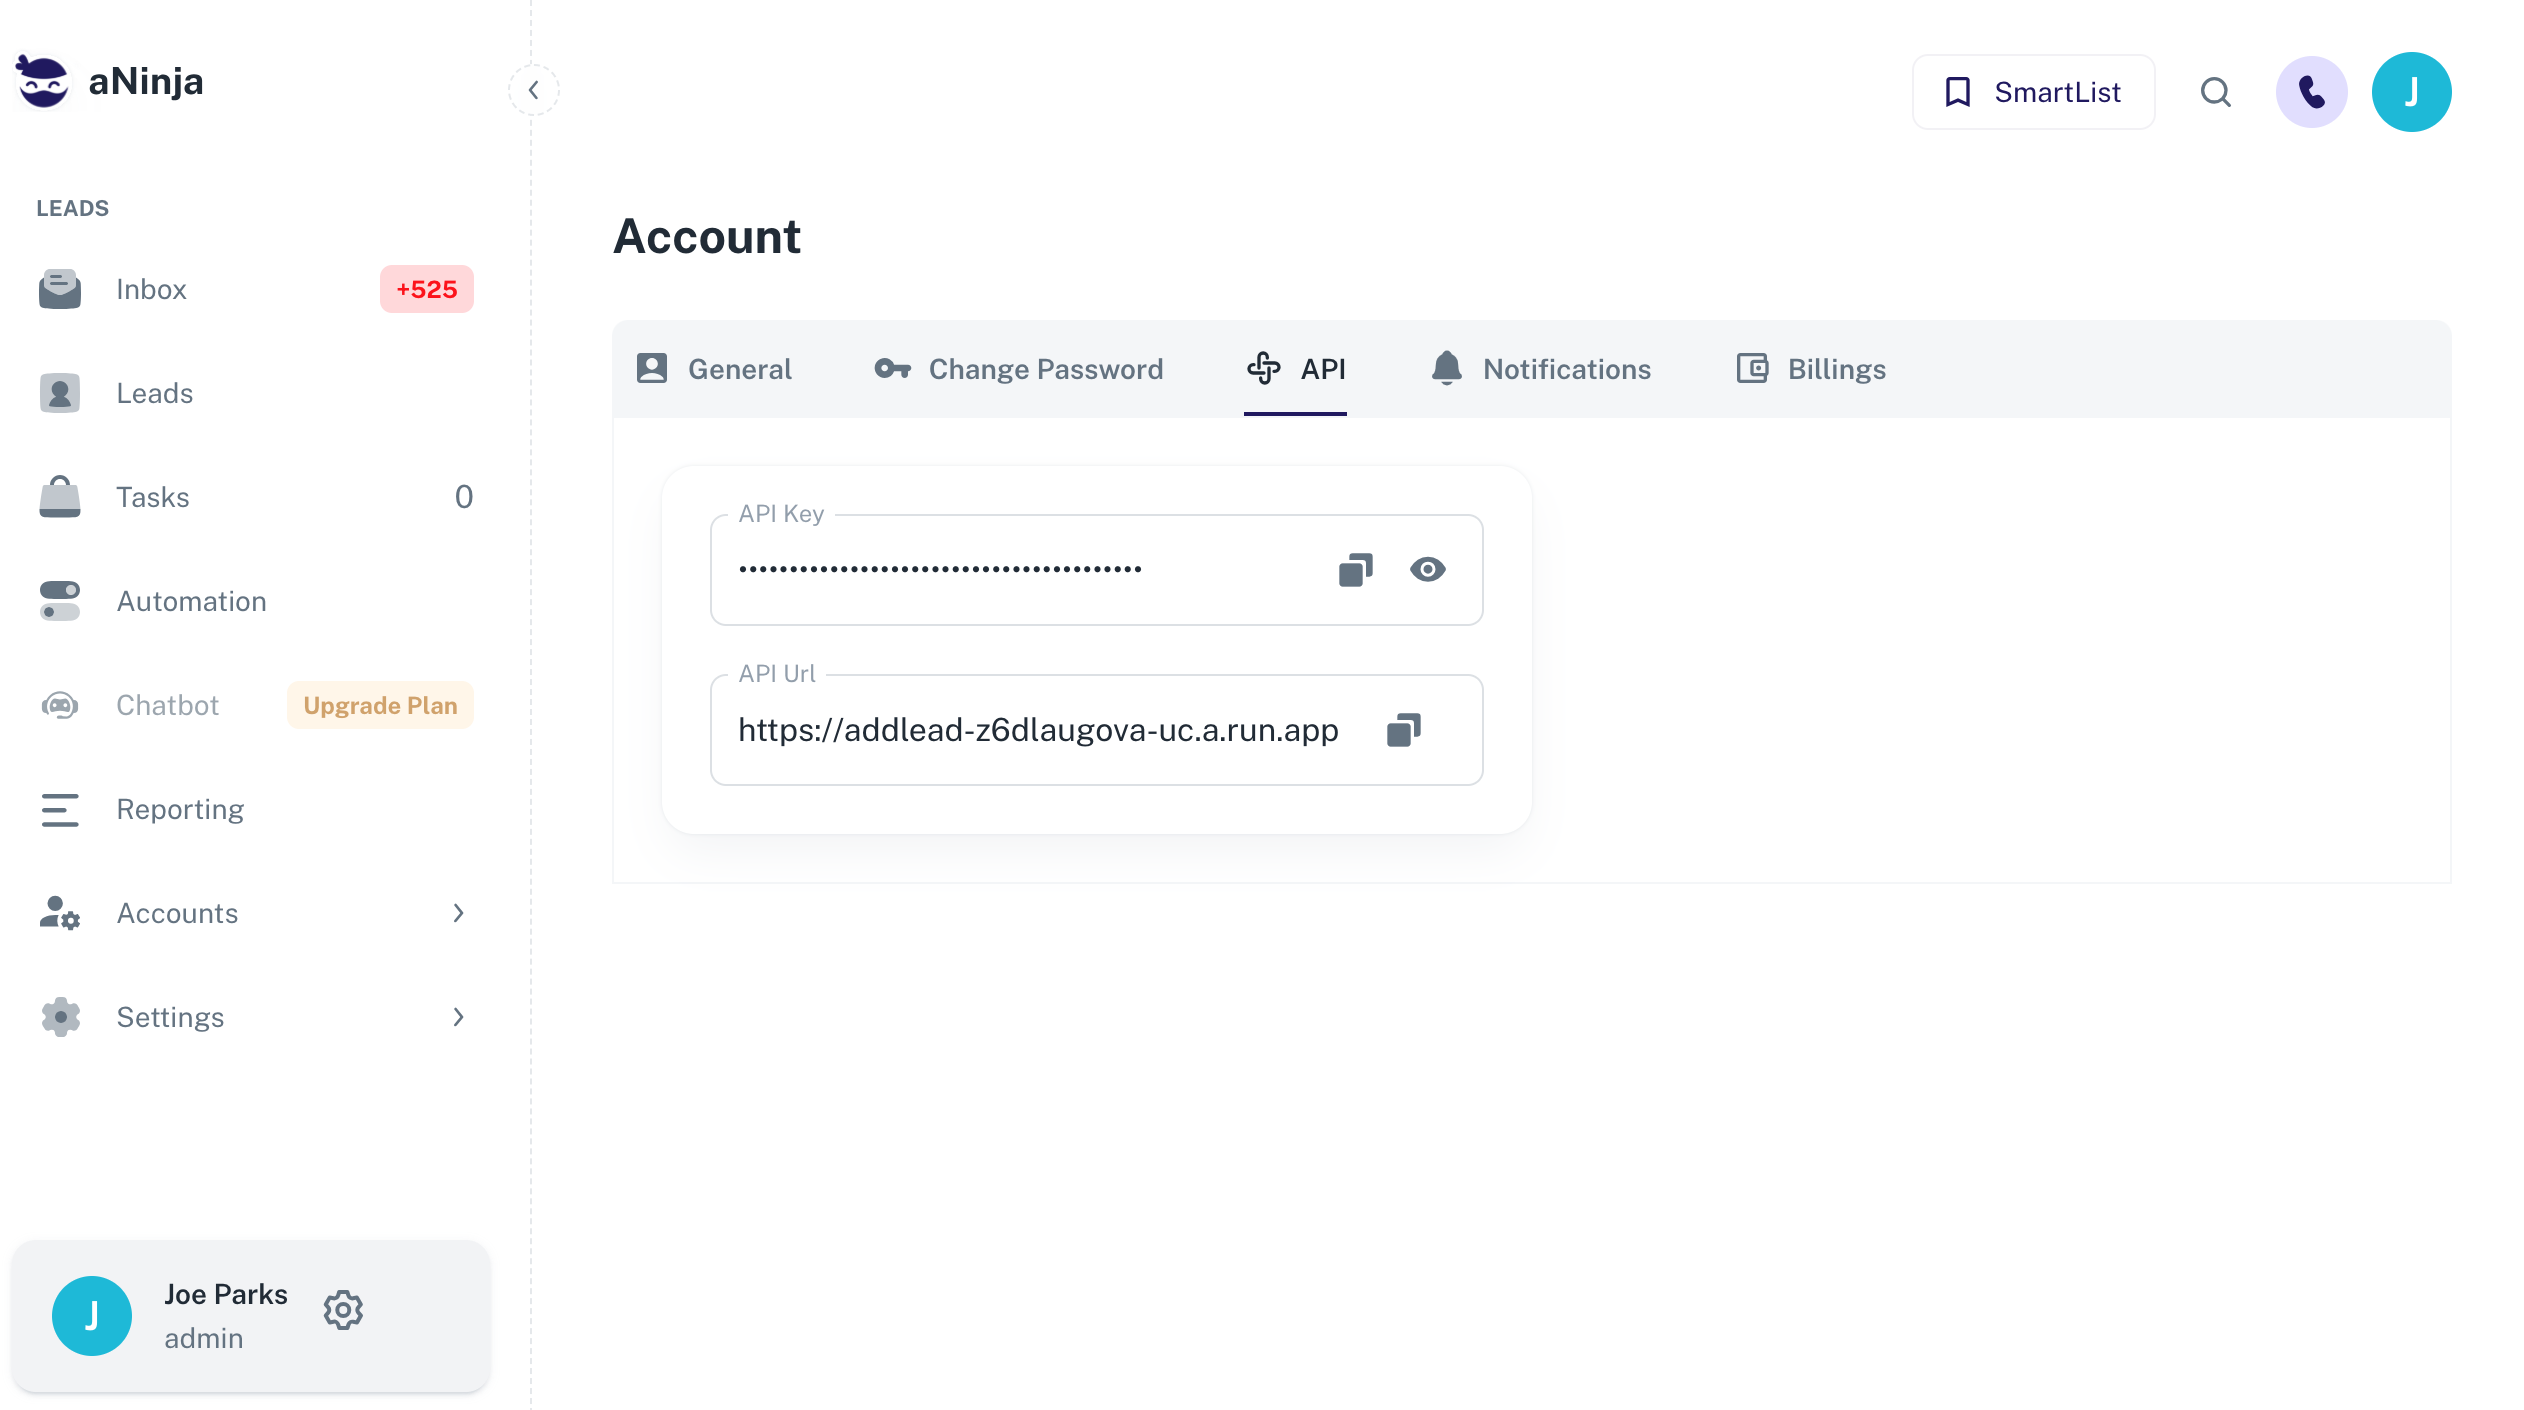
- Click on API Tab: Here’s your private aNinja API key and API Url
- Fill in the field values as provided in the screenshot below. Check the Fields mapping section below to map your form fields to the appropriate aNinja fields
- In Feed Settings, under Request URL field put:
- Click Update Settings
- Your integration between Gravity forms and aNinja is now complete. And all form submissions will be injected into aNinja as new leads.
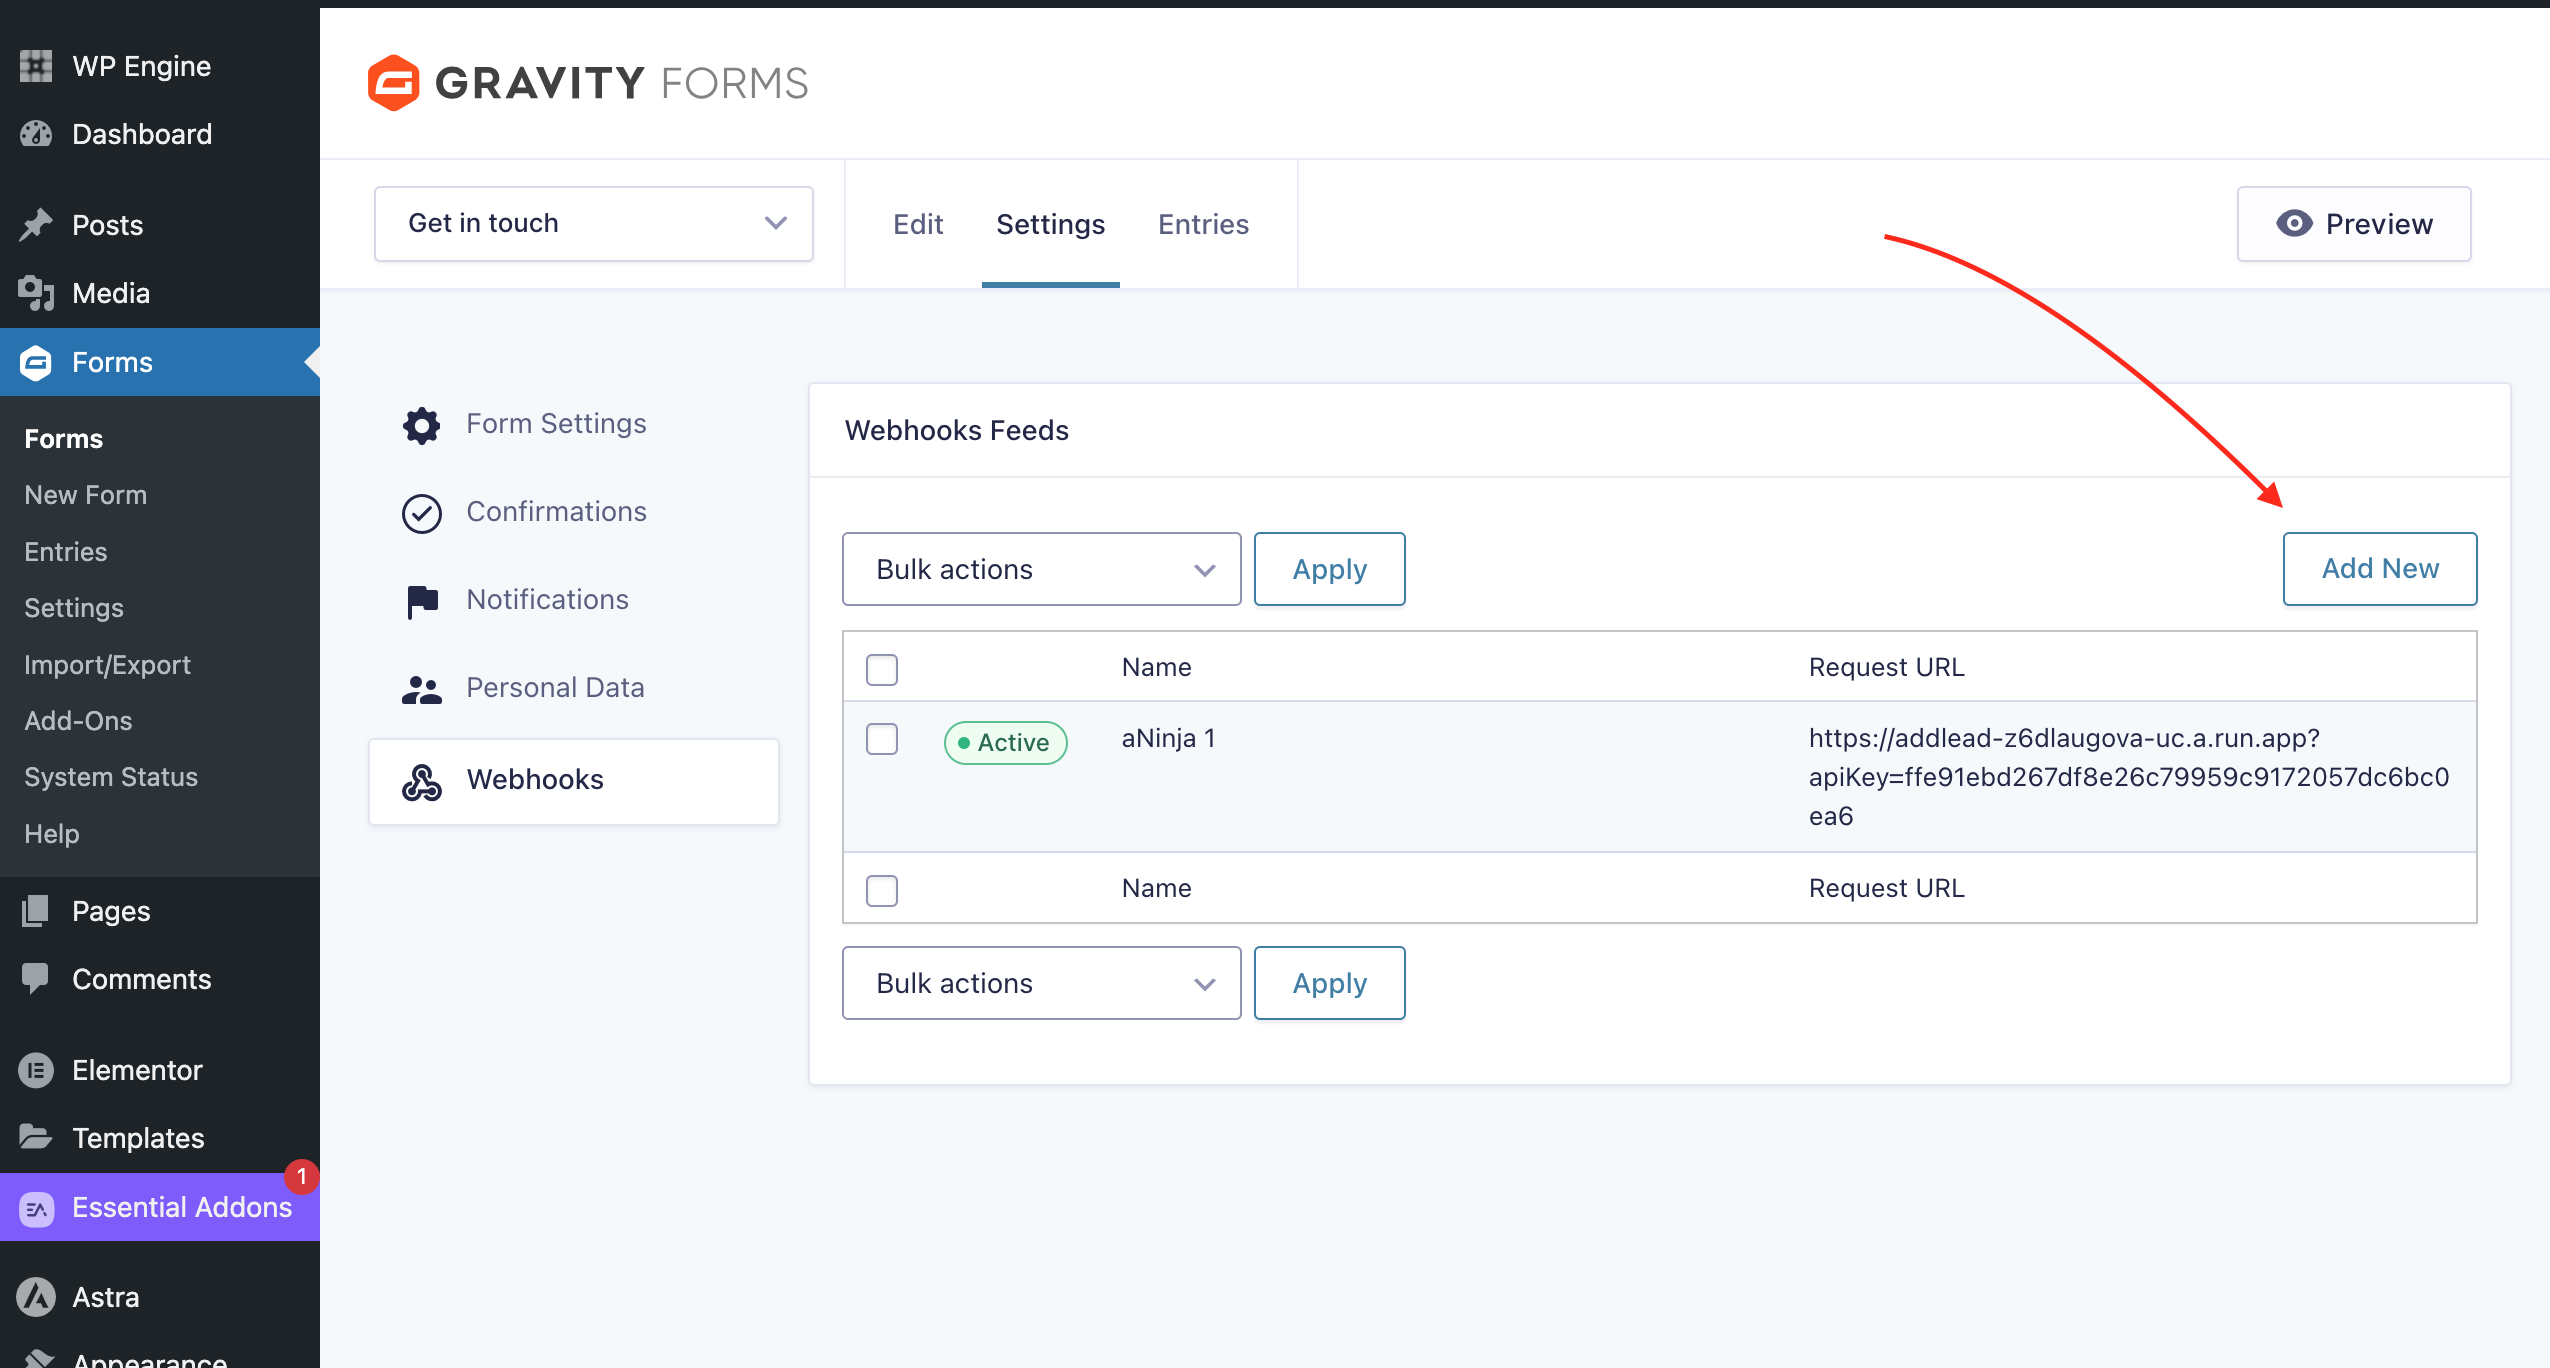
https://addlead-z6dlaugova-uc.a.run.app?apiKey=YOUR_API_KEY
Example: https://addlead-z6dlaugova-uc.a.run.app?apiKey=a5b702255f5d55779e9bcc47a2562b890fdcc047
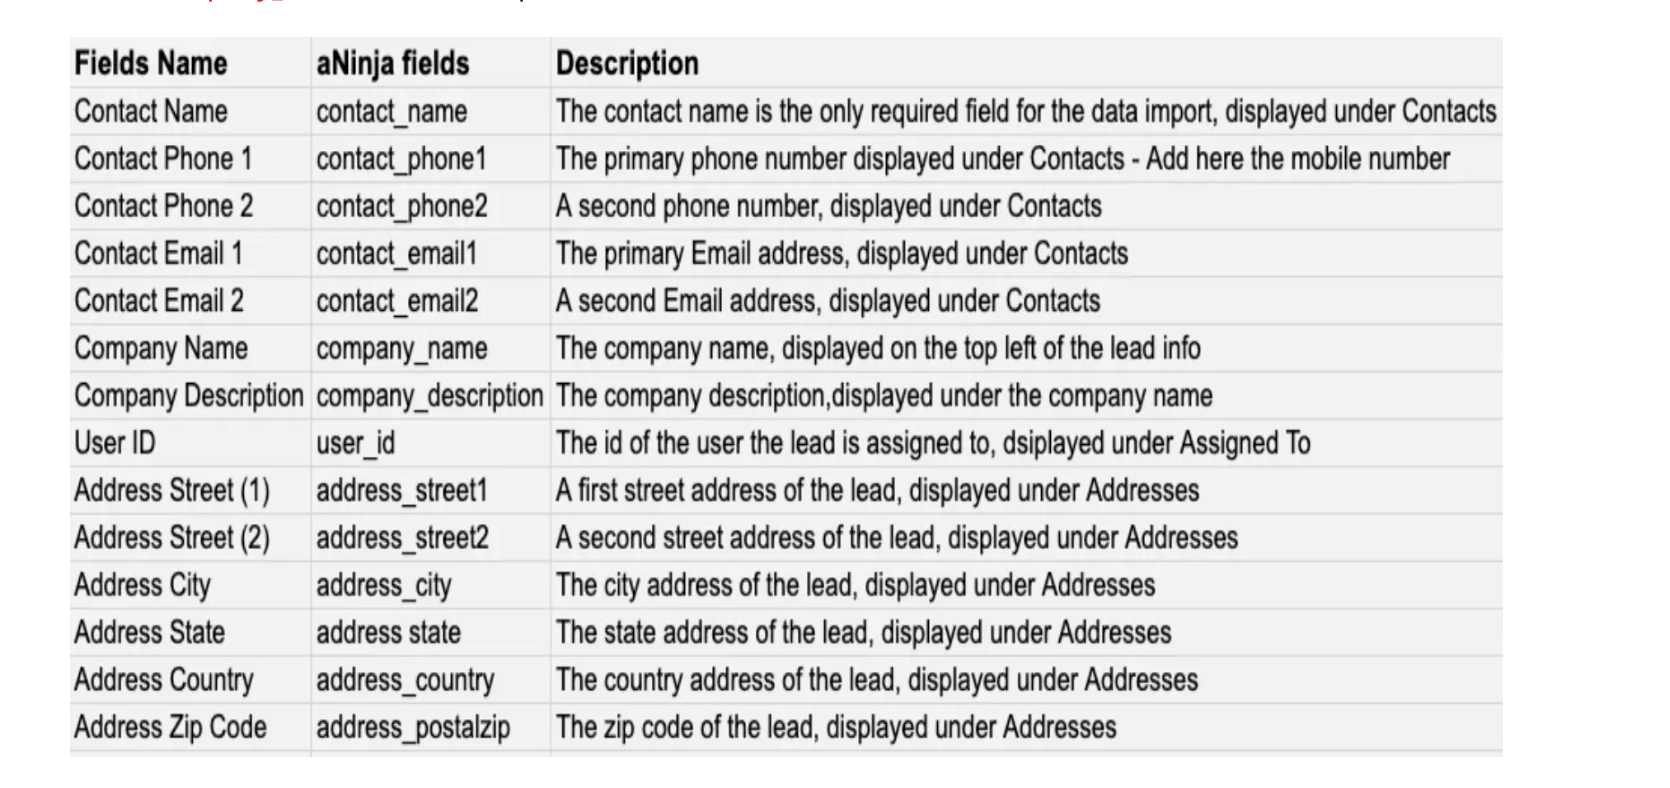
Fields mapping
Map the Data on the aNinja fields and Form fields
These are the default aNinja fields:
Custom Fields Mapping
For the Custom Fields, just prefix the field name with “customFields.” e.g customFields.Source