How Can We Help?
Integrate Chatbot to Your WordPress Website
Looking to add a smart and responsive chatbot to your WordPress site? With aNinja, you can easily embed a live chatbot to engage visitors, capture leads, and provide real-time support. This quick guide will walk you through integrating the aNinja chatbot using a simple WordPress plugin—no coding required.
Step 1: Log in to Your WordPress Admin
- Go to
yourwebsite.com/wp-admin - Enter your admin username and password.
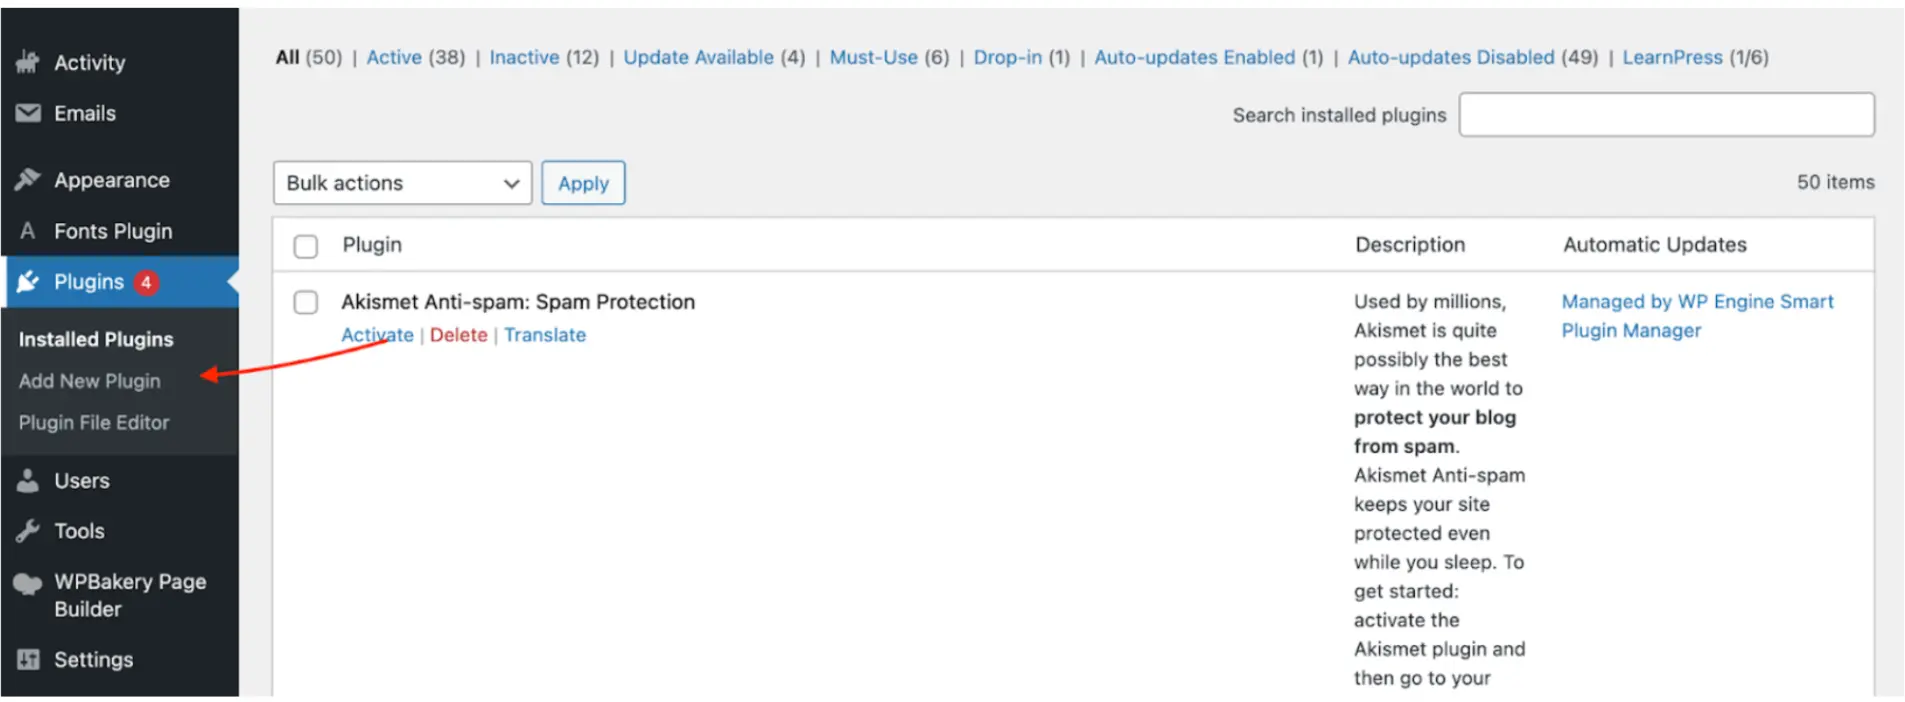
Step 2: Navigate to the Plugins Page
- In the left sidebar, click on Plugins.
- Then click Add New Plugin.
Step 3: Search for the Plugin
- In the top-right search bar, type: WPCode.
- Look for: “WPCode – Insert Headers and Footers + Custom Code Snippets” by WPCode.
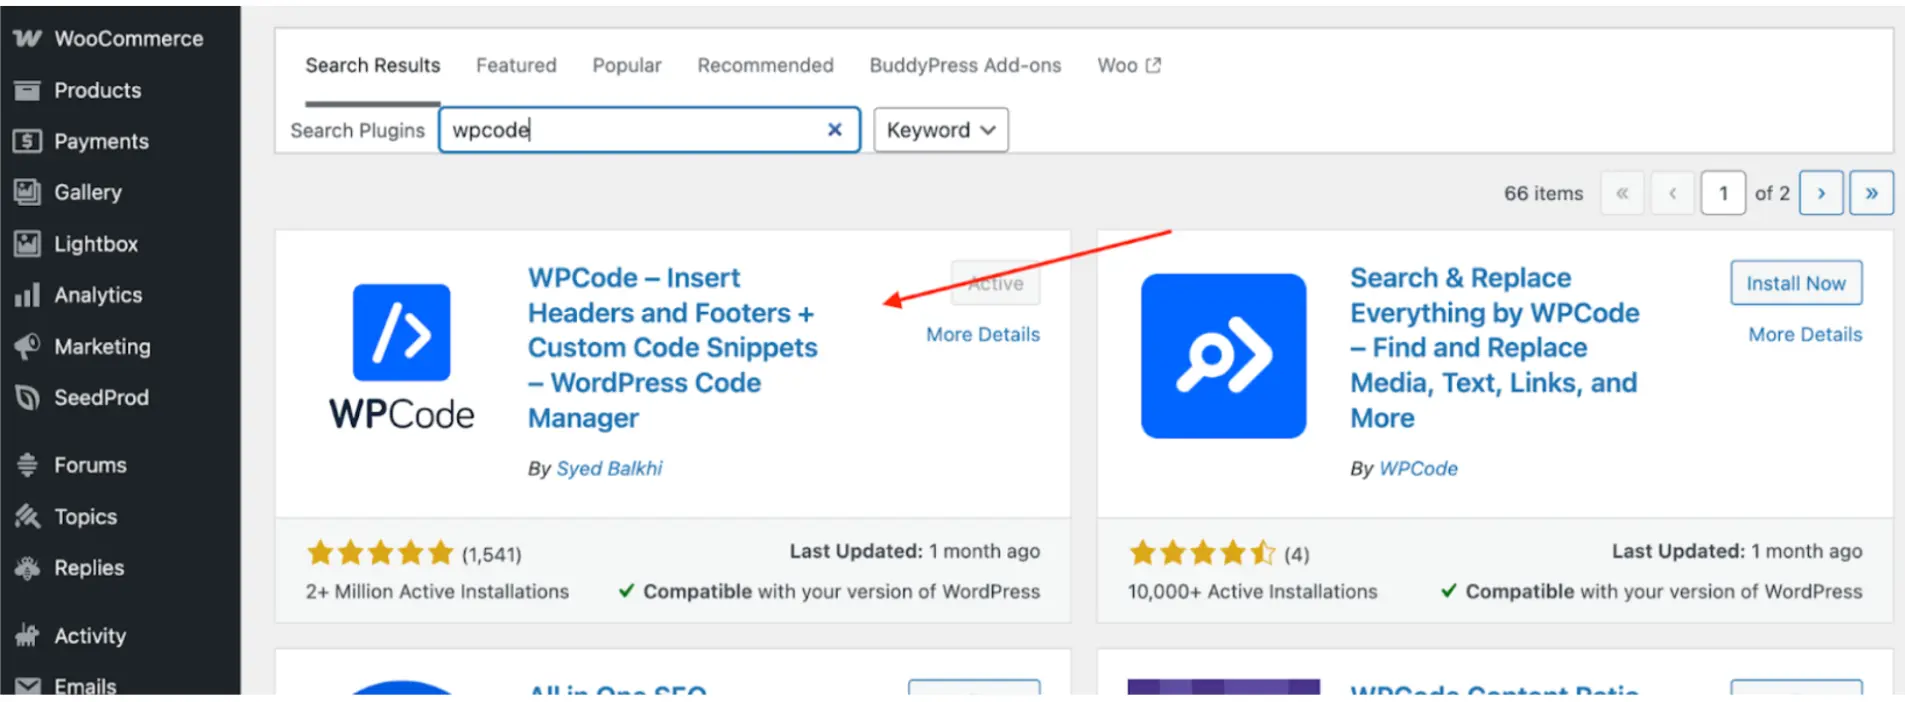
Step 4: Install the Plugin
- Click the Install Now button next to the plugin.
Step 5: Activate the Plugin
- Once installed, click the Activate button.
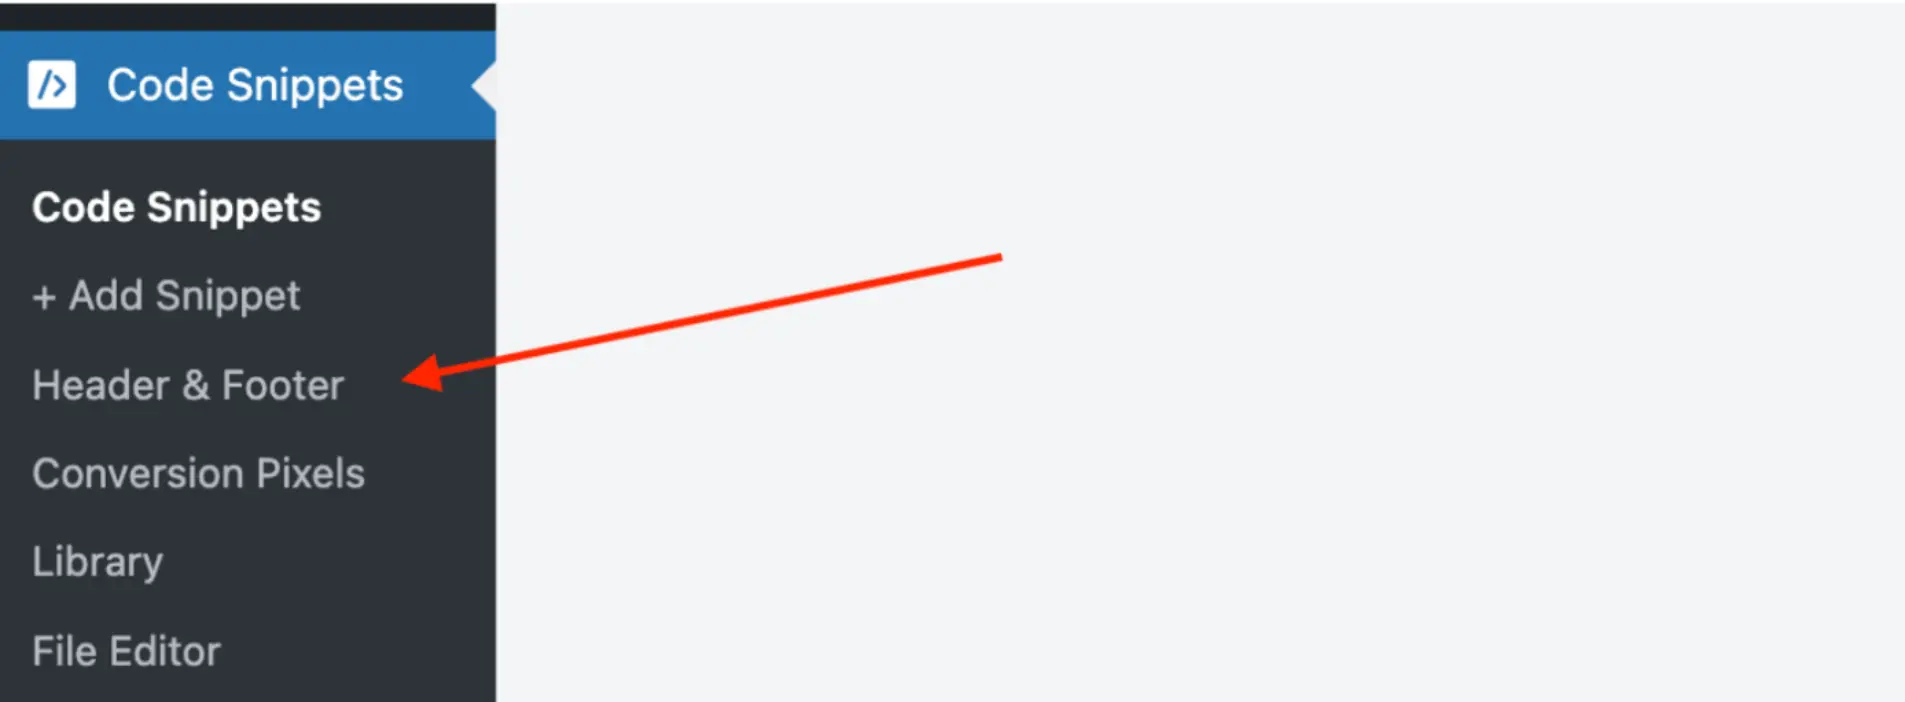
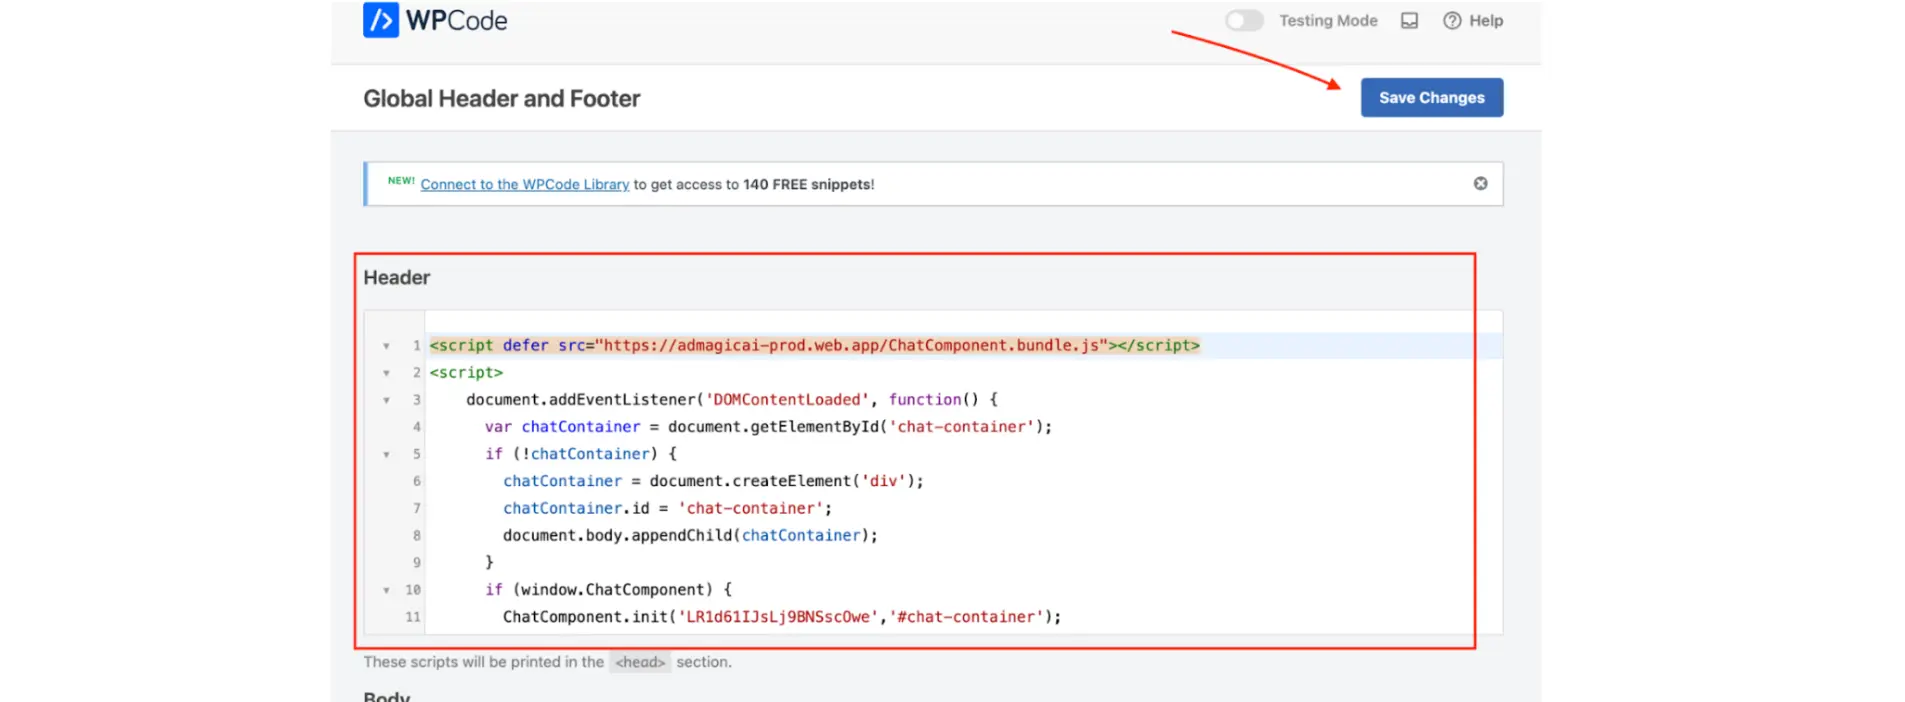
Step 6: Access WPCode
- After activation, a new menu item Code Snippets will appear in the left sidebar.
- Click on Header & Footer option to start adding custom code snippets.
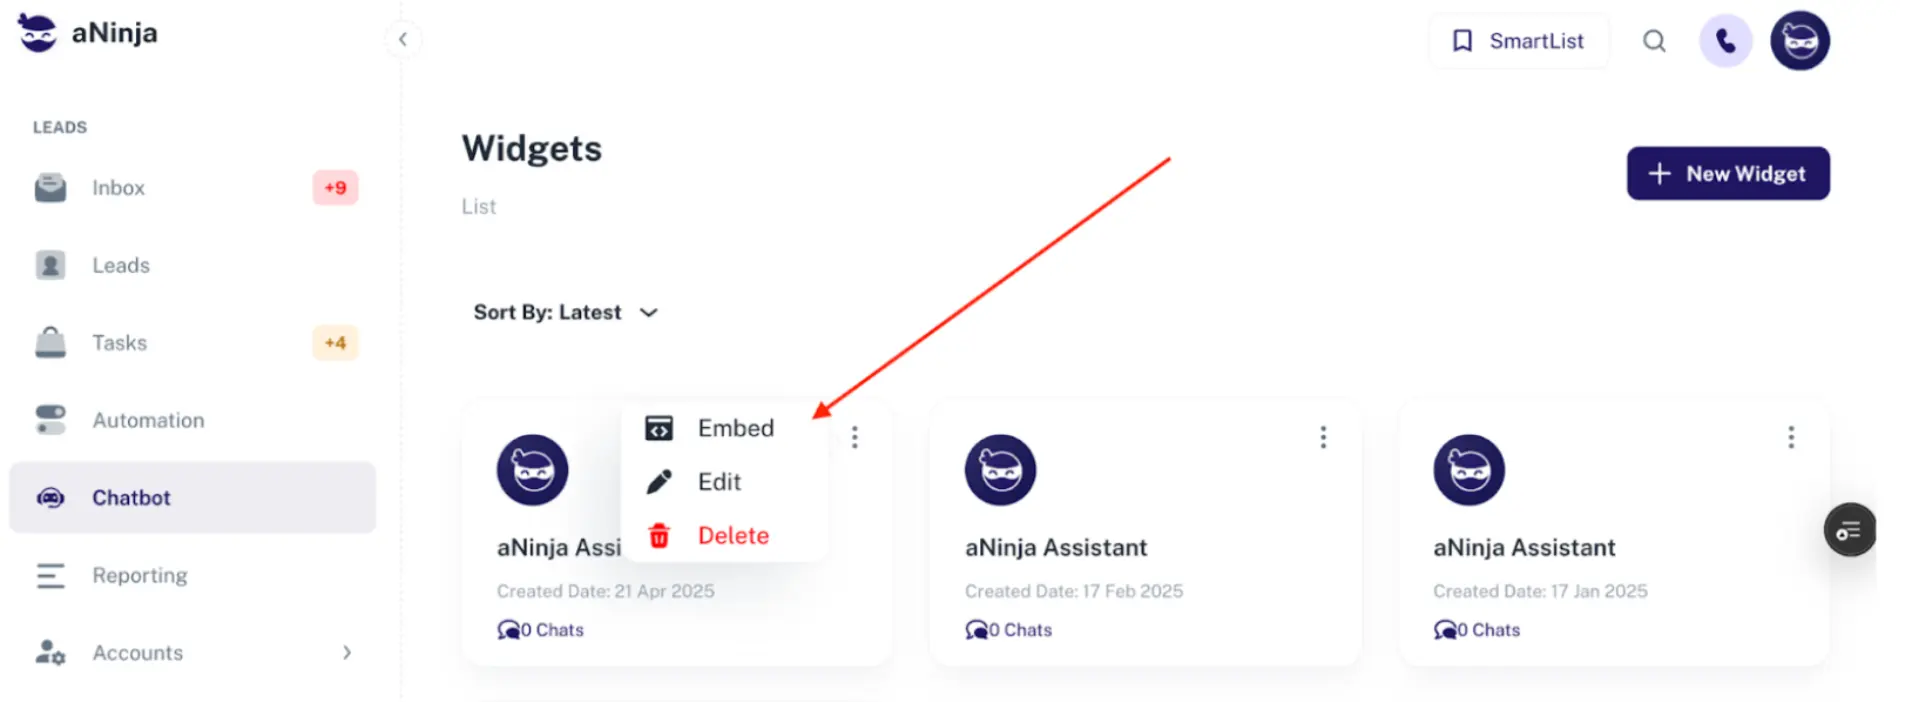
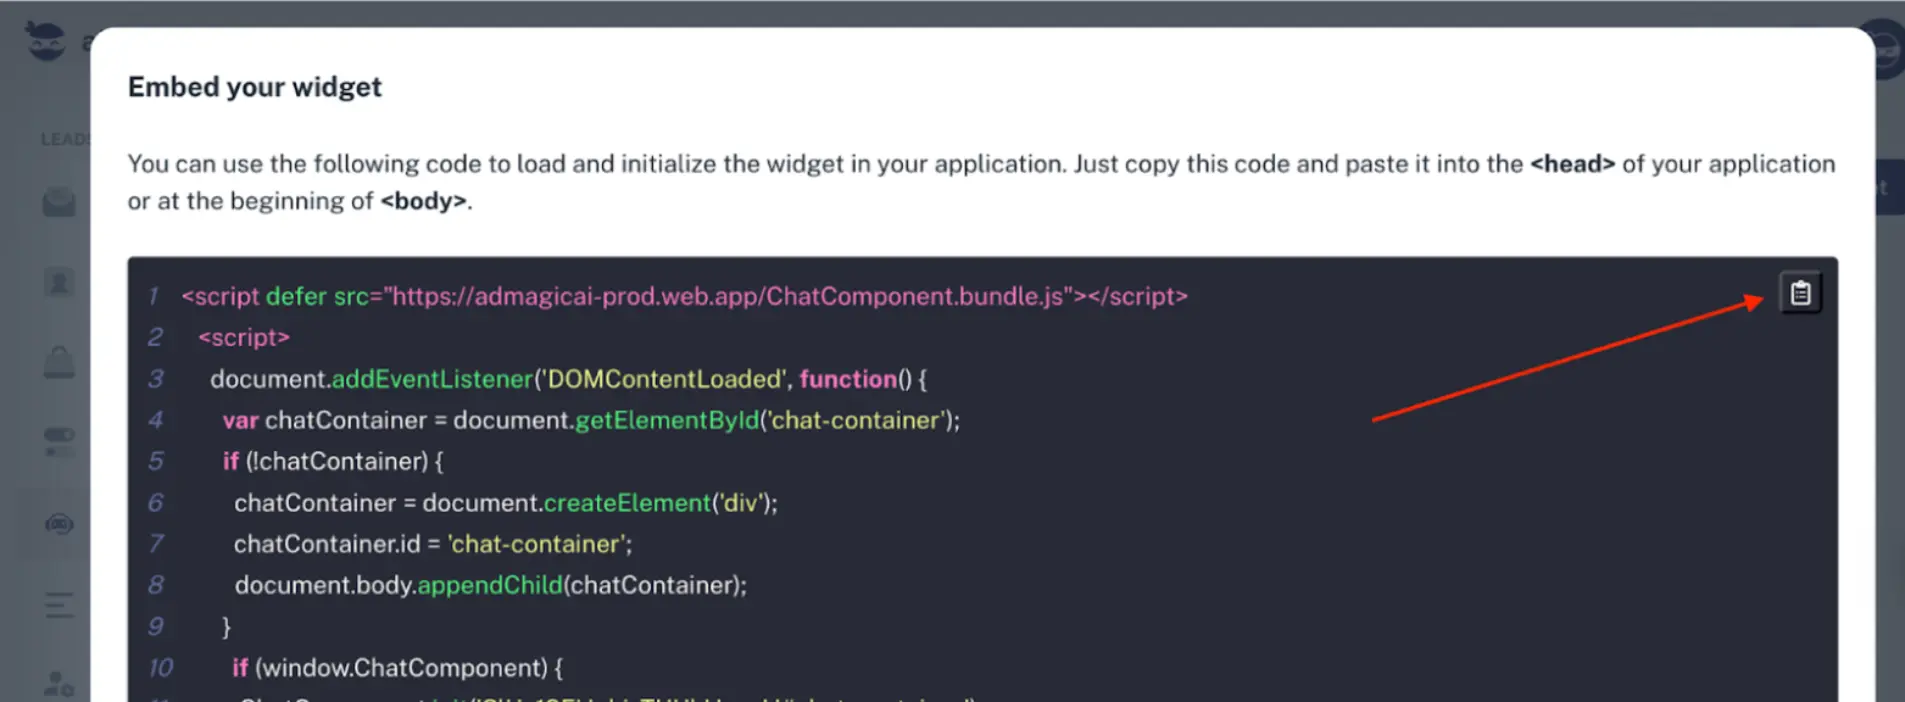
Step 7: Copy Your Chatbot Snippet from aNinja
- Go to the Chatbot tab in your aNinja account.
- Click on the three dots (⋮) and then click Embed.
- Copy the provided snippet code.
Step 8: Add Your Snippet in the Header Section
- Paste the copied snippet in the Header section of WPCode.
- Click Save.
Your Chatbot is Now Live!
Congratulations! Your aNinja chatbot is now active on your WordPress website. Visit your site to see it in action and start engaging with your visitors immediately.
Troubleshooting
- Chatbot not appearing? Make sure you’ve placed the correct snippet in the header section and cleared your website cache.
- Script conflicts? If you notice any issues with your website after adding the chatbot, try temporarily disabling other scripts or plugins to identify conflicts.
- Need Help? Contact aNinja Support for assistance.