How Can We Help?
How to Integrate Your Google Form with aNinja CRM (Leads Section)
Connecting your Google Form to your aNinja CRM allows every submitted form to automatically create a new lead inside your aNinja account. Follow the steps below to set up this integration.
Step 1 – Open Google Apps Script
- Open your Google Form.
- Click on the three dots (⋮) in the top-right corner.
- Select Apps Script.

Step 2 – Paste the Integration Script
In the Apps Script editor, delete any existing code and paste the following script:
var API_URL = 'YOUR_API_URL';
var API_KEY = 'your_api_key';

// IMPORTANT:
// LEFT SIDE → aNinja field name (DO NOT change these)
// RIGHT SIDE → Your Google Form question titles (you CAN change these)
var FIELD_MAPPING = {
  'contactName': 'Name',
  'contactEmail': 'Email Address',
  'contactPhone': 'Phone Number',
  'organizationName': 'Company Name'
};

// Optional: Add custom fields that should be sent to aNinja
var CUSTOM_FIELD = [
  "What is your Business Sector?",
  "How did you hear about us",
  "What information are you interested in learning?"
];

// Function to sanitize field names for aNinja API
function sanitizeFieldName(fieldName) {
  return fieldName
    .replace(/\?/g, '')           // Remove question marks
    .replace(/\s+/g, '_')          // Replace spaces with underscores
    .replace(/[^\w_]/g, '')        // Remove special characters
    .replace(/_+/g, '_')           // Replace multiple underscores with single
    .replace(/^_|_$/g, '');        // Remove leading/trailing underscores
}

function onFormSubmit(e){
  const formData = mapResponse(e);

  const payload = {
    apiKey: API_KEY,
    ...formData
  };

  var options = {
    method: 'post',
    contentType: 'application/json',
    payload: JSON.stringify(payload),
    muteHttpExceptions: true
  };

  try {
    const response = UrlFetchApp.fetch(API_URL, options);
    Logger.log('Success: ' + response.getContentText());
    Logger.log('Payload sent: ' + JSON.stringify(payload, null, 2));
  } catch (error) {
    Logger.log('Error: ' + error.toString());
  }
}

function mapResponse(e){
  const itemResponses = e.response.getItemResponses();
  const mappedData = {};

  // ✅ NEW: Check for auto-collected email first
  // This handles forms with "Collect email addresses" enabled
  try {
    const autoEmail = e.response.getRespondentEmail();
    if (autoEmail && autoEmail.trim() !== '') {
      mappedData.contactEmail = autoEmail;
      Logger.log('Auto-collected email found: ' + autoEmail);
    }
  } catch (error) {
    // If getRespondentEmail() fails, we'll look for email in form questions
    Logger.log('No auto-collected email, will check form questions');
  }

  // Create reverse lookup for standard fields
  const questionToField = {};
  for (const apiField in FIELD_MAPPING) {
    const formQuestion = FIELD_MAPPING[apiField];
    if (formQuestion && formQuestion.trim() !== '') {
      questionToField[formQuestion] = apiField;
    }
  }

  // Map responses
  const fields = [];
  for (let i = 0; i < itemResponses.length; i++) {
    const itemResponse = itemResponses[i];
    const questionTitle = itemResponse.getItem().getTitle();
    let answer = itemResponse.getResponse();
    const sanitizedQuestionTitle = questionTitle.replace(/^\s+|\s+$/g, '');

    // Handle multiple-choice answers (convert array to string)
    if (Array.isArray(answer)) {
      answer = answer.join(", ");
    }

    // Map standard fields
    if (questionToField[sanitizedQuestionTitle]) {
      const apiField = questionToField[sanitizedQuestionTitle];

      // ✅ IMPORTANT: Only override email if it wasn't auto-collected
      // This prevents a manual email question from overwriting the auto-collected one
      if (apiField === 'contactEmail' && mappedData.contactEmail) {
        Logger.log('Skipping email question - already have auto-collected email');
        continue;
      }

      mappedData[apiField] = answer;
    }

    // Map custom fields with sanitized names
    if (CUSTOM_FIELD.includes(sanitizedQuestionTitle)){
      const sanitizedName = sanitizeFieldName(sanitizedQuestionTitle);
      fields.push({
        "name": sanitizedName,
        "value": answer
      });
    }
  }

  // Add custom fields array if any exist
  if (fields.length > 0) {
    mappedData.fields = fields;
  }

  return mappedData;
}
Step 3 – Get Your API URL and Key from aNinja
- Log in to your aNinja CRM.
- Click your profile picture on the top-right corner.
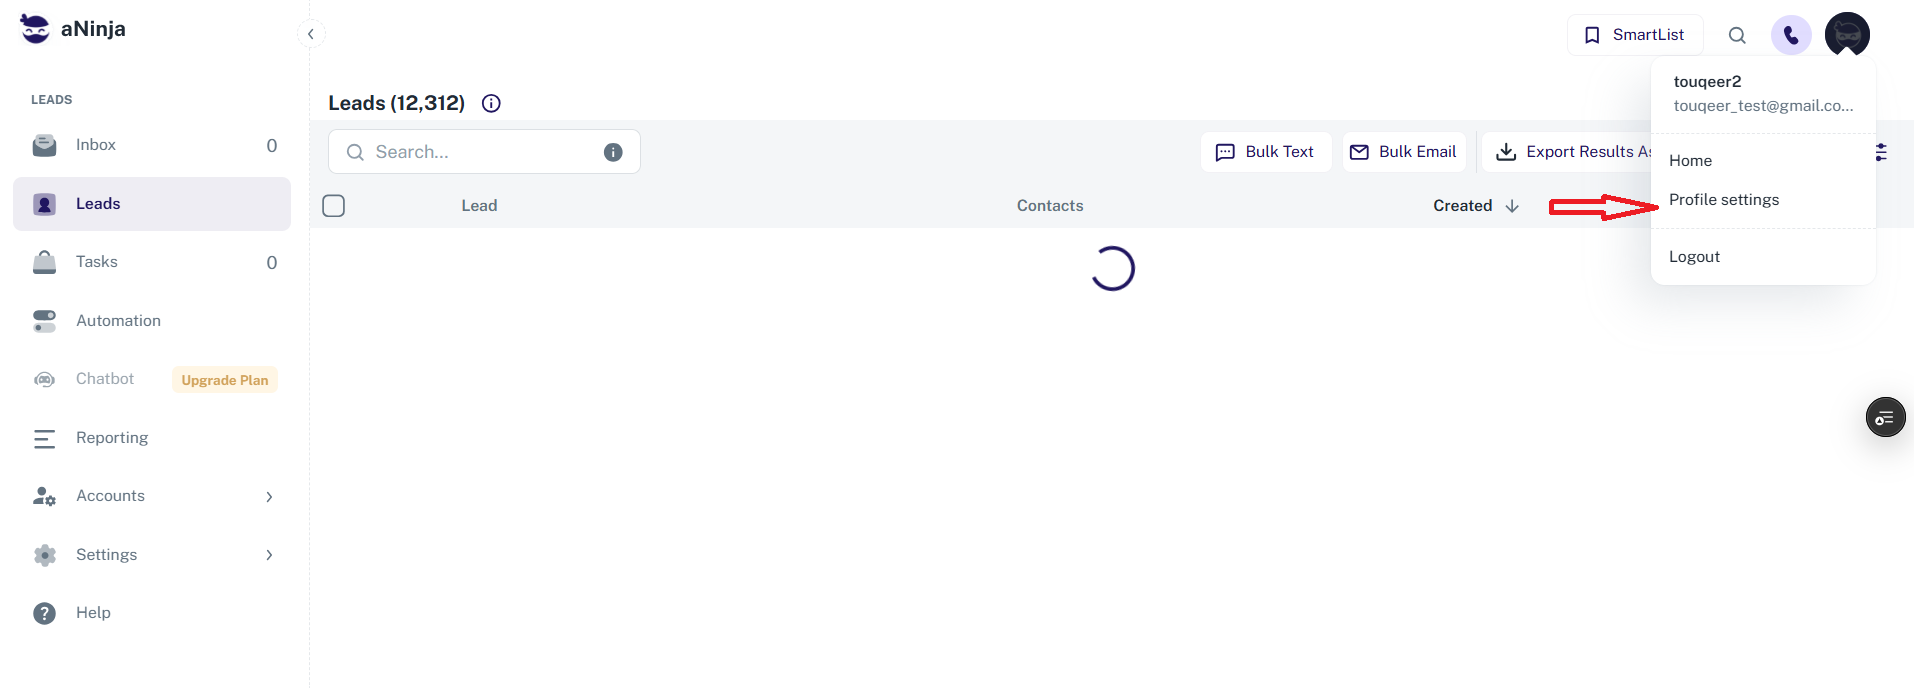
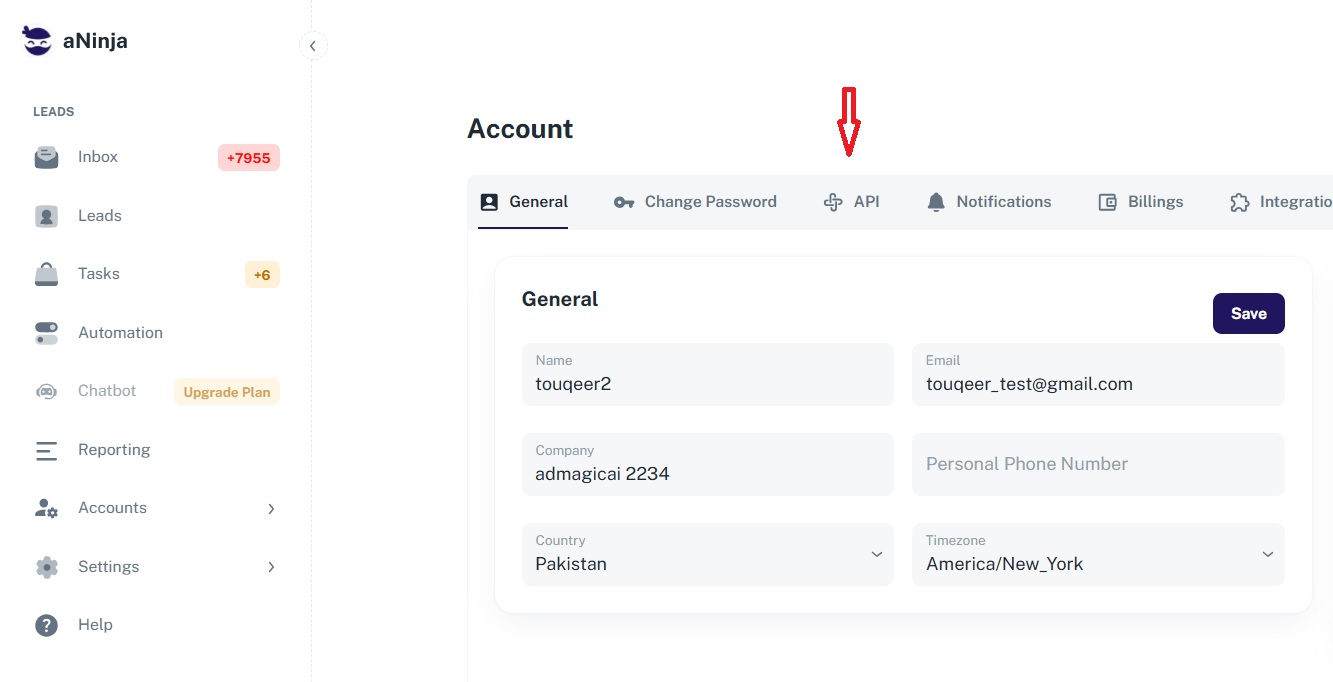
- Select Profile Settings.
- Click on API.
- Copy your API URL and API Key and paste them into the script:
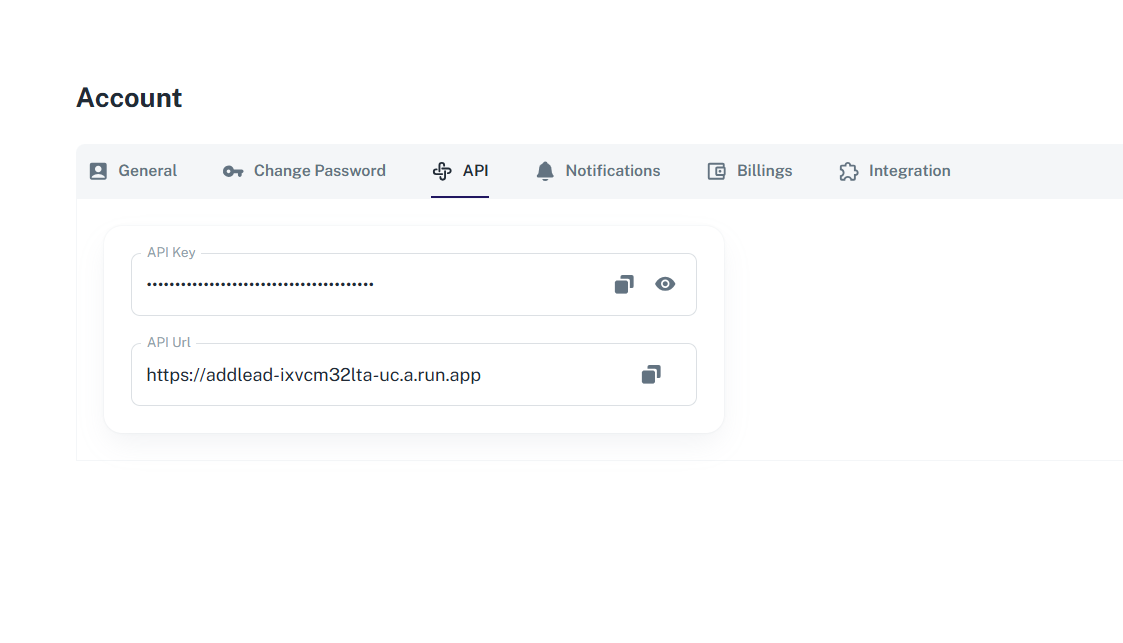
var API_URL = 'PASTE_YOUR_URL_HERE';
var API_KEY = 'PASTE_YOUR_KEY_HERE';
Step 4 – Deploy the Script
- Click Save.
- Click the clock icon (Triggers) and add a new trigger.
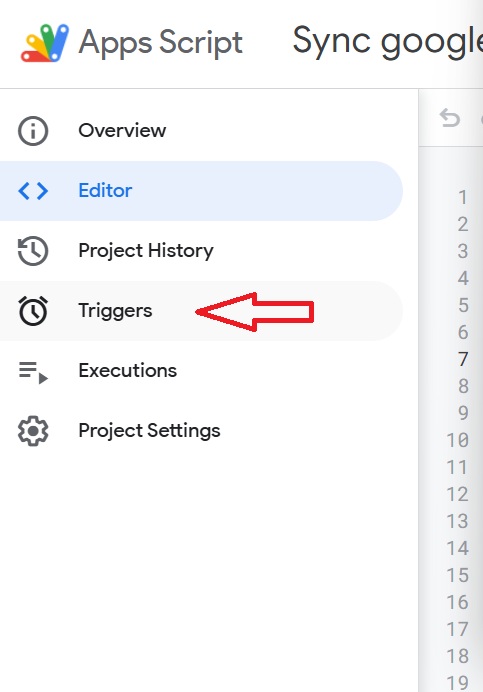
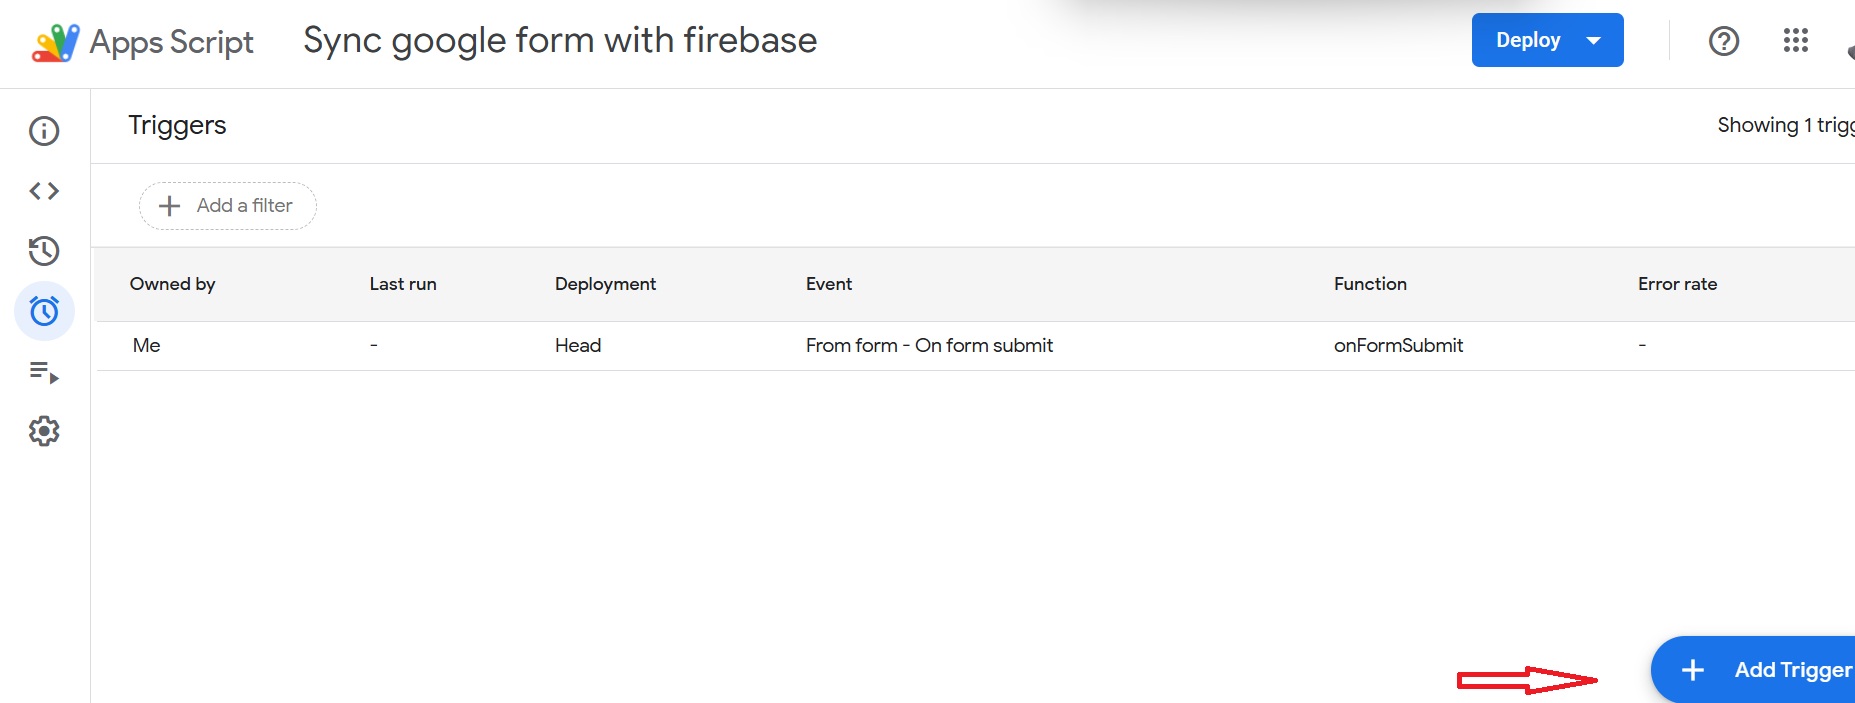
- Select onFormSubmit as the function.
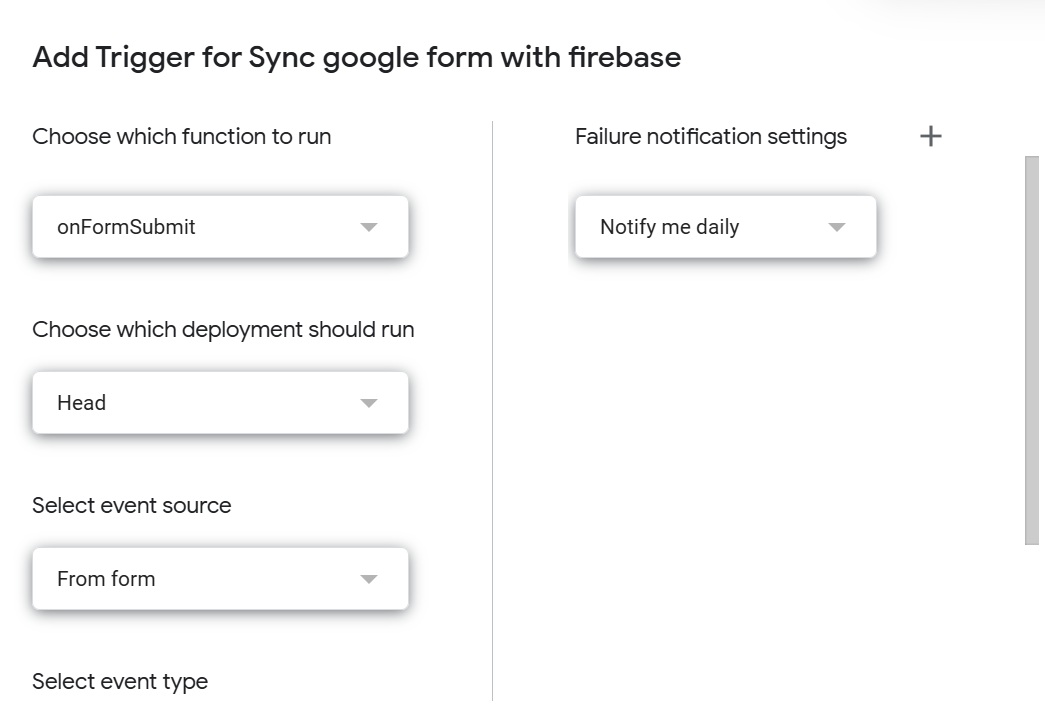
- Set event type to On form submit.
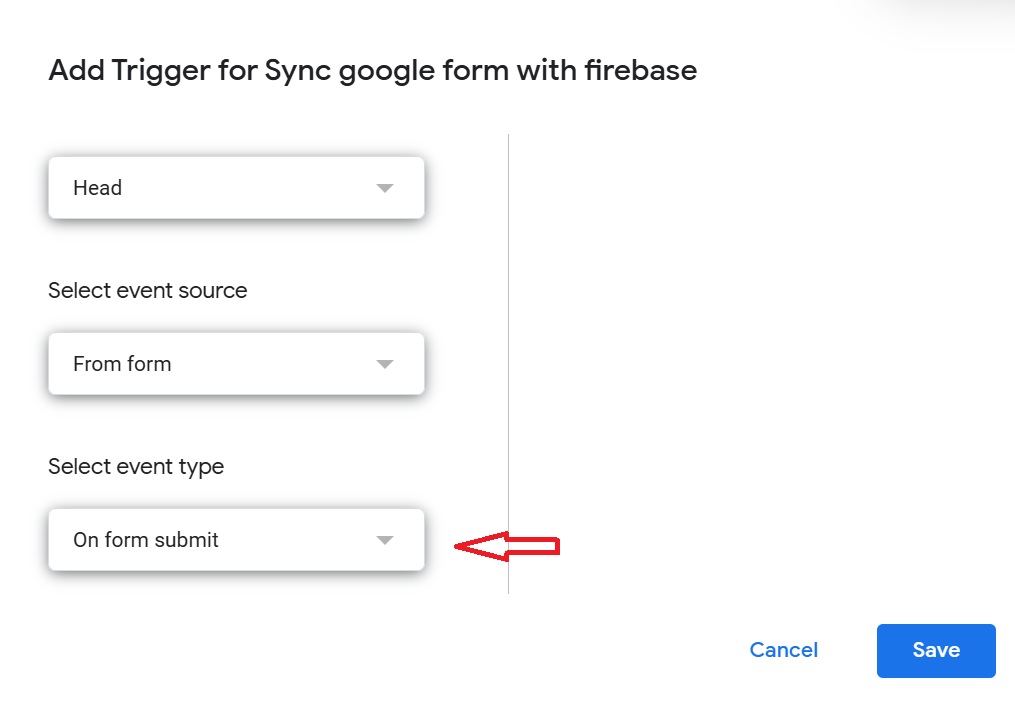
- Save the trigger.
Your Google Form is now successfully integrated with aNinja CRM.
Important Notes About Field Mapping
You will see a section like this in the code:
'contactName': 'Full Name',
- Left side (contactName) — This is the system field aNinja requires. You must NOT change it.
- Right side (Full Name) — This MUST match your Google Form question exactly.
Example:
'contactName': 'please type your full name',
What Are Custom Fields?
Custom fields allow you to send additional information from your Google Form to aNinja. These are questions beyond the basic contact information (name, email, phone, company).
To add custom fields, find the CUSTOM_FIELD array in the script and uncomment (remove //) or add your form questions:
var CUSTOM_FIELD = [
  "What is your Business Sector?",
  "How did you hear about us",
  "What are you interested in?"
];
- “What is your Business Sector?” becomes “What_is_your_Business_Sector”
- “How did you hear about us?” becomes “How_did_you_hear_about_us”
This happens automatically — you don’t need to change anything.
Example Payload Structure
When a form is submitted, the script sends data to aNinja in this format:
{
  "apiKey": "your_api_key",
  "contactName": "John Doe",
  "contactEmail": "[email protected]",
  "contactPhone": "+1-555-1234",
  "organizationName": "Acme Corporation",
  "fields": [
    { "name": "What_is_your_Business_Sector", "value": "Manufacturing" },
    { "name": "How_did_you_hear_about_us", "value": "Google, Referral" }
  ]
}
Address Fields (Optional)
You may also include any of these optional address-related fields in your FIELD_MAPPING:
var FIELD_MAPPING = {
  'contactName': 'Full Name',
  'contactEmail': 'Email Address',
  'contactPhone': 'Phone Number',
  'organizationName': 'Company Name',
  'address_street': 'Street Address',
  'address_city': 'City',
  'address_state': 'State',
  'address_postalzip': 'ZIP Code',
  'address_country': 'Country'
};
More Fields You Can Include
| Field Name | aNinja Field | Description |
|---|---|---|
| Contact Name | contactName | Required. Main contact name. |
| Contact Phone | contactPhone | Primary phone number. |
| Contact Email | contactEmail | Main email address. |
| Organization Name | organizationName | Lead’s company name. |
| Address Street | address_street | Street address. |
| Address City | address_city | City of the lead. |
| Address State | address_state | State of the lead. |
| Address Country | address_country | Country of the lead. |
| Address Zip | address_postalzip | Postal code. |
Handling Multiple-Choice Questions
If your Google Form has multiple-choice questions (checkboxes where users can select multiple options), the script automatically converts the selections into a comma-separated string.
For example, if someone selects “Google” and “Friend” for “How did you hear about us?”, it will be sent as: "Google, Friend"
Step 5: Test Your Integration
Submit your Google Form once.
Then check inside:
aNinja → Leads
Troubleshooting
- Check if your API key is correct.
- Ensure the API URL is exact.
- contactName is required — missing it will cause failure.
- Form question text must match the right-hand mapping exactly (including spaces and capitalization).
- Check Apps Script logs (View → Executions) for detailed error messages.
- If custom fields aren’t appearing, verify that the question titles in
CUSTOM_FIELDexactly match your Google Form questions. - For multiple-choice questions, ensure the question allows multiple selections if you expect multiple answers.
Your Google Form is now fully integrated with aNinja CRM. Every new submission creates a lead automatically. If you need help, contact aNinja Support.