How Can We Help?
How to Integrate Shopify with aNinja AI
If you’re looking to automate lead generation from your Shopify store into your aNinja AI CRM, this guide will walk you through the entire integration process using Shopify webhooks. By the end of this tutorial, every time a new customer is created in your Shopify store, a lead will automatically be added to your aNinja AI dashboard.
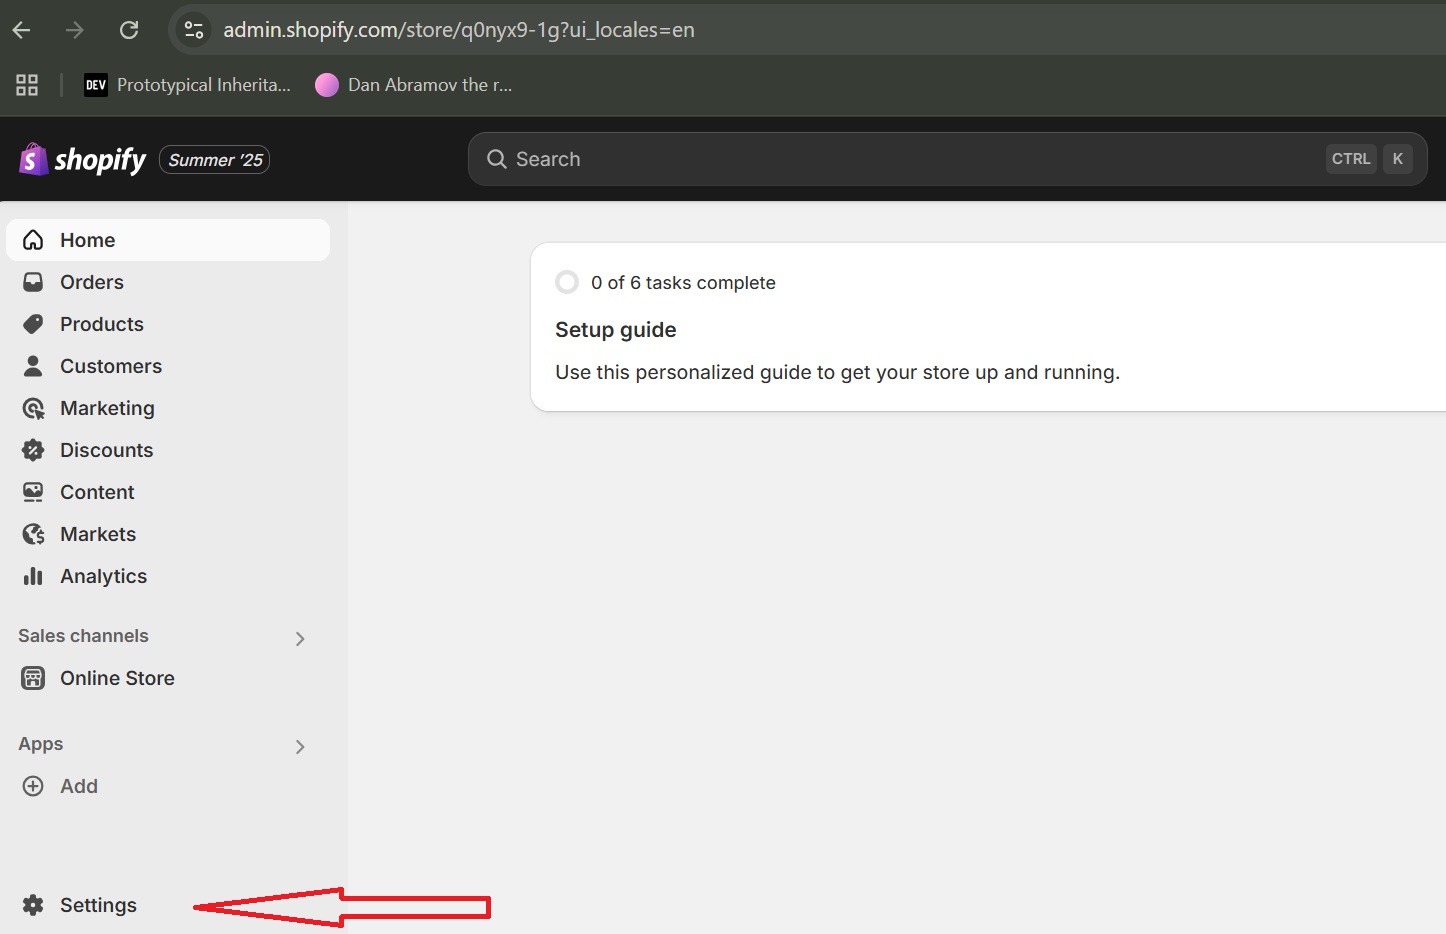
Step 1: Access Shopify Settings
- Login to your Shopify Admin Dashboard.
- Navigate to the bottom-left corner and click on Settings.
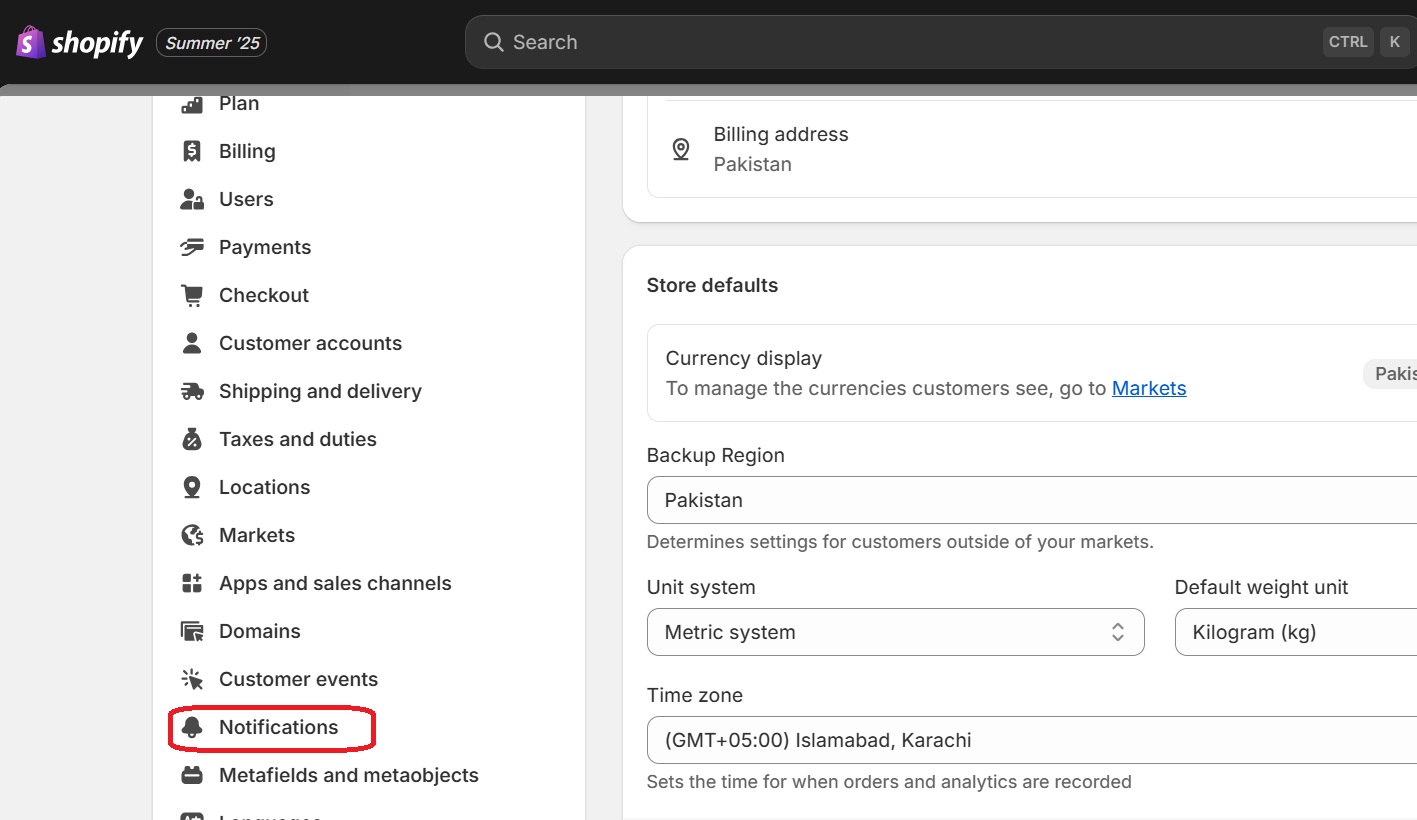
Step 2: Navigate to Notifications
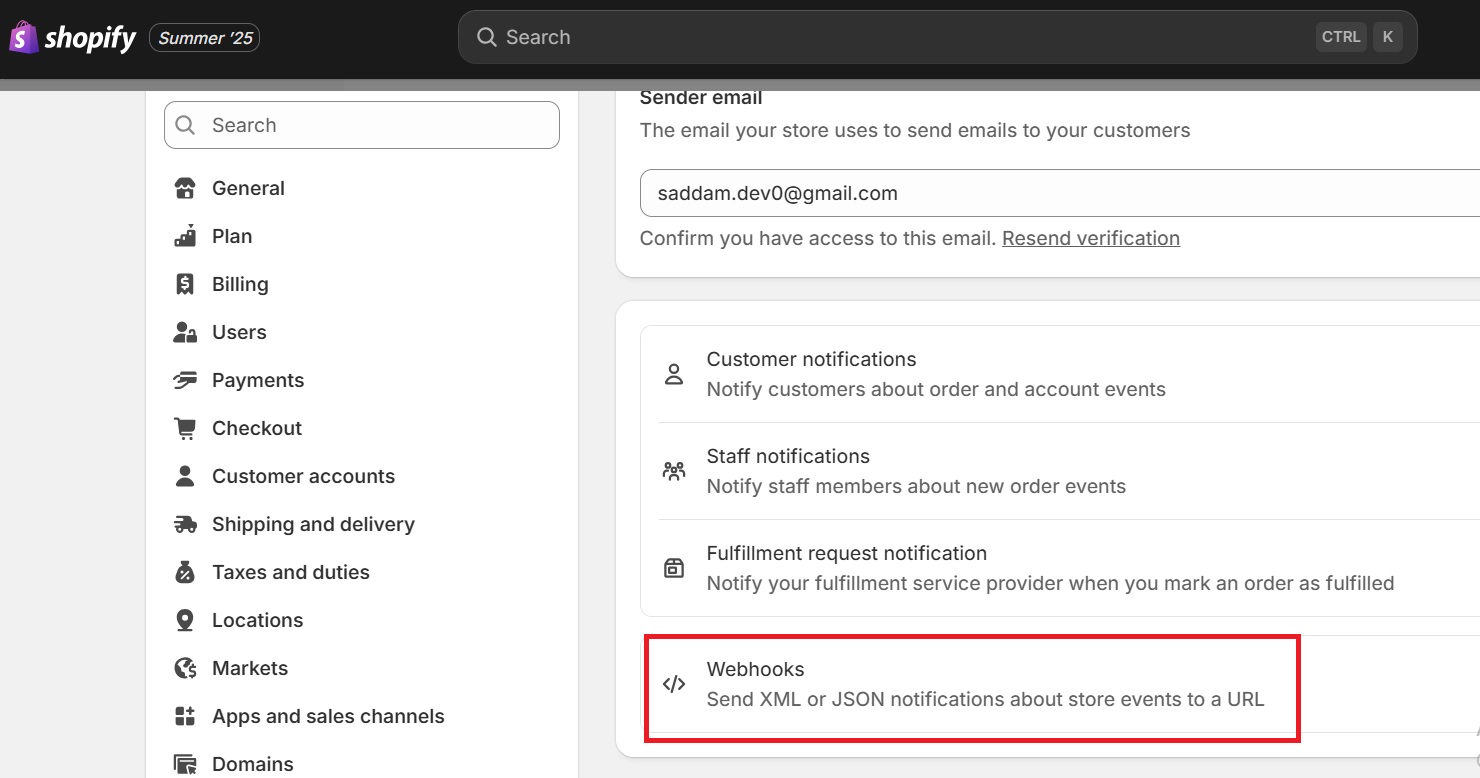
- In the Settings page, scroll down and click on Notifications.
- Scroll to the bottom and look for the Webhooks section.
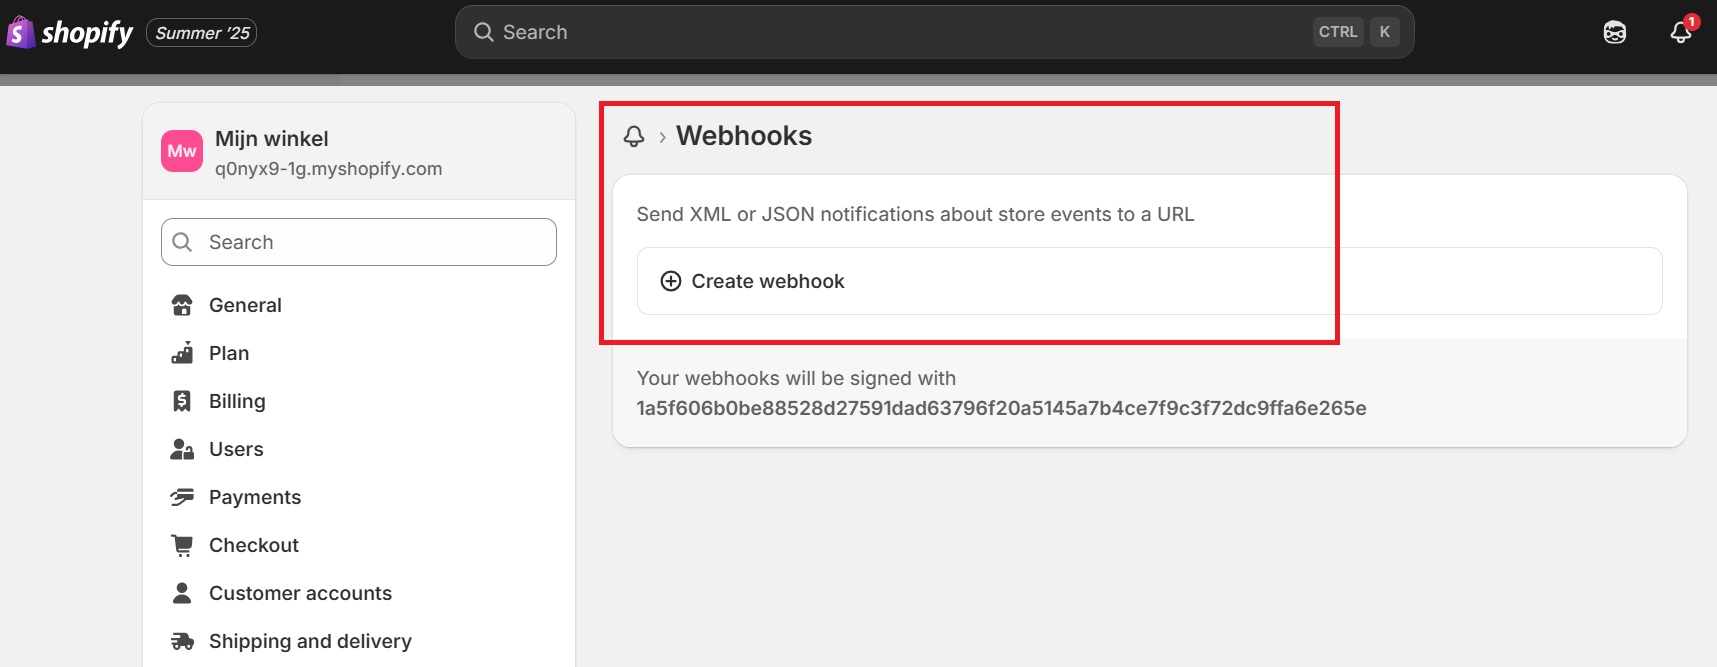
Step 3: Create a New Webhook
- Click Create Webhook.
- In the Event dropdown, select
Customer creation. - Set the Format to
JSON.

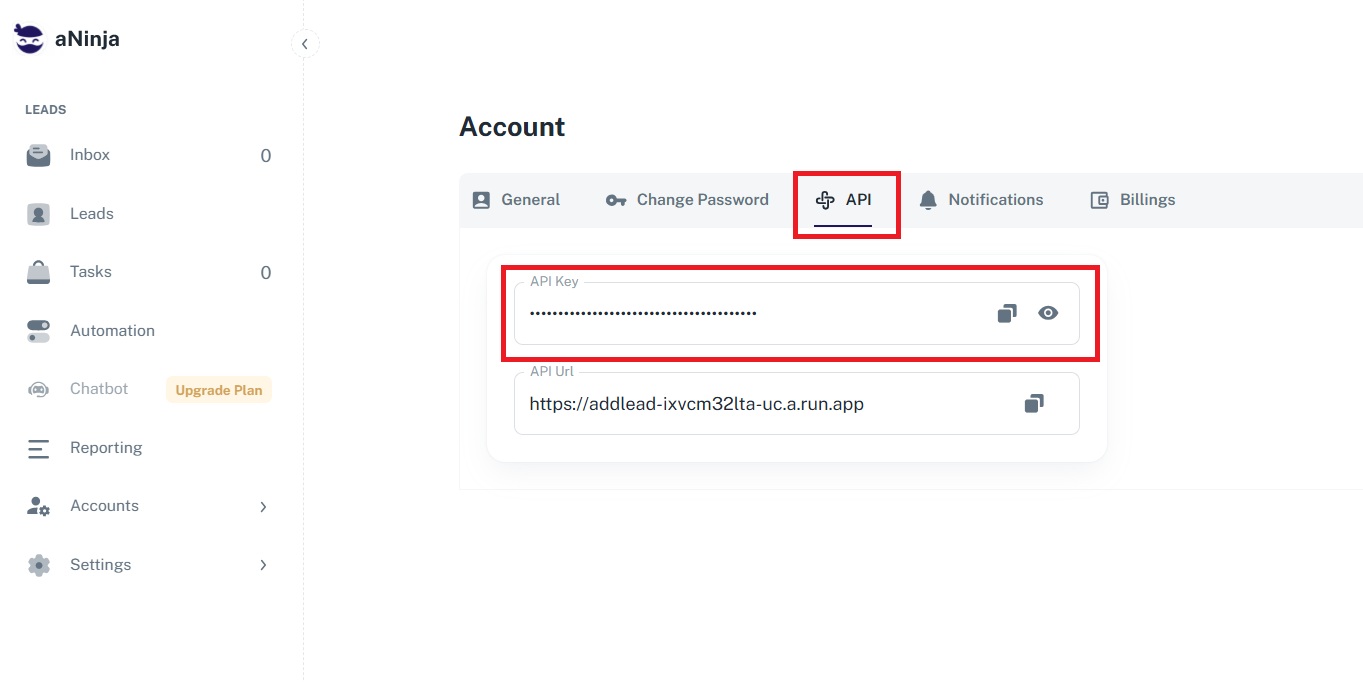
Step 4: Get Your Webhook URL from aNinja AI
- Open a new tab and go to your aNinja AI dashboard.
- Navigate to
Settings > API. - Copy the Webhook URL provided there.
Step 5: Append Required Parameters
Once you’ve pasted the webhook URL into Shopify, append the following parameters to the URL:
?platform=shopify&api_key=YOUR_API_KEYTo get your API Key:
- Go back to your aNinja AI dashboard.
- In the API section, copy your personal API key.
Example Full URL:
https://your-aninja-url.com/webhook?platform=shopify&api_key=abc123xyzStep 6: Set API Version
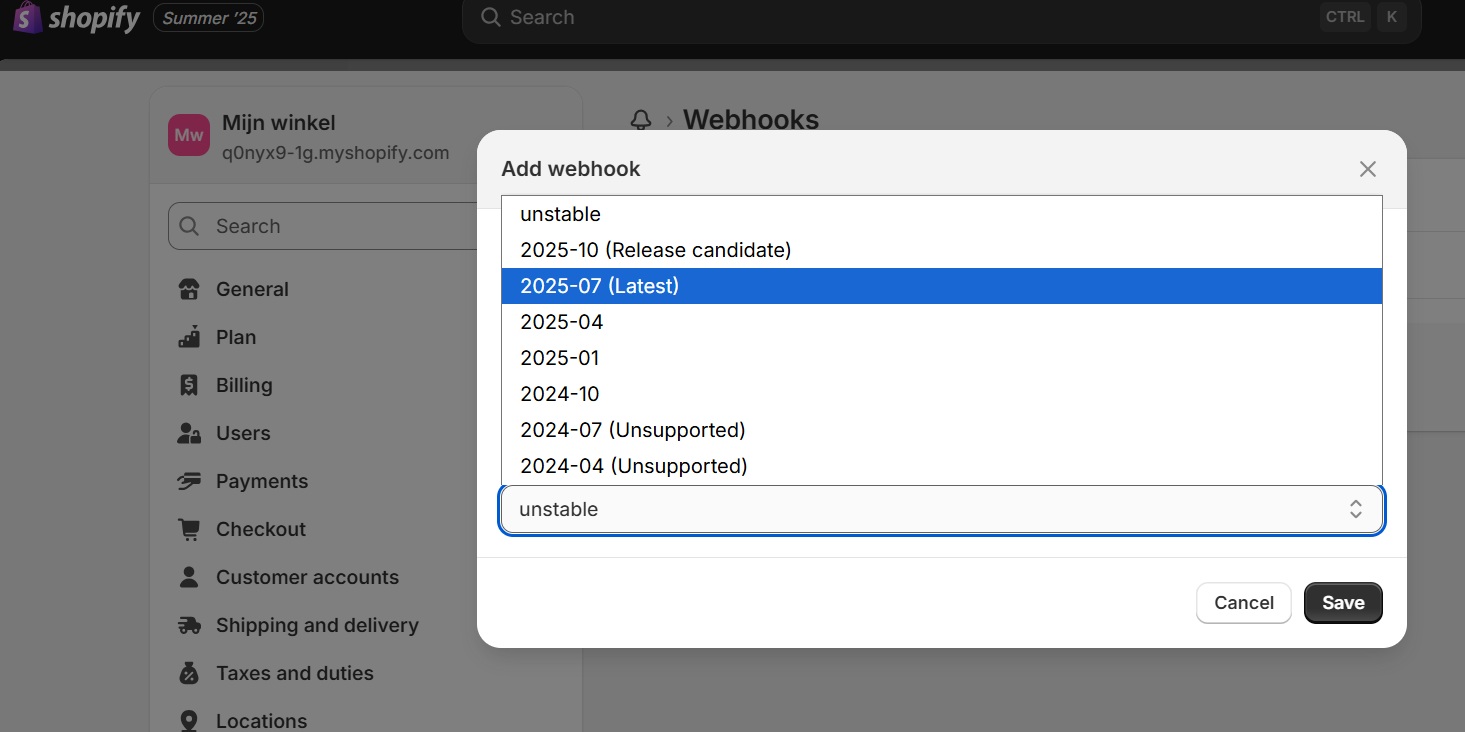
- In Shopify’s webhook creation screen, set the API version to the latest, e.g.,
2025-07.
Step 7: Save and Test the Webhook
- Click Save Webhook.
- Then click Send Test Notification to make sure it’s working.
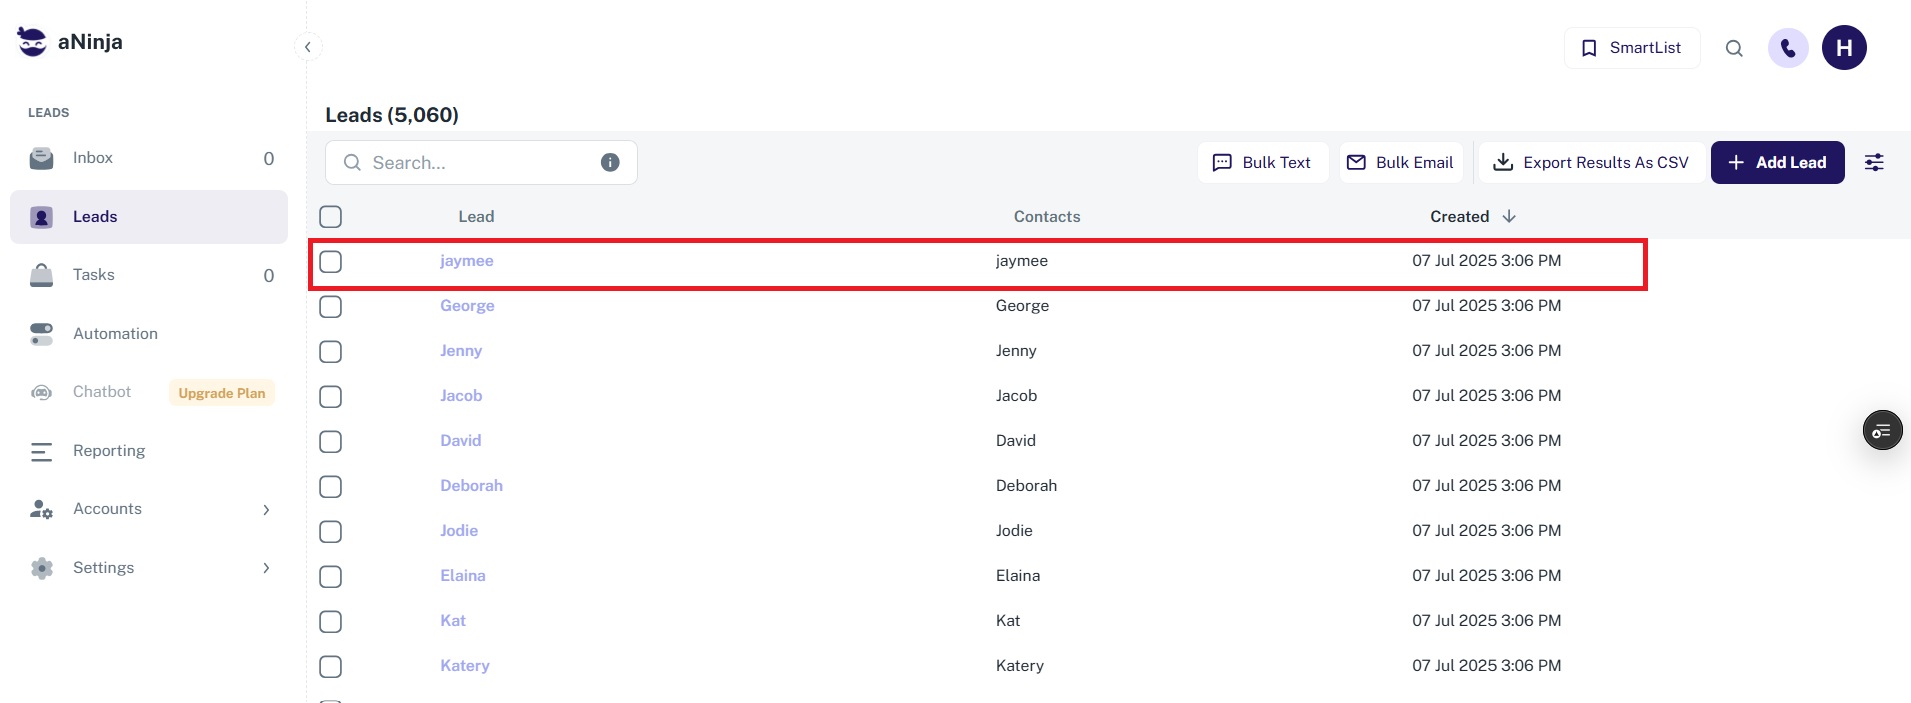
- Head back to your aNinja AI Leads Dashboard and confirm that a new lead has appeared.
Step 8: Try It Live
- Go to Shopify > Customers.
- Click Add Customer.
- Fill in the customer details:
- Name: Aninja Testing
- Email: [email protected]
- Phone: Any number
- Click Save.
- Return to your aNinja AI dashboard. You should see the new lead created automatically.
You’re All Set!
That’s it! Now every new Shopify customer will seamlessly be pushed into aNinja AI as a lead. This integration helps you stay organized, automate your CRM workflows, and never miss a potential customer.