How Can We Help?
Connecting Your Facebook Lead Forms to aNinja
This guide will walk you through the process of integrating your Facebook account with aNinja to automatically receive leads generated from your Facebook Lead Ad forms.
Prerequisites
- You must have a Facebook Page and be an Admin or have the necessary permissions to manage the Page and its associated Business Account.
- You must have at least one existing Lead Ad Form created on your Facebook Page.
Step 1: Initiate the Facebook Integration
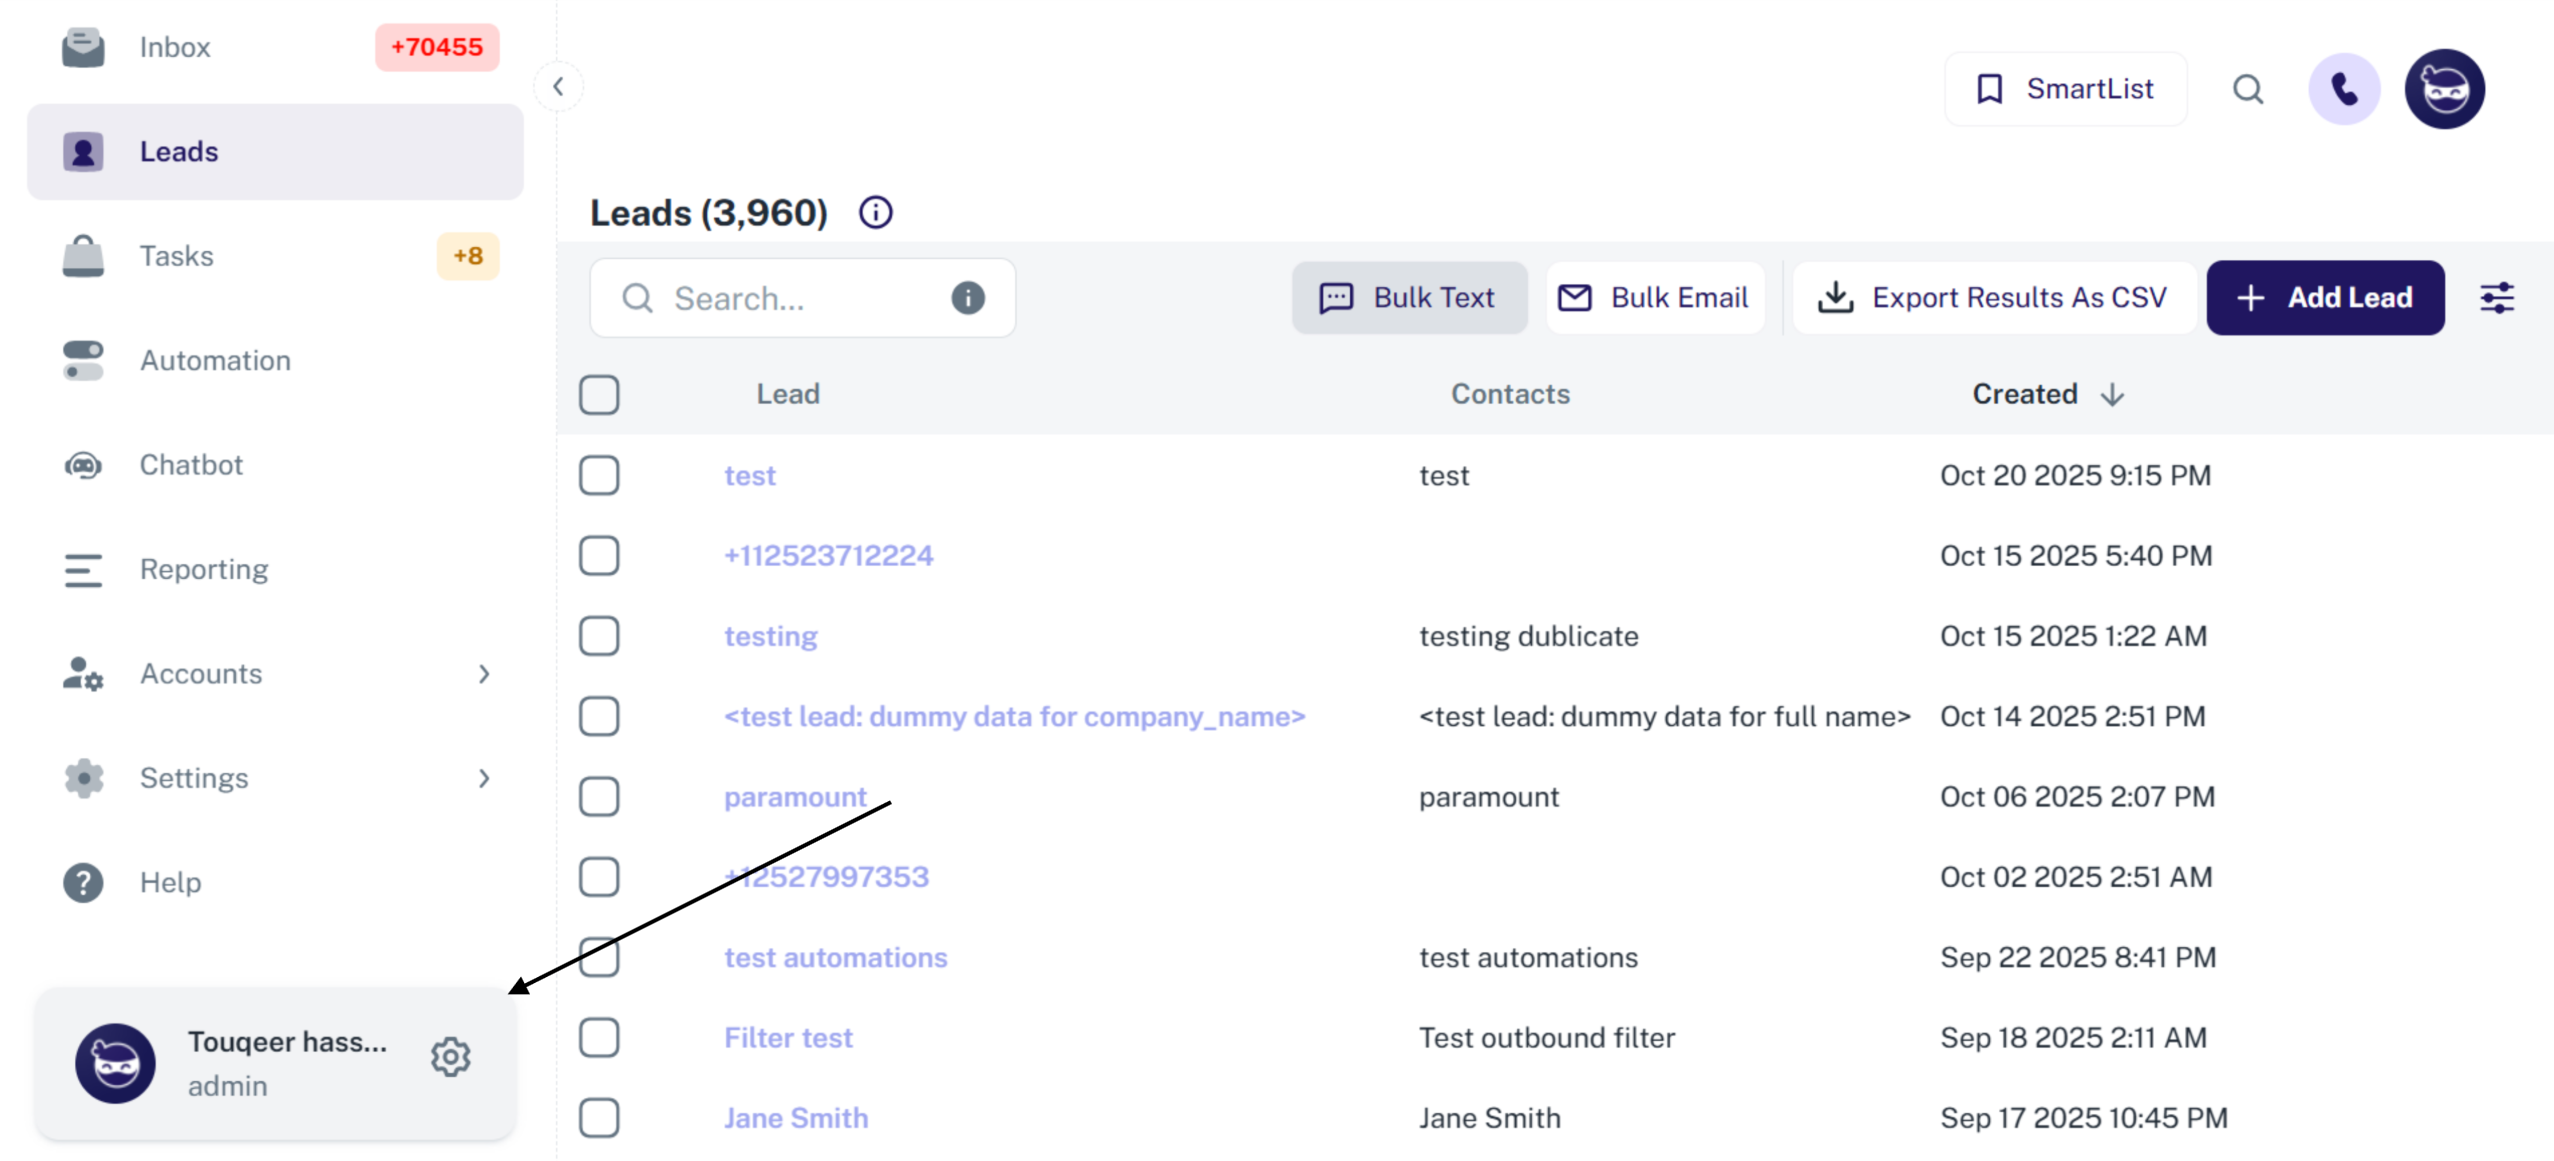
- Navigate to your Profile Settings within the aNinja application. (Refer to the user profile area in the bottom left of your screen)
- Click on the General tab.
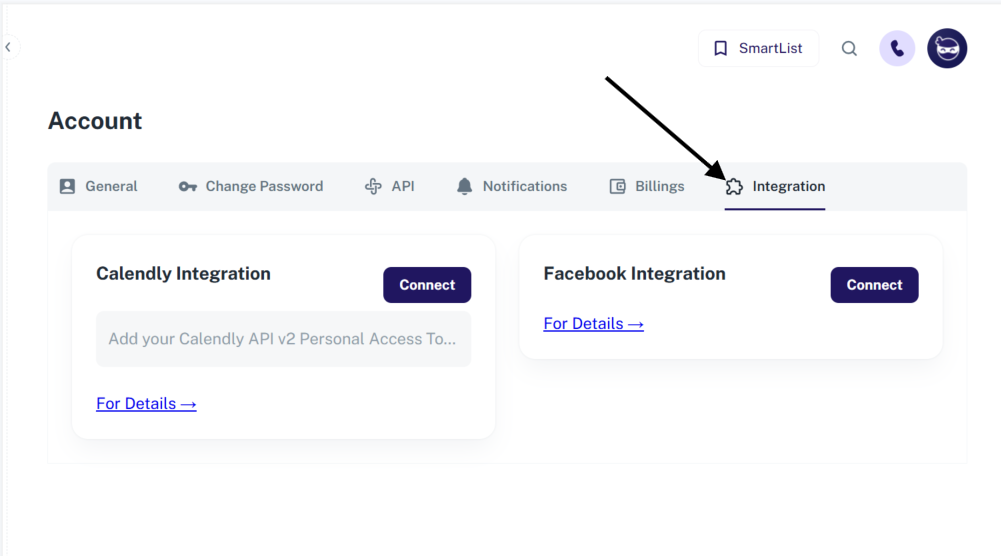
- Click the Integration tab (indicated by a gear/star icon) in the settings menu.
- Locate the Facebook Integration section and click the Connect button.

Step 2: Facebook Authentication and Asset Selection
You will be redirected to the Facebook authentication flow to grant aNinja the necessary permissions to manage your ads and retrieve leads.
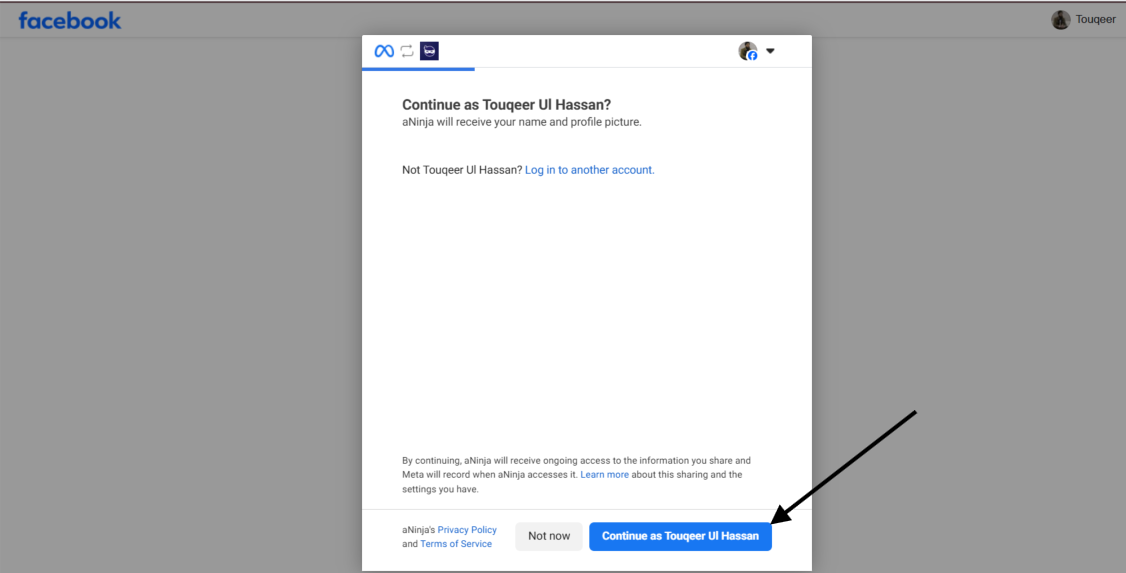
- Continue as User: On the Facebook screen, click Continue as [Your Name] to proceed with your personal Facebook account.
- Select Pages: You will be prompted to select the Facebook Pages you want to connect. Select the Page(s) that have the Lead Ad Forms you intend to use and click Continue. (Example: Select ‘aNinja’)
- Select Businesses: You will be prompted to select the Businesses you want to connect. Select the Business(es) associated with your Pages and click Continue.
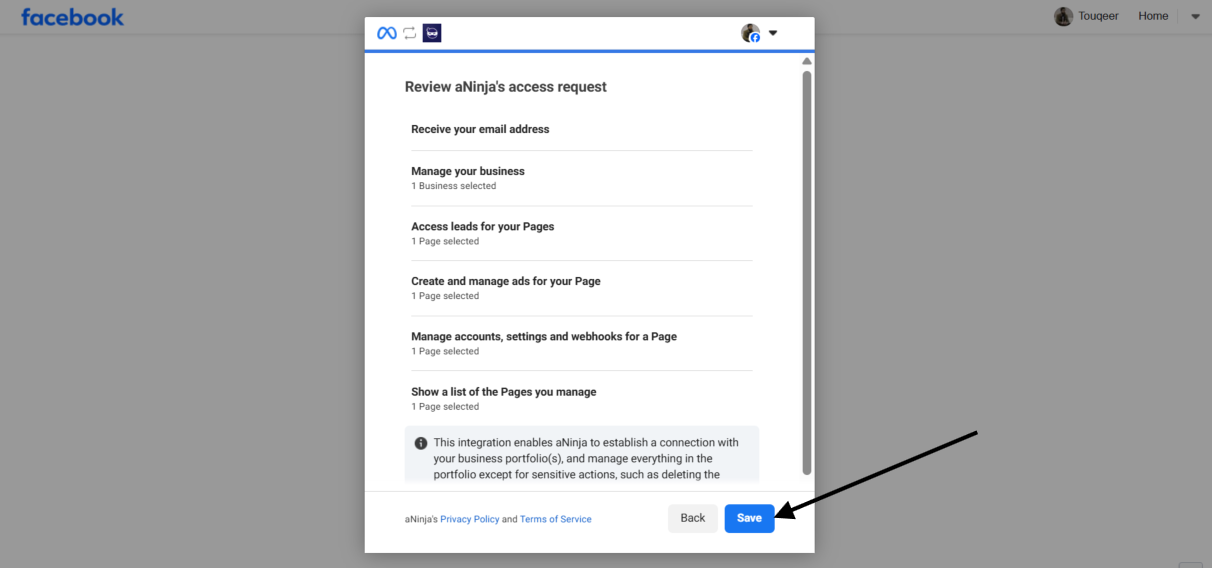
- Review Permissions: Review the permissions that aNinja is requesting (including accessing leads, creating/managing ads, and managing accounts/settings for your Page). Click Save to confirm and complete the Facebook connection.
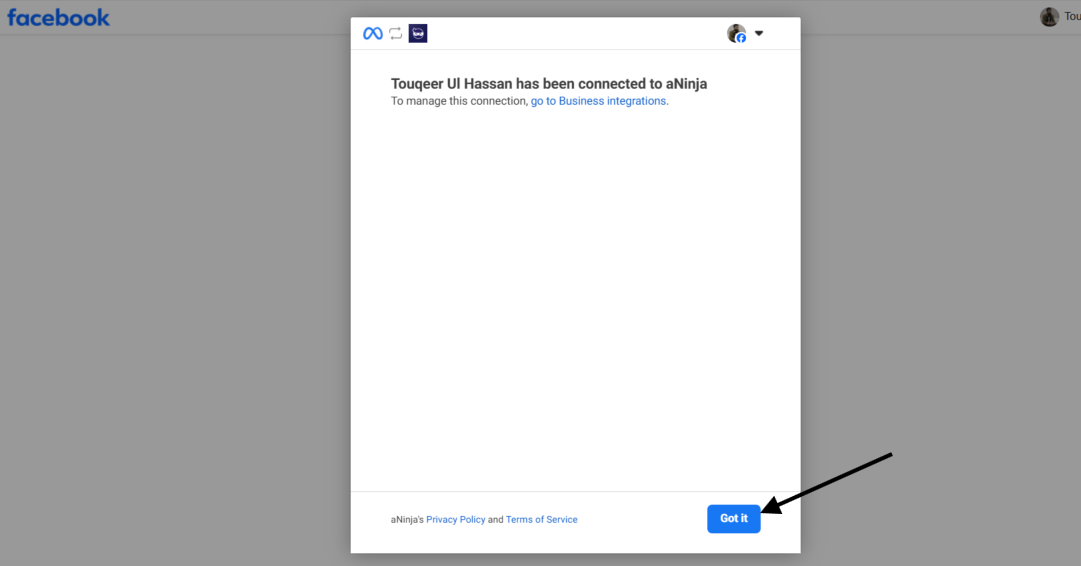
- Connection Successful: You will see a confirmation screen that your Facebook account has been connected to aNinja. Click Got it and then Continue.


Step 3: Connect Your Lead Forms
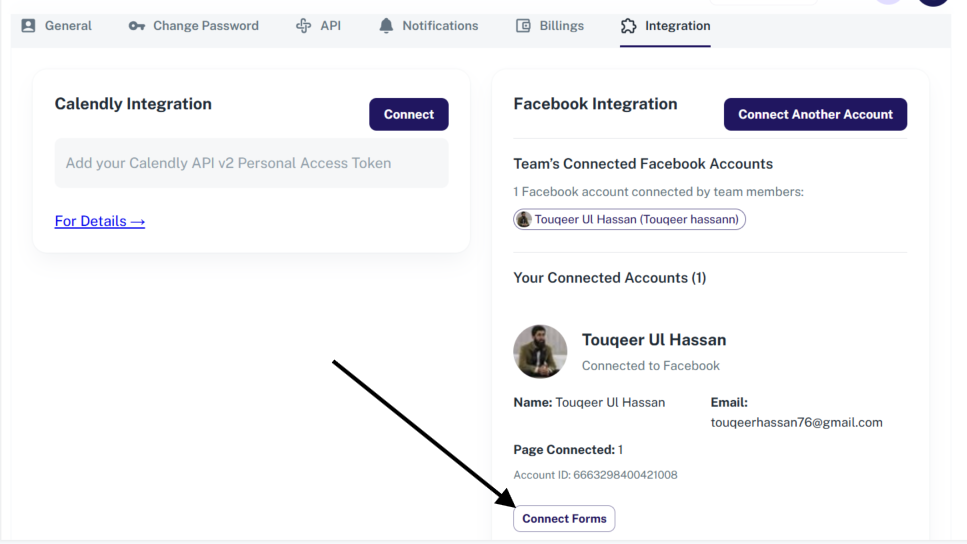
After successfully connecting your Facebook account, you will be redirected back to the aNinja Integration tab.
- In the Facebook Integration section, your connected Facebook account will now be visible. Click the Connect Forms button.
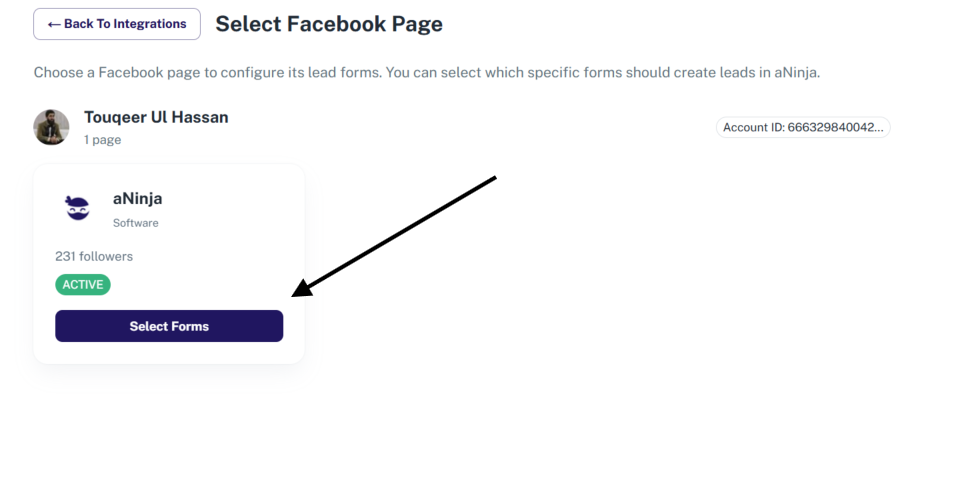
- Select a Page: A list of the Facebook Pages you manage will appear. Click on the desired Facebook Page (e.g., “aNinja” Page) that contains the lead forms you wish to connect.
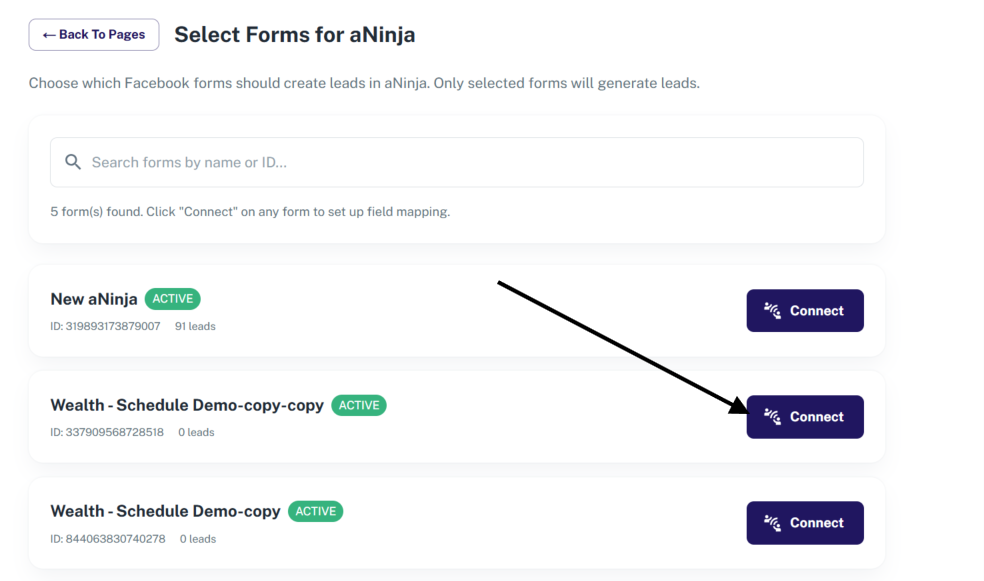
- Select Forms: All the Lead Ad Forms associated with the selected Page will be displayed.
- To complete the process, find the desired form(s) and click the Connect button next to each form to map it.
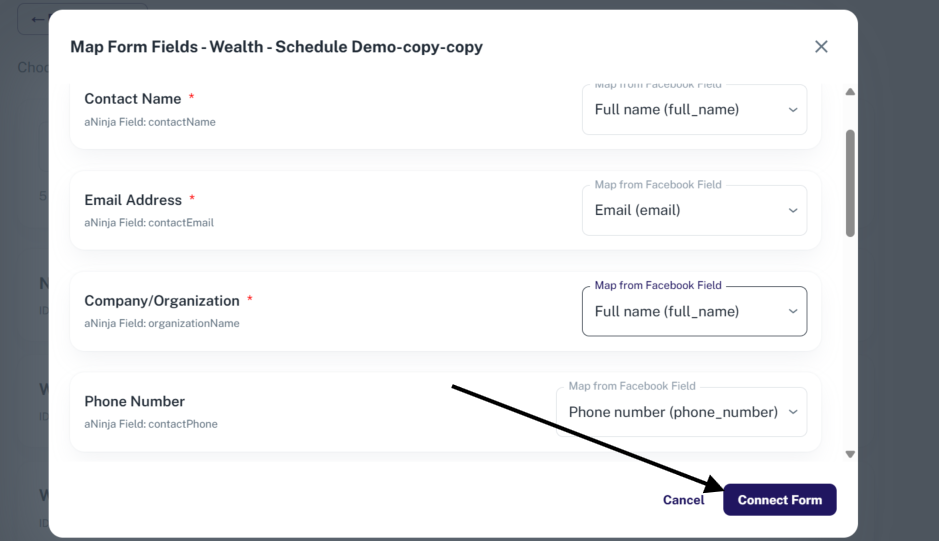
Once the form mapping is complete, the form will be connected successfully, and aNinja will begin automatically receiving new leads submitted through that Facebook Lead Ad Form. You can view these leads in the Leads section of your aNinja account.
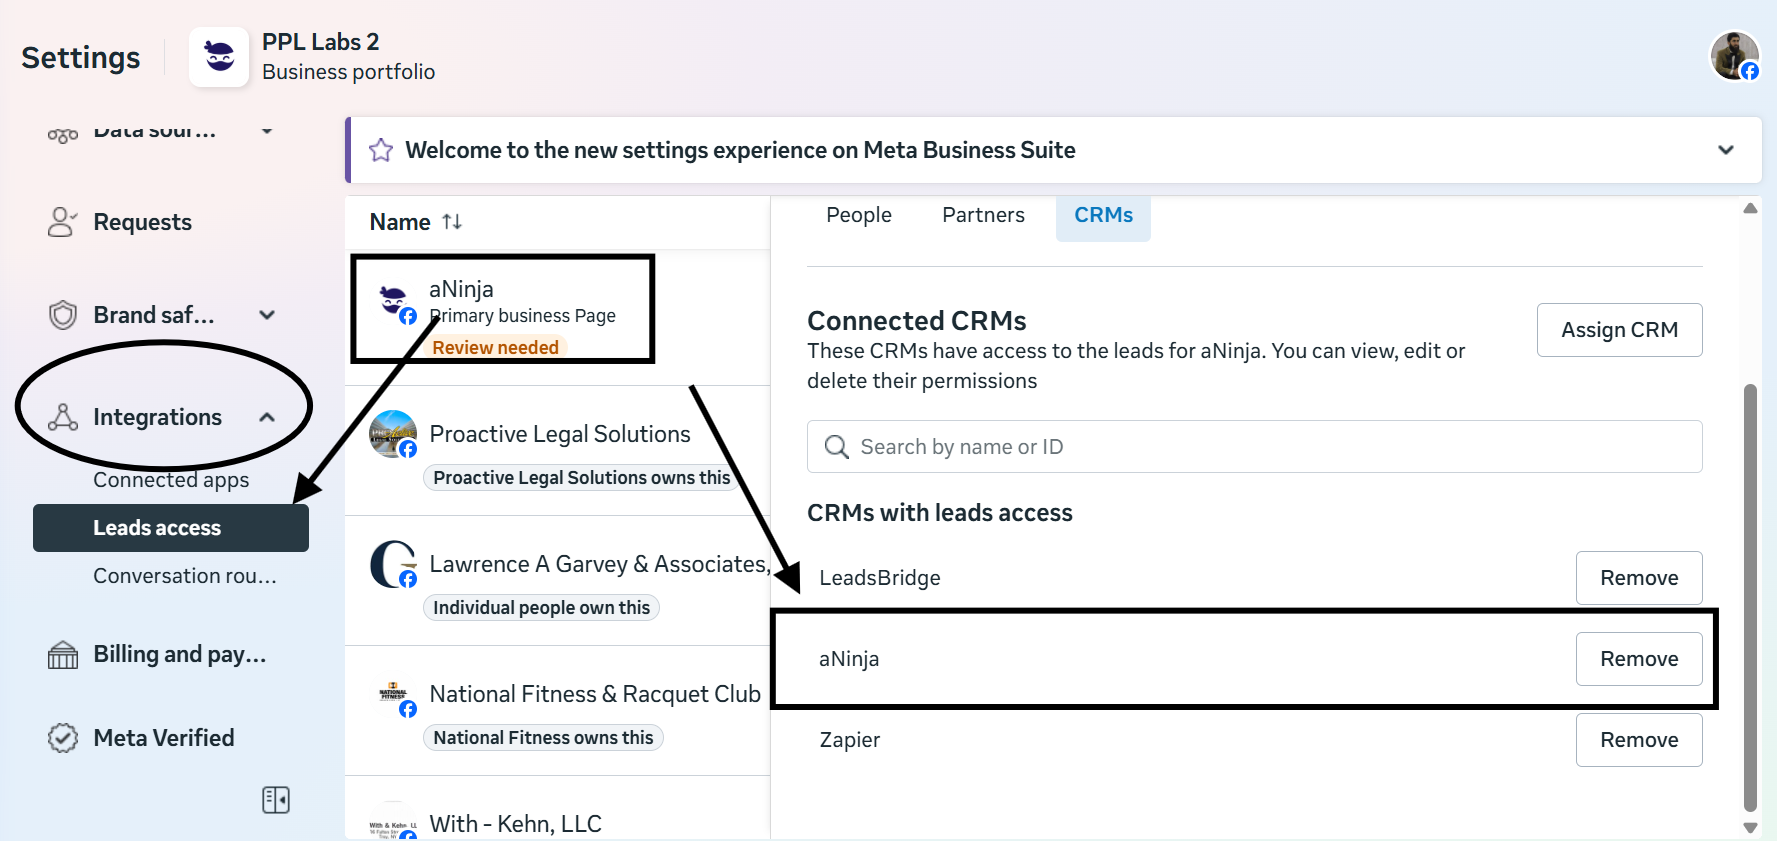
Verify and grant access:
• Open Business Settings: Go to business.facebook.com/settings.
• Navigate to Leads Access: In the left-hand menu, go to Integrations and Leads Access.
• Select Your Page: Choose the specific Facebook Page you are trying to connect to aNinja.
• Assign CRMs:
Click on the CRMs tab.
Check if “aNinja” is listed.
If it is NOT listed, or if its access is marked as “Revoked,” click Assign CRMs and select your app to grant it access.