How Can We Help?
Connect your Gmail with aNinja
Connect your Gmail with aNinja to start sending emails to your leads. It’s important to complete these steps of the authorization for your email to sync properly.
Step 1: Add Email Account
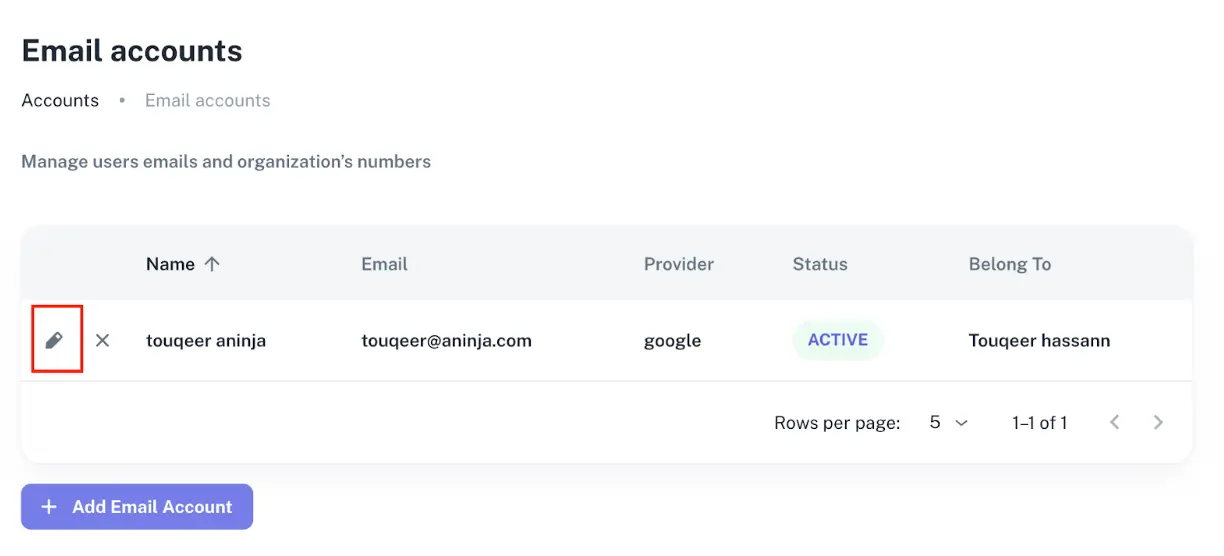
- Click on Add Email Account.
- If your account is already set up, click on the Edit button instead.
Step 2: Enter Your Information
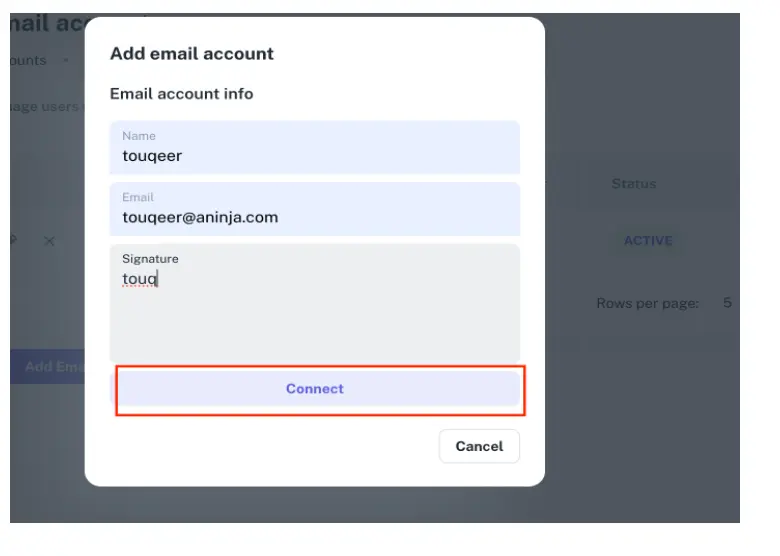
- After entering your information, click the Connect button.
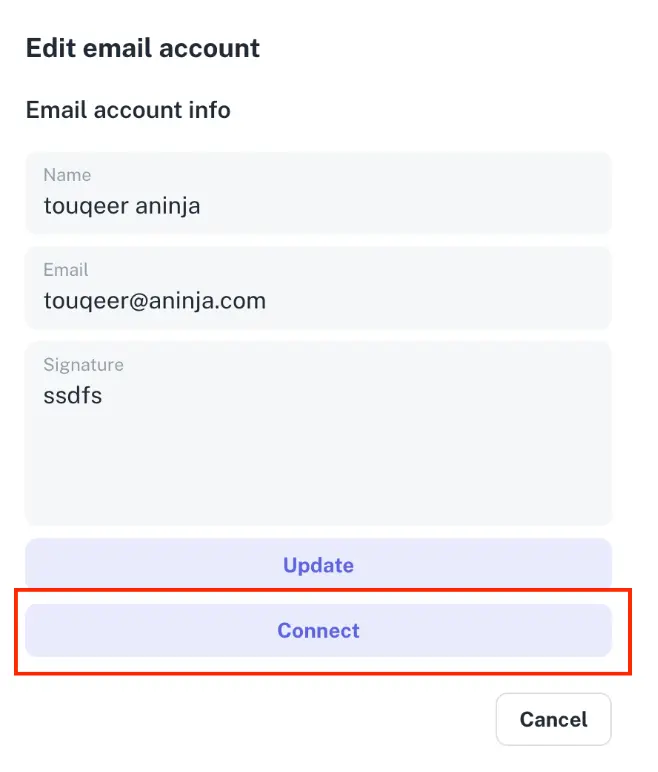
- If you clicked the Edit button in Step 1, you’ll also see the Connect button — click it.
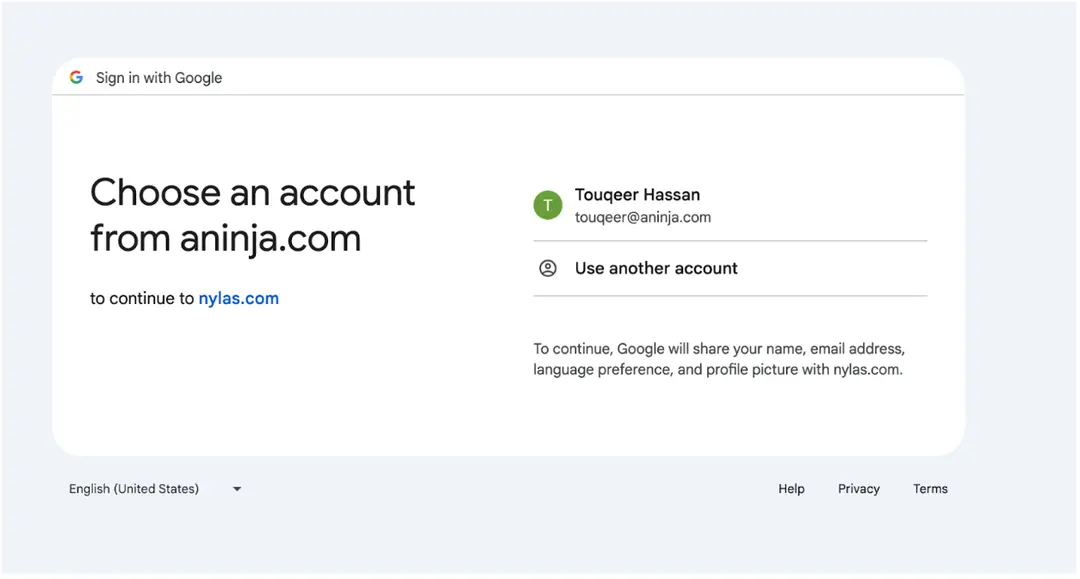
Step 3: Google Sign-In
- You will be redirected to the Google sign-in screen.
- Select your email address and click the Continue button.
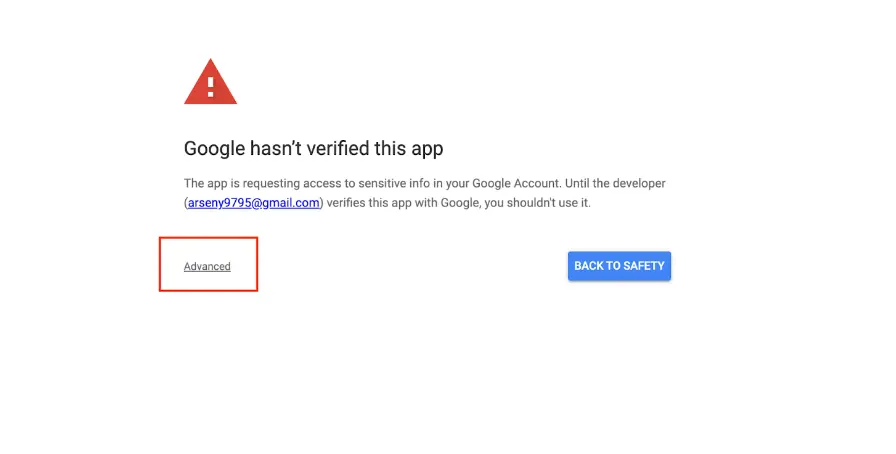
Step 4: Advanced Options
- After clicking Continue, you will see a screen with a warning message.
- Click the Advanced button.
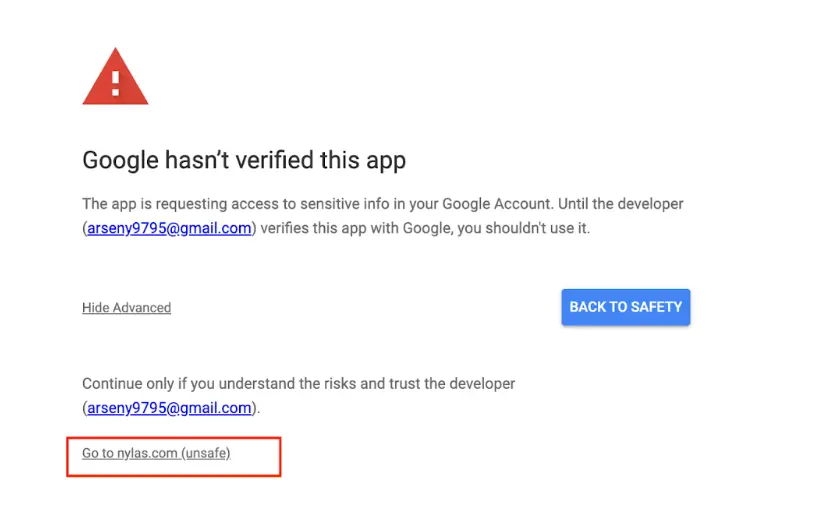
Step 5: Proceed Anyway
- Click on the link or button that appears after expanding Advanced options to proceed.
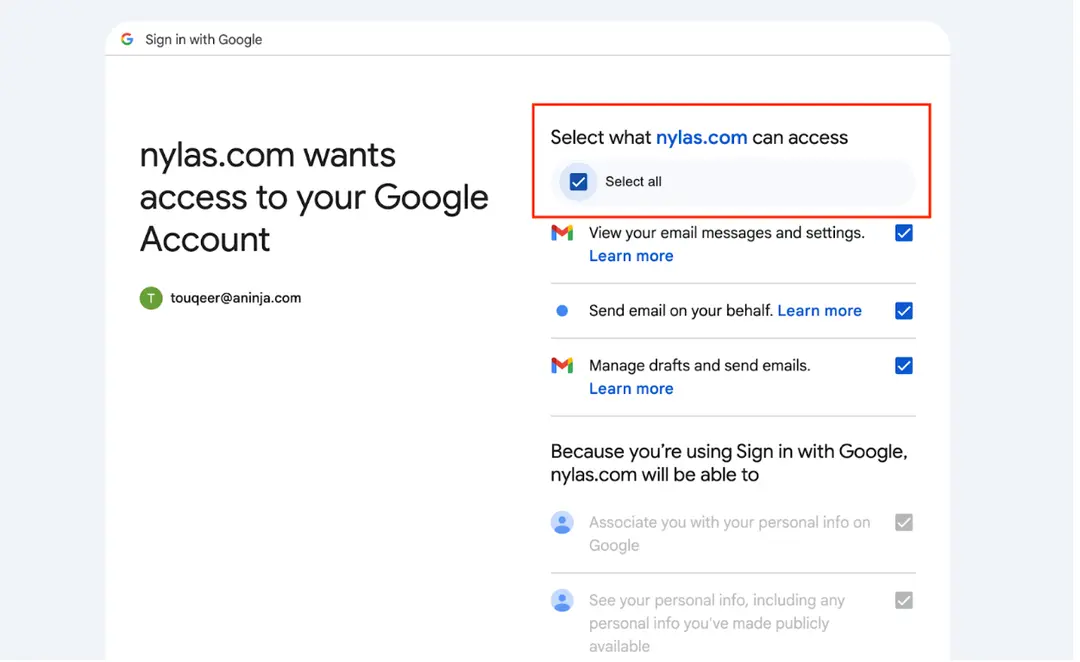
Step 6: Grant Permissions
- Check Select All options to grant all necessary permissions.
- Click the Continue button at the bottom of the page.
Success!
After completing these steps, your Gmail will be synced and you will be redirected back to the aNinja application.